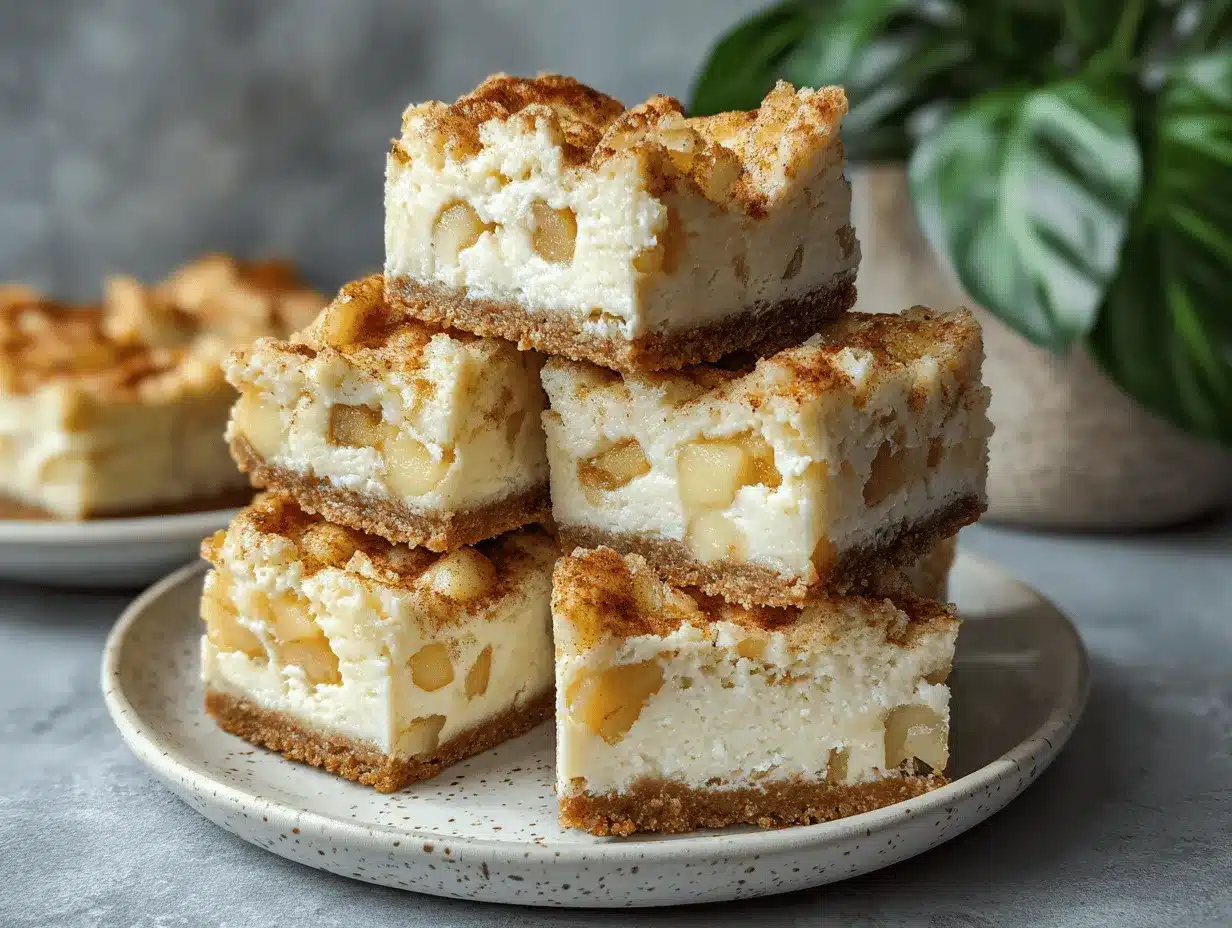
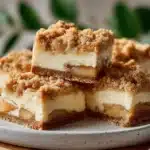
Warm, sweet apples mingling with silky cheesecake, all tucked under a crumbly cinnamon streusel—now that’s the kind of dessert that turns an average day into something unforgettable. The first time I baked these apple cheesecake bars, my kitchen smelled like a cozy autumn afternoon (even though it was the middle of July). I couldn’t resist sneaking a bite straight from the pan, and wow—every layer brings something special. These bars are the perfect mash-up of creamy, crunchy, and juicy, plus that cinnamon topping? It’s the stuff of dessert dreams.
I stumbled on this apple cheesecake bars recipe during one of those “let’s just see what’s in the fridge” baking sessions. I had cream cheese begging to be used, a couple of apples, and, you know, a craving for something comforting but not plain old apple pie. The cinnamon streusel topping was a happy accident—a leftover from my favorite coffee cake, but it took these bars to a whole new level. Honestly, this recipe has become a family staple for potlucks, lazy weekend baking, and anytime folks need a pick-me-up treat.
Why do I keep coming back to these apple cheesecake bars? They’re easy enough for a weeknight, impressive enough for guests, and they strike that perfect balance between fruit and indulgence. If you love classic apple desserts, creamy cheesecake, or just need a reason to break out the cinnamon, you’re in for a treat. Whether you’re a busy parent, a dessert fiend, or just someone who loves baking with real ingredients, this recipe fits the bill—plus, I’ve tested it more times than I can count, so you can trust it’ll work in your kitchen, too!
Why You’ll Love This Recipe
Honestly, I can’t think of a single person who hasn’t swooned over these apple cheesecake bars—kids, adults, picky eaters, all of them. After baking these countless times (at family gatherings, bake sales, and even as a midnight snack), I’ve picked up some reliable tricks and realized why this recipe stands out from the crowd.
- Quick & Easy: These bars come together in under an hour (including baking time!). No water baths, no fussy steps—just simple assembly and bake.
- Simple Ingredients: No need for fancy stuff. Apples, cream cheese, and pantry staples—most likely, you’ve got everything you need already.
- Perfect for Any Occasion: Whether it’s brunch, a cozy fall dinner, or a holiday potluck, these bars always steal the spotlight.
- Crowd-Pleaser: I’ve watched these disappear at kids’ parties and adult get-togethers. People always ask for the recipe (and seconds!).
- Unbelievably Delicious: The layers of buttery crust, creamy cheesecake, spiced apples, and crunchy streusel are a dream team.
What makes this apple cheesecake bars recipe so different? It’s all in the details—blending the cream cheese for a super smooth layer, sautéing the apples for maximum flavor, and loading up the cinnamon streusel for that crave-worthy crunch. My secret: just a touch of lemon zest in the cheesecake layer brings everything to life. I’ve tried swapping in gluten-free flour, using different apples, and even making a batch with pecans in the streusel—it’s always a hit.
These bars aren’t just good—they’re the kind you close your eyes and savor. Comforting, rich, but still light enough not to weigh you down. Perfect for wowing guests without breaking a sweat, or just turning regular apples into something special.
Ingredients Needed
This recipe uses simple, wholesome ingredients to deliver bold flavor and satisfying texture without the fuss. You’ll probably find most of these in your kitchen already, and the few specialty items (like cream cheese) are easy to find at any grocery store.
- For the crust:
- 1 cup (120 g) all-purpose flour
- 1/4 cup (50 g) granulated sugar
- 1/2 cup (113 g) unsalted butter, cold and cubed
- Pinch of salt
- For the cheesecake layer:
- 8 oz (227 g) cream cheese, softened (I love Philadelphia for extra creaminess)
- 1/4 cup (50 g) granulated sugar
- 1 large egg, room temperature
- 1/2 tsp vanilla extract
- 1 tsp lemon zest (optional, but it brightens the flavor!)
- For the apple filling:
- 2 medium apples, peeled, cored, and diced (about 1 1/2 cups / 180 g; Granny Smith or Honeycrisp are my go-to)
- 1 tbsp brown sugar
- 1/2 tsp ground cinnamon
- 1/2 tbsp unsalted butter
- 1 tsp lemon juice
- For the cinnamon streusel topping:
- 1/2 cup (60 g) all-purpose flour
- 1/4 cup (55 g) brown sugar
- 1/2 tsp ground cinnamon
- 1/4 cup (57 g) unsalted butter, melted
- Pinch of salt
- 1/4 cup (25 g) chopped pecans or walnuts (optional, adds a lovely crunch)
If you need to make this gluten-free, just swap the all-purpose flour for a blend like King Arthur’s GF flour (works perfectly, honestly). Dairy-free cream cheese also works if you’re avoiding lactose, and coconut oil can stand in for butter in a pinch. Apples—use whatever’s in season, but firmer varieties hold up best. I’ve even snuck in pears when apples were running low. No nuts? No problem—leave them out or toss in some oats for extra texture. The lemon zest isn’t mandatory, but it does make everything pop, especially if your apples are super sweet.
Equipment Needed
You don’t need any fancy gadgets for these apple cheesecake bars, which is a relief. Here’s what’s essential:
- 8×8-inch (20×20 cm) baking pan (a glass or metal pan both work—just line with parchment for easy removal)
- Mixing bowls (at least two: one for crust/streusel, one for cheesecake batter)
- Hand mixer or stand mixer (for the creamiest cheesecake layer)
- Whisk and spatula (nothing fancy—any sturdy spatula will do)
- Small saucepan or skillet (for the apple filling)
- Measuring cups and spoons (accuracy matters with cheesecake!)
- Knife and peeler (for prepping apples)
If you don’t have a mixer, you can use a sturdy whisk—just be ready for a bit of an arm workout. I’ve made these bars with a hand-held pastry blender for the crust and streusel; works like a charm. If your pan is nonstick, you might get away without parchment, but for easy slicing (and prettier bars!), parchment is my go-to. For budget options, I’ve used mixing bowls from the dollar store and a basic electric hand mixer—everything still comes out delicious. Just remember to wash your mixer attachments after the cheesecake layer; that stuff sticks!
Preparation Method
- Preheat and prep: Preheat your oven to 350°F (175°C). Line your 8×8-inch pan with parchment paper, leaving an overhang for easy lifting later. Trust me, you’ll thank yourself at slicing time.
- Make the crust: In a mixing bowl, combine 1 cup (120 g) flour, 1/4 cup (50 g) sugar, pinch of salt, and 1/2 cup (113 g) cold butter. Use a pastry blender or your fingers to rub the butter into the flour mixture until it resembles coarse crumbs. Press this mixture firmly into the bottom of the prepared pan. Bake for 10 minutes, or until just set and lightly golden. Let cool while you prep the next layers.
- Prepare the apple filling: In a small skillet, melt 1/2 tbsp butter over medium heat. Add diced apples, 1 tbsp brown sugar, 1/2 tsp cinnamon, and 1 tsp lemon juice. Sauté for 3-5 minutes, until apples are just tender and slightly caramelized. Set aside to cool for a few minutes. (If you overcook the apples, they’ll get mushy—aim for tender but still holding shape.)
- Mix the cheesecake layer: In a large bowl, beat 8 oz (227 g) cream cheese until smooth and creamy (about 1 minute). Add 1/4 cup (50 g) sugar, 1 egg, 1/2 tsp vanilla, and 1 tsp lemon zest if using. Beat until everything is just combined—don’t overmix, or your cheesecake might crack. Pour this mixture evenly over the cooled crust. Give the pan a gentle shake to smooth out the surface.
- Add the apples: Spoon the sautéed apple mixture over the cheesecake layer. Spread them out evenly—try not to press them in too hard, just let them nestle naturally.
- Make the streusel: In a bowl, mix 1/2 cup (60 g) flour, 1/4 cup (55 g) brown sugar, 1/2 tsp cinnamon, pinch of salt, and 1/4 cup (57 g) melted butter. Stir in chopped nuts if using. The mixture should look like chunky, moist sand. Sprinkle streusel evenly over the apples, making sure every inch gets a bit of topping.
- Bake: Bake the assembled bars for 30-35 minutes, until the cheesecake layer is set and the streusel is golden brown. If the topping starts to brown too quickly, cover loosely with foil for the last 10 minutes.
- Cool and chill: Let bars cool to room temperature in the pan (about 1 hour). Then refrigerate for at least 2 hours before slicing—this helps the cheesecake layer firm up and makes for cleaner cuts. Don’t rush this step; patience pays off!
- Slice and serve: Lift the bars out using the parchment overhang. Cut into squares with a sharp knife (wipe between cuts for perfect slices). Serve chilled or at room temperature.
Troubleshooting: If your cheesecake layer looks runny, chill longer—it’ll firm up. If the crust crumbles, it probably needed a firmer press or a couple more minutes in the oven. If the streusel melts into the apples, add a tablespoon more flour next time for crunchier results. Sensory cues: The bars should smell like cinnamon toast, the apples should be tender, and the cheesecake layer should jiggle slightly but not slosh. My top tip: Make these the night before—flavors meld and the texture improves!
Cooking Tips & Techniques
Here’s what I’ve learned after baking apple cheesecake bars (and, let’s be honest, a few kitchen mishaps):
- Room Temperature Cream Cheese: Softened cream cheese blends smoother—cold cream cheese leads to lumps (been there, done that).
- Don’t Overmix: Overbeating the cheesecake layer makes it dense and can cause cracks. Once it’s creamy, stop mixing. Less is more!
- Press Crust Firmly: Use the bottom of a measuring cup to press the crust into the pan. This avoids crumbly bottoms (and messy fingers).
- Apple Choice Matters: Firmer apples (like Granny Smith) hold up better and don’t turn to mush. Softer apples are delicious but may blend into the cheesecake.
- Streusel Crunch: For extra crispy topping, make sure the streusel is chunky, not sandy. I once melted the butter too much—ended up with a thin, chewy layer instead of a crumbly crunch.
- Timing: Bake until the center is just set. If you’re unsure, give the pan a gentle jiggle—the middle should look firm but slightly wobbly. Overbaking dries out the cheesecake.
- Multitasking: While the crust bakes, sauté apples and whip up the cheesecake layer to save time. I usually have everything ready by the time the crust’s done.
- Clean Slices: Chill the bars fully before slicing. Run your knife under hot water, wipe it off, and slice—it really does make a difference.
My biggest lesson: Don’t skip chilling. I tried serving these warm once and, let’s just say, “apple cheesecake pudding” was not the vibe I was going for. Take your time, and you’ll get those neat, bakery-worthy squares every single time.
Variations & Adaptations
Love to tweak your recipes? Me too! These apple cheesecake bars are super forgiving—here’s how you can make them your own:
- Gluten-Free: Swap all-purpose flour for your favorite gluten-free blend (like Bob’s Red Mill or King Arthur). The crust and streusel turn out just as tasty.
- Dairy-Free: Use plant-based cream cheese (Tofutti or Kite Hill are great) and substitute coconut oil for butter. The texture changes a bit, but the flavor is still spot-on.
- Seasonal Fruit: Try pears, peaches, or berries in place of apples. I’ve done a peach version in late summer—amazing!
- Nutty Streusel: Add chopped pecans, walnuts, or slivered almonds to the topping for extra crunch. If you’re nut-free, sub in rolled oats.
- Spice It Up: Add a pinch of nutmeg or ginger to the apple filling for extra warmth. I sometimes go rogue and toss in a handful of dried cranberries.
- Different Cooking Methods: If you don’t have an oven, try baking these bars in a toaster oven (just watch for hot spots). They also work as mini muffin cheesecakes in a cupcake pan—just reduce baking time by 5-8 minutes.
I once made a batch with caramel drizzle over the top—wow, talk about indulgent! This recipe truly adapts to whatever’s in your pantry or whatever mood you’re in.
Serving & Storage Suggestions
For that ultimate dessert moment, serve these apple cheesecake bars chilled or at room temperature. The flavors are brightest when cold, but if you like a softer cheesecake, let them sit out for 15 minutes before serving.
- Serving: Dust with powdered sugar, drizzle with caramel sauce, or add a scoop of vanilla ice cream for a decadent treat. These bars look gorgeous on a rustic wooden board or a fancy platter—totally Pinterest-worthy!
- Pairings: Great with hot coffee, spiced chai, or even mulled cider. If you’re serving at brunch, fresh berries or whipped cream make a lovely side.
- Storage: Store leftovers in an airtight container in the fridge for up to 5 days. The flavors deepen after a day or two, so don’t be afraid to make them ahead.
- Freezing: These bars freeze surprisingly well. Wrap individually in plastic, then store in a freezer bag for up to 2 months. Thaw overnight in the fridge before serving.
- Reheating: If you want them slightly warm, pop a bar in the microwave for 10-15 seconds. The streusel softens a little, but it’s still delicious.
Tip: Let the bars come to room temperature before adding any toppings like caramel or whipped cream—otherwise they’ll slide right off!
Nutritional Information & Benefits
Each apple cheesecake bar (assuming 16 squares) contains roughly:
- Calories: 180-220
- Fat: 10-12g
- Carbs: 22-25g
- Protein: 2-3g
Thanks to the apples, you get a dose of fiber and vitamin C. Cream cheese brings calcium and a bit of protein, while cinnamon offers antioxidants. If you use gluten-free or dairy-free options, the bars fit a variety of diets. Allergens: Contains dairy, gluten, eggs, and nuts (if using). If you’re watching sugar, swap some of the sugar for a natural sweetener—though let’s be honest, dessert is meant to be enjoyed! Personally, I love that these bars feel indulgent but still have a bit of fruit and a manageable portion size. Balance, right?
Conclusion
These apple cheesecake bars with cinnamon streusel topping are my go-to dessert for good reason—they’re simple, stunning, and satisfy every comfort food craving. Whether you’re baking for a crowd or just for yourself, this recipe is easy to tweak and endlessly delicious. I love how the creamy cheesecake, tart apples, and crunchy topping come together in every bite. Honestly, they’re the kind of treat that makes an ordinary day feel special.
So grab your apples, cream cheese, and a dash of cinnamon—and make these bars yours. Try a variation, share with friends, or save a batch for later. If you bake them, drop a comment below and let me know how you customized your apple cheesecake bars. I can’t wait to hear what you think! Happy baking, and may your kitchen always smell like cinnamon and apples.
Frequently Asked Questions
Can I make apple cheesecake bars ahead of time?
Absolutely! These bars actually taste better the next day as the flavors meld. Just store them in the fridge and slice when ready to serve.
What’s the best apple variety for cheesecake bars?
Granny Smith and Honeycrisp are my favorites—they’re firm and keep their shape. Softer apples work too, but may blend into the cheesecake layer.
Can I freeze apple cheesecake bars?
Yes! Wrap the bars well and freeze for up to 2 months. Thaw overnight in the fridge for best texture and flavor.
How do I keep the streusel topping crunchy?
Use cold butter for the crust and melted butter for the streusel, and don’t overmix. If you want extra crunch, add nuts or oats to the topping.
Are these bars gluten-free or dairy-free?
They can be! Just swap flours for a gluten-free blend and use plant-based cream cheese and coconut oil for a dairy-free version.
Pin This Recipe!
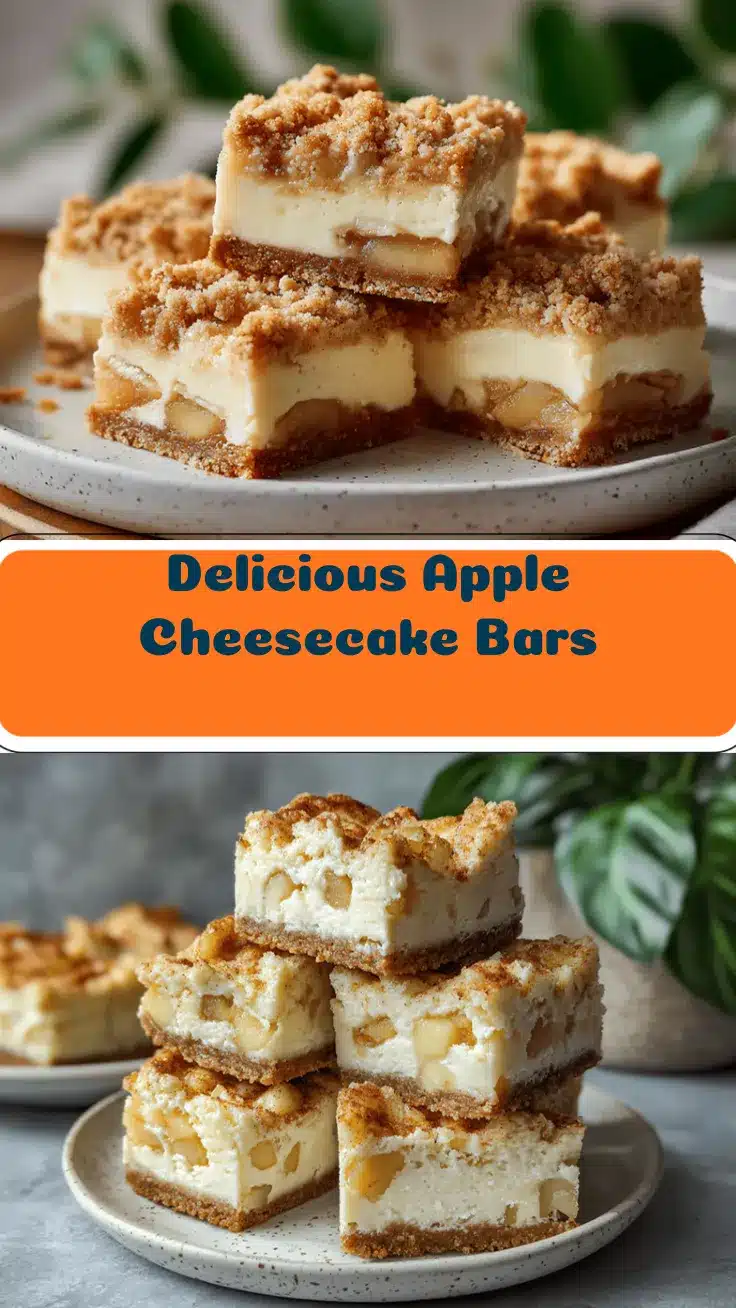
Apple Cheesecake Bars Recipe: Easy Cinnamon Streusel Dessert
- Total Time: 3 hours
- Yield: 16 bars 1x
Description
Warm, sweet apples and silky cheesecake layered under a crumbly cinnamon streusel make these bars a comforting, crowd-pleasing dessert. Quick to assemble and endlessly adaptable, they’re perfect for potlucks, brunch, or a cozy treat any time of year.
Ingredients
- 1 cup all-purpose flour
- 1/4 cup granulated sugar
- 1/2 cup unsalted butter, cold and cubed
- Pinch of salt
- 8 oz cream cheese, softened
- 1/4 cup granulated sugar
- 1 large egg, room temperature
- 1/2 tsp vanilla extract
- 1 tsp lemon zest (optional)
- 2 medium apples, peeled, cored, and diced (about 1 1/2 cups)
- 1 tbsp brown sugar
- 1/2 tsp ground cinnamon
- 1/2 tbsp unsalted butter
- 1 tsp lemon juice
- 1/2 cup all-purpose flour
- 1/4 cup brown sugar
- 1/2 tsp ground cinnamon
- 1/4 cup unsalted butter, melted
- Pinch of salt
- 1/4 cup chopped pecans or walnuts (optional)
Instructions
- Preheat oven to 350°F (175°C). Line an 8×8-inch baking pan with parchment paper, leaving an overhang.
- Make the crust: In a mixing bowl, combine 1 cup flour, 1/4 cup sugar, pinch of salt, and 1/2 cup cold butter. Rub butter into flour mixture until coarse crumbs form. Press mixture firmly into the bottom of the prepared pan. Bake for 10 minutes, until just set and lightly golden. Let cool.
- Prepare the apple filling: In a small skillet, melt 1/2 tbsp butter over medium heat. Add diced apples, 1 tbsp brown sugar, 1/2 tsp cinnamon, and 1 tsp lemon juice. Sauté for 3-5 minutes, until apples are just tender and slightly caramelized. Set aside to cool.
- Mix the cheesecake layer: In a large bowl, beat 8 oz cream cheese until smooth. Add 1/4 cup sugar, 1 egg, 1/2 tsp vanilla, and 1 tsp lemon zest (if using). Beat until just combined. Pour mixture evenly over cooled crust.
- Add the apples: Spoon sautéed apple mixture over cheesecake layer and spread evenly.
- Make the streusel: In a bowl, mix 1/2 cup flour, 1/4 cup brown sugar, 1/2 tsp cinnamon, pinch of salt, and 1/4 cup melted butter. Stir in nuts if using. Sprinkle streusel evenly over apples.
- Bake: Bake for 30-35 minutes, until cheesecake layer is set and streusel is golden brown. Cover loosely with foil if topping browns too quickly.
- Cool and chill: Let bars cool to room temperature in the pan (about 1 hour). Refrigerate for at least 2 hours before slicing.
- Slice and serve: Lift bars out using parchment overhang. Cut into squares with a sharp knife. Serve chilled or at room temperature.
Notes
For best results, use room temperature cream cheese and firm apples like Granny Smith or Honeycrisp. Chill bars fully before slicing for clean cuts. Streusel can be customized with nuts or oats. Bars freeze well for up to 2 months. Gluten-free and dairy-free adaptations work with simple swaps.
- Prep Time: 20 minutes
- Cook Time: 40 minutes
- Category: Dessert
- Cuisine: American
Nutrition
- Serving Size: 1 bar (1/16 of pan)
- Calories: 200
- Sugar: 14
- Sodium: 90
- Fat: 11
- Saturated Fat: 6
- Carbohydrates: 24
- Fiber: 1
- Protein: 2.5
Keywords: apple cheesecake bars, cinnamon streusel, easy dessert, fall baking, cream cheese, apple dessert, potluck recipe, cheesecake bars