Golden, crispy, gooey… the first bite of a fried cheese ball is pure joy. The crunch, the melty cheese inside, and that little hint of seasoning—honestly, it’s the kind of snack you dream about when you’re hungry. I’ll admit, I first whipped up these fried cheese balls on a rainy Saturday when the snack cravings hit hard. My fridge was almost empty except for a block of cheddar, some leftover Parmesan, and a few pantry basics. That’s when the magic happened.
There’s something nostalgic about cheese balls. Maybe it’s the memory of sharing them at sleepovers, or the way their aroma would fill the house on game night. But this fried cheese balls recipe? It’s become my go-to for parties, late-night nibbles, and as a sneaky treat for my kids (okay, for myself too). I love how customizable it is—sometimes I use mozzarella, sometimes I mix in pepper jack for a little kick. You get the picture.
If you’re looking for an easy homemade snack for parties, you’re in the right spot. These cheese balls are simple to whip up, and the results are always impressive. They’re perfect for anyone who loves comfort food, enjoys hosting, or just wants to add some crunch to their day. I’ve tested this recipe over a dozen times, tweaking the seasoning, experimenting with different cheeses, and finally landing on the version that gets rave reviews every time. Trust me, you’ll want to save (and share) this fried cheese balls recipe!
Why You’ll Love This Fried Cheese Balls Recipe
Let’s face it—snacks should be fun, easy, and absolutely delicious. After making these cheese balls for friends, family, and more parties than I can count, I’ve got plenty of reasons why this recipe is a must-try. Here’s what makes it stand out:
- Quick & Easy: You can prep and fry these cheese balls in under 30 minutes. No waiting, no fuss—just instant gratification.
- Simple Ingredients: Most of what you need is probably in your fridge right now. No fancy shopping trips required.
- Perfect for Parties: These are always the first to disappear at gatherings. They’re bite-sized, easy to serve, and universally loved.
- Crowd-Pleaser: Kids ask for seconds, adults sneak thirds. Seriously, I’ve never seen leftovers after making these fried cheese balls.
- Unbelievably Delicious: The combo of crisp coating and warm, melted cheese inside is snack heaven. You know that “close your eyes and savor” moment? This is it.
Here’s what sets my fried cheese balls recipe apart: I blend a mix of cheeses for that perfect pull and flavor depth. A light seasoning in the breadcrumb coating adds extra oomph. I’ve found that freezing the balls for a few minutes before frying makes all the difference—no cheesy explosions in the oil!
This isn’t just any cheese ball recipe. It’s the one you’ll write in your family cookbook, pass to friends, or whip out every time you need something special but stress-free. Whether you’re hosting a party or just want a cozy snack for movie night, these cheese balls deliver every time.
Ingredients Needed
This fried cheese balls recipe is all about simple, tasty ingredients. You don’t need anything fancy, just the basics for cheesy, crispy goodness. I usually use a mix of cheeses for flavor and texture, but you can easily swap things to suit what you have on hand.
- Cheddar cheese, shredded (1 cup / 115g) – sharp or mild, your choice
- Mozzarella cheese, shredded (1 cup / 115g) – for that gooey stretch
- Parmesan cheese, grated (1/4 cup / 25g) – adds a salty, nutty kick
- All-purpose flour (1/2 cup / 60g) – helps bind the cheese together
- Cornstarch (2 tablespoons / 16g) – optional, for extra crispiness
- Eggs (2 large) – for binding and coating
- Bread crumbs (1 cup / 100g) – panko or regular, both work (I prefer panko for crunch)
- Salt (1/2 teaspoon) – to taste
- Black pepper (1/4 teaspoon) – freshly ground if possible
- Garlic powder (1/2 teaspoon) – optional, but recommended
- Paprika (1/2 teaspoon) – for subtle warmth and color
- Vegetable oil – for frying (enough for deep frying, about 2-3 cups / 500-750ml)
Optional add-ins:
- Chopped fresh herbs (like parsley or chives, 2 tablespoons) – for fresh flavor
- Chili flakes (1/4 teaspoon) – if you want a spicy kick
Substitutions:
- Gluten-free flour & breadcrumbs: Use gluten-free options to make this recipe celiac-friendly.
- Dairy-free cheese: Works well if you’re avoiding dairy—just pick your favorite vegan cheese blend.
- Different cheeses: Try Gouda, Pepper Jack, or Swiss for new flavors.
Honestly, the best cheese balls come from mixing up what you love. I’ve used store-brand cheddar, fancy imported Parmesan, and even leftover cheese ends from the fridge. In summer, I toss in a little fresh basil. In winter, I stick with the classic blend. The recipe is forgiving and fun!
Equipment Needed
Making fried cheese balls doesn’t require a high-tech kitchen. Here’s what you’ll need:
- Mixing bowls – One for the cheese mixture, another for breading
- Measuring cups and spoons – For accurate measurements
- Cheese grater – If you’re using block cheese (I love my old box grater—it’s survived years of cheese ball nights)
- Baking sheet or plate – For holding the shaped balls before frying
- Deep fryer or heavy-bottomed pot – I use a medium-size saucepan; it heats evenly and keeps the oil at a steady temp
- Slotted spoon or spider strainer – For safely removing cheese balls from hot oil
- Paper towels – For draining excess oil
Alternatives: If you don’t have a deep fryer, a sturdy soup pot works fine. For grating, a food processor with a shredding blade is a time-saver. I’ve even used a fork to mix when every spatula was dirty—works in a pinch!
Maintenance tip: Wash your equipment right after frying to avoid sticky cheese residue. For budget options, thrift stores often have fantastic mixing bowls and strainers. I snagged my favorite slotted spoon for $1!
Preparation Method

-
Prep Your Workspace (5 minutes):
Gather all ingredients and equipment. Line a baking sheet with parchment or wax paper. -
Mix the Cheese Filling (5 minutes):
In a large bowl, combine 1 cup (115g) shredded cheddar, 1 cup (115g) shredded mozzarella, and 1/4 cup (25g) grated Parmesan. Add 1/2 cup (60g) flour and 2 tablespoons (16g) cornstarch. Sprinkle in 1/2 teaspoon salt, 1/4 teaspoon pepper, 1/2 teaspoon garlic powder, and 1/2 teaspoon paprika. Mix everything until it’s well blended and sticks together when pressed. -
Shape the Cheese Balls (10 minutes):
Scoop about 1 tablespoon of mixture and roll it between your palms to form balls (about 1-inch diameter). Place them on the lined baking sheet. You should get 20-24 balls, depending on size.
Prep note: If the mixture feels sticky, add a little more flour. If it’s too dry, drizzle in a teaspoon of water. -
Chill the Balls (10-15 minutes):
Place the baking sheet in the freezer for at least 10 minutes. This helps the cheese balls hold their shape and prevents them from bursting in hot oil.
Tip: Don’t skip this step! It’s the secret to perfect fried cheese balls. -
Prepare Breading Station (5 minutes):
Beat 2 eggs in a bowl. Place 1 cup (100g) breadcrumbs in another bowl. If you want extra crunch, mix in a pinch of salt and paprika to the breadcrumbs. -
Bread the Cheese Balls (5 minutes):
Remove chilled cheese balls from the freezer. Dip each ball in egg, then roll in breadcrumbs until fully coated. Gently press the crumbs so they stick well. -
Heat the Oil (5 minutes):
Pour 2-3 cups (500-750ml) vegetable oil into a deep fryer or heavy pot. Heat to 350°F (175°C). Test by dropping a breadcrumb in—if it sizzles and rises, you’re good. -
Fry the Cheese Balls (5-7 minutes):
Fry in batches, 4-6 at a time. Gently drop balls into hot oil, turning occasionally. Fry until golden brown (2-3 minutes per batch). Use a slotted spoon to transfer to paper towels.
Warning: Don’t overcrowd the pan—oil temp drops and balls may burst.
Sensory cue: Look for deep golden color and listen for the crispy crackling sound. -
Serve Hot:
Enjoy immediately for maximum cheese pull! If you’re saving for later, keep them warm in a low oven (250°F/120°C).
Troubleshooting: If cheese leaks out while frying, your oil may be too hot. If balls crack before frying, mixture is too dry—add a splash of milk. I’ve had my share of cheese mishaps, but chilling always saves the day.
Cooking Tips & Techniques
After many batches (some perfect, some… not so much), I’ve picked up a few tricks for this fried cheese balls recipe:
- Chilling is key: Freezing the balls before frying keeps the cheese inside and the shape round. Honestly, I learned this the hard way—cheese lava everywhere!
- Don’t rush the oil heating: Use a thermometer if you have one. Too cold and the balls soak up oil, too hot and they burst. I hover around 350°F (175°C).
- Double breading: For extra crunch, dip in egg and crumbs twice. It makes the shell thicker and crispier.
- Multitasking: While the balls chill, set up your breading station and heat the oil. It saves time and keeps the process smooth.
- Consistency matters: Grate cheese finely for even mixing. Large chunks don’t melt as smoothly.
- Batch frying: Don’t overcrowd—fry in small batches to keep oil temp stable and balls evenly cooked.
- Personal fail: Once, I tried skipping the flour to make them “healthier.” The balls collapsed in the oil! Lesson learned: stick to the recipe for best results.
When you follow these tips, each cheese ball comes out golden, crisp, and perfectly gooey inside. It’s snack perfection!
Variations & Adaptations
This fried cheese balls recipe is just begging to be customized. Here are my favorite ways to switch things up:
- Gluten-Free Version: Use gluten-free flour and breadcrumbs. I’ve tried this for a celiac friend—no one noticed the difference!
- Spicy Cheese Balls: Add chopped jalapeños or a sprinkle of chili flakes to the cheese mixture. Pepper jack cheese is also amazing for heat lovers.
- Herb-Infused: Mix fresh basil, parsley, or chives into the cheese filling. Adds color and brightness, especially in summer.
- Air Fryer Method: Spray breaded balls lightly with oil and air fry at 375°F (190°C) for 8-10 minutes. They’re lighter but still satisfyingly crunchy.
- Vegan Adaptation: Use plant-based cheeses and egg replacer for a dairy-free, egg-free version. I’ve made these with vegan cheddar and flax egg—they worked great!
For allergies, swap out dairy for vegan cheese, and egg for aquafaba or flax egg. I’ve even stuffed the center with bits of cooked bacon or sun-dried tomato for a surprise twist. Honestly, this recipe is super forgiving—have fun with it!
Serving & Storage Suggestions
Cheese balls are best served piping hot, straight from the fryer—crispy on the outside, gooey in the middle. I love serving them with a dipping sauce: marinara, ranch, or spicy sriracha mayo. For parties, pile them high on a platter with toothpicks and a sprinkle of fresh herbs.
Want to prep ahead? You can freeze uncooked balls after breading. Just lay them on a baking sheet, freeze until firm, then transfer to a zip-top bag. To cook, fry straight from the freezer—add a minute or two to the frying time.
Leftovers (if you have any!) keep in the fridge for up to 3 days. Reheat in a 350°F (175°C) oven for 8-10 minutes to restore crispiness. I don’t recommend microwaving—they get mushy. Over time, the flavors meld and the cheese inside becomes even more savory. You might even prefer them the next day!
Nutritional Information & Benefits
Here’s a quick look at what’s inside each serving of fried cheese balls (based on 24 balls, 4 servings):
- Calories: ~320 per serving
- Protein: 12g
- Fat: 20g
- Carbohydrates: 18g
- Sodium: 480mg
Cheese provides calcium and protein, while eggs add extra protein. If you use whole grain breadcrumbs, you’ll sneak in a little fiber. For gluten-free or vegan diets, substitute as needed—this recipe adapts well. Allergens include dairy, egg, and gluten (unless substituted). Personally, I love that these cheese balls satisfy cravings without needing to overindulge—one or two and I’m happy!
Conclusion
If you’re craving a homemade snack that’s crispy, cheesy, and totally irresistible, this fried cheese balls recipe is your answer. It’s the perfect party starter, comfort food treat, or just a fun way to use up leftover cheese. I love how easy it is to adapt—make it spicy, gluten-free, or even vegan, and it never disappoints.
Give these cheese balls a try, and don’t be afraid to put your own spin on them. Share your results, swap cheeses, add herbs—make it yours! Honestly, every batch reminds me why I keep coming back to this recipe. It’s simple, satisfying, and a guaranteed crowd-pleaser.
If you make this recipe, drop a comment below, share your tweaks, or tag me on social media! Let’s keep the cheese ball love rolling—one golden bite at a time.
Frequently Asked Questions
Can I make fried cheese balls in advance?
Yes! Shape and bread the balls, then freeze on a tray. Fry straight from the freezer when needed—just add a minute to the frying time.
What’s the best cheese combination for cheese balls?
I love mixing cheddar and mozzarella for flavor and meltiness. Parmesan adds depth. Try Gouda or Pepper Jack for new twists!
How do I keep cheese balls from bursting while frying?
Chill or freeze before frying, don’t overcrowd the pan, and keep your oil at 350°F (175°C). These tricks really help!
Can I bake cheese balls instead of frying?
Yes, but they won’t be as crispy. Brush with oil and bake at 400°F (200°C) for 15-18 minutes, turning halfway through.
Are fried cheese balls gluten-free?
They can be! Use gluten-free flour and breadcrumbs. I’ve made this version for celiac friends and it’s just as tasty.
Pin This Recipe!
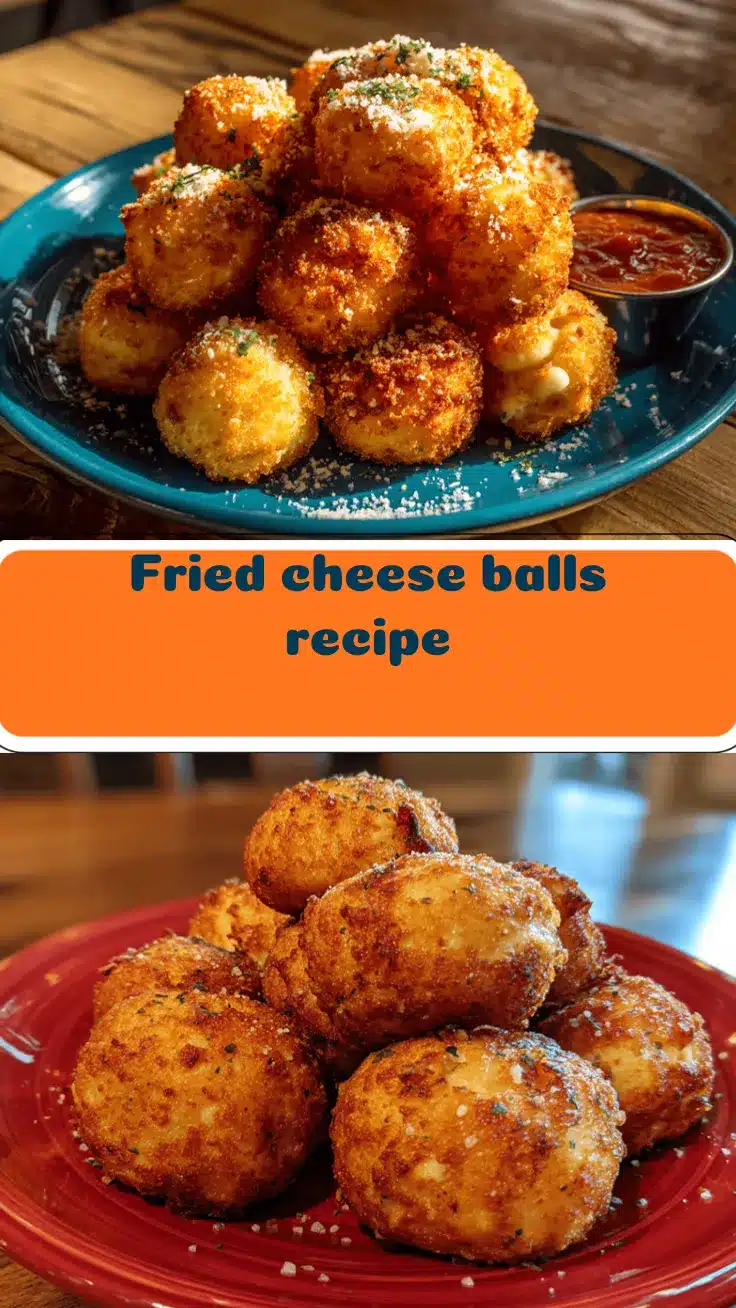

Fried Cheese Balls Recipe: Easy Homemade Snack for Parties
- Total Time: 30 minutes
- Yield: 4 servings (20-24 cheese balls) 1x
Description
Golden, crispy, and gooey, these fried cheese balls are the ultimate party snack. Quick to make and endlessly customizable, they’re perfect for gatherings, movie nights, or anytime you crave comfort food.
Ingredients
- 1 cup shredded cheddar cheese (about 4 oz)
- 1 cup shredded mozzarella cheese (about 4 oz)
- 1/4 cup grated Parmesan cheese (about 1 oz)
- 1/2 cup all-purpose flour
- 2 tablespoons cornstarch (optional)
- 2 large eggs
- 1 cup bread crumbs (panko or regular)
- 1/2 teaspoon salt
- 1/4 teaspoon black pepper
- 1/2 teaspoon garlic powder (optional)
- 1/2 teaspoon paprika
- 2–3 cups vegetable oil (for frying)
- Optional: 2 tablespoons chopped fresh herbs (parsley or chives)
- Optional: 1/4 teaspoon chili flakes
Instructions
- Gather all ingredients and equipment. Line a baking sheet with parchment or wax paper.
- In a large bowl, combine cheddar, mozzarella, Parmesan, flour, cornstarch, salt, pepper, garlic powder, and paprika. Mix until well blended and the mixture sticks together when pressed.
- Scoop about 1 tablespoon of mixture and roll between your palms to form balls (about 1-inch diameter). Place on the lined baking sheet. You should get 20-24 balls.
- Place the baking sheet in the freezer for at least 10 minutes to chill the balls and help them hold their shape.
- Beat eggs in a bowl. Place bread crumbs in another bowl. Mix in a pinch of salt and paprika to the bread crumbs if desired.
- Remove chilled cheese balls from the freezer. Dip each ball in egg, then roll in bread crumbs until fully coated. Gently press the crumbs so they stick well.
- Pour vegetable oil into a deep fryer or heavy-bottomed pot and heat to 350°F (175°C). Test by dropping a breadcrumb in—if it sizzles and rises, the oil is ready.
- Fry cheese balls in batches (4-6 at a time), turning occasionally, until golden brown (2-3 minutes per batch). Use a slotted spoon to transfer to paper towels.
- Serve hot for maximum cheese pull. To keep warm for later, place in a low oven (250°F/120°C).
Notes
Chilling the cheese balls before frying is essential to prevent bursting and ensure a gooey center. For extra crunch, double bread the balls. You can freeze uncooked, breaded balls and fry straight from the freezer. Serve with marinara, ranch, or spicy mayo for dipping. For gluten-free or vegan diets, substitute flour, breadcrumbs, cheese, and eggs as needed.
- Prep Time: 20 minutes
- Cook Time: 10 minutes
- Category: Appetizer
- Cuisine: American
Nutrition
- Serving Size: 5-6 cheese balls per serving
- Calories: 320
- Sugar: 1
- Sodium: 480
- Fat: 20
- Saturated Fat: 10
- Carbohydrates: 18
- Fiber: 1
- Protein: 12
Keywords: fried cheese balls, party snack, appetizer, cheese balls, easy snack, crispy cheese balls, comfort food, finger food, vegetarian option, gluten-free option