The scent of buttery pastry mingling with roasted autumn vegetables—honestly, that’s what signals the start of sweater weather in my kitchen. The first time I whipped up these fall appetizer tartlets, I was trying to impress a group of friends at a chilly October gathering. (Let’s just say, they vanished from the platter faster than the cider!)
I’ve always loved the way autumn brings everyone together: cozy parties, tailgates, and family nights that revolve around food. These homemade tartlets are my go-to for those moments. They’re adorable, perfectly portioned, and packed with the best flavors of the season. You know, the kind of bite that’s equal parts comforting and elegant—it’s a recipe I’ve tweaked over the years, adding little touches like herbed cheese or a drizzle of honey on top.
Why fall appetizer tartlets? Well, for starters, they’re totally customizable. I’ve filled them with everything from caramelized onions and mushrooms to roasted squash and goat cheese. The base is simple (store-bought or homemade pastry, depending on my mood), but the fillings are where you can really play. They work for busy families, picky eaters, and anyone who wants a delicious, crowd-pleasing party bite.
As a food blogger obsessed with seasonal produce, I’ve tested these tartlets more times than I can count. They never disappoint! Whether you’re hosting a big bash or just want a fun snack for movie night, this fall appetizer tartlets recipe brings autumn straight to your table—no fuss, just flavor and a dash of autumn magic.
If you’re searching for a memorable, easy fall appetizer tartlets recipe that delivers on taste and presentation, you’re in the right place. Trust me, these little bites are about to become your new autumn tradition.
Why You’ll Love This Recipe
Let’s face it: not all party appetizers are created equal. After dozens of autumn gatherings (and more recipe tweaks than I care to admit), I can confidently say these fall appetizer tartlets are the ones everyone reaches for first. Here’s why:
- Quick & Easy: You can prep and bake these tartlets in under 45 minutes, making them perfect for last-minute parties or spontaneous family nights.
- Simple Ingredients: No fancy shopping trips required—most of the ingredients are seasonal and likely already in your kitchen.
- Perfect for Any Occasion: From elegant Thanksgiving spreads to casual game-day snacking, these tartlets fit in everywhere.
- Crowd-Pleaser: Both kids and adults devour these. I’ve seen even the pickiest eaters come back for seconds (and thirds!).
- Unbelievably Delicious: The golden, flaky crust combined with savory fillings and a hint of autumn herbs? Next-level comfort food.
What sets this fall appetizer tartlets recipe apart? For starters, I blend roasted vegetables with rich cheese and fresh herbs—giving every bite that warm, cozy autumn feeling. I use a trick I learned from a pastry chef friend: blind-baking the tartlet shells for extra crispness. It’s the kind of little detail that makes a big difference.
Honestly, these tartlets are more than just delicious—they’re a celebration of autumn. You get that sweet and savory combo, plus a texture that’s both creamy and crisp. They’re easy to pick up, no mess, and look gorgeous on a party platter. If you want to wow guests or just treat yourself, give this fall appetizer tartlets recipe a try. I promise you’ll be making them again (probably sooner than you expect!).
For me, there’s something nostalgic about these tartlets. Maybe it’s the scent of thyme and roasted squash wafting through the house, or the way everyone gathers around, sharing stories and bites. That’s the magic of a truly great fall appetizer tartlet—memories baked right in.
Ingredients Needed
This fall appetizer tartlets recipe uses simple, wholesome ingredients to deliver bold seasonal flavor and a satisfying texture. I love that you can mix and match based on what’s fresh or what you’ve got on hand. Here’s everything you’ll need:
- For the Tartlet Shells:
- 1 package refrigerated pie dough (or homemade, see tips below)
- Flour for dusting
- Butter for greasing tartlet pans
- For the Filling:
- 1 cup butternut squash, diced (roasted; use sweet potato if preferred)
- 1 cup cremini mushrooms, finely chopped (adds earthiness)
- 1 small red onion, thinly sliced (caramelizes beautifully)
- 1 tablespoon olive oil
- 1/2 teaspoon sea salt
- 1/4 teaspoon freshly ground black pepper
- 1/2 teaspoon dried thyme (or 1 teaspoon fresh thyme, chopped)
- 2 ounces goat cheese, crumbled (or use feta for a tangier bite)
- 1/2 cup shredded Gruyère cheese (melty, nutty flavor)
- 1 large egg (for binding)
- 2 tablespoons heavy cream (or milk; use non-dairy if needed)
- For Garnish:
- Fresh thyme sprigs (optional)
- Drizzle of honey (optional, for a touch of sweetness)
- Cracked black pepper
Ingredient notes and swaps:
- I like to use store-bought pie dough when time is short, but homemade pastry gives a richer flavor (try a simple butter crust if you have the time!).
- Can’t find butternut squash? Swap in roasted pumpkin, acorn squash, or even leftover sweet potatoes.
- For a dairy-free option, use vegan cheese and coconut cream in the filling.
- Want it gluten-free? Replace the regular dough with your favorite gluten-free pastry blend (Bob’s Red Mill is a good choice).
- If you’re out of Gruyère, shredded cheddar or smoked gouda works just fine (I’ve tried them all!).
Trust me, the filling is flexible—feel free to toss in spinach, roasted peppers, or even chopped apples for a sweet-savory twist. These tartlets are forgiving, so don’t stress if you need to improvise a bit!
Equipment Needed
You don’t need fancy gear for these fall appetizer tartlets—just the basics, plus a couple of helpful tools if you want to get extra crisp shells. Here’s my toolkit:
- Mini tartlet pans or a standard muffin tin (nonstick is best; I’ve used both with great results)
- Rolling pin (for thinning out the pastry—if you don’t have one, a clean wine bottle does the job!)
- Sharp knife or pizza cutter (to trim pastry rounds)
- Baking sheet (for roasting veggies)
- Mixing bowls (one for filling, one for eggs/cream)
- Whisk or fork (for blending egg and cream)
- Pastry brush (for greasing pans or brushing egg wash if desired)
If you’re making homemade pastry, a food processor helps cut the butter in quickly. For cleaning up, I love using silicone muffin liners—they pop out easily and make washing up a breeze.
Maintenance tip: If you use metal tartlet pans, give them a quick wash and dry after every use to prevent rust. Budget-friendly note: Muffin tins from the dollar store work just fine—don’t feel like you need top-of-the-line equipment. I’ve baked hundreds of tartlets in basic pans, and they’ve always come out delicious!
Preparation Method
- Roast the Vegetables: Preheat your oven to 400°F (200°C). Toss diced butternut squash, chopped mushrooms, and sliced onions with olive oil, salt, pepper, and thyme on a baking sheet. Roast for 15-20 minutes until tender and golden, stirring halfway through. (Tip: The veggies should smell sweet and earthy—don’t worry if they get a few crispy edges!)
- Prepare the Pastry Shells: While veggies roast, roll out your pie dough on a floured surface until about 1/8-inch (3mm) thick. Cut rounds to fit your tartlet pans or muffin tin wells—usually about 3 inches (7.5cm) in diameter. Gently press into greased pans, trimming any excess. Prick the bottoms with a fork to prevent puffing.
- Blind Bake the Shells: Place a small square of parchment and a few dried beans (or pie weights) in each tartlet. Bake at 400°F (200°C) for 8 minutes. Remove weights and bake 2 more minutes until barely golden. (This keeps the crust crisp and prevents sogginess.)
- Mix the Filling: In a bowl, whisk together the egg and cream. Fold in crumbled goat cheese, shredded Gruyère, and the roasted veggies. The mixture should be creamy but chunky. (If it seems dry, add a splash more cream.)
- Fill the Tartlets: Spoon the veggie-cheese mixture evenly into each shell—don’t overfill, as the mixture will puff slightly when baking.
- Bake: Return filled tartlets to the oven and bake for 12-15 minutes at 375°F (190°C), until the filling is set and the tops are golden. (They’ll smell absolutely incredible—watch for bubbling cheese and a hint of browning at the edges.)
- Cool and Garnish: Let tartlets cool in the pan for 5 minutes, then gently lift them out. Garnish with fresh thyme, a drizzle of honey, and cracked pepper.
Prep notes:
- If your dough tears, just patch it together—no one will notice after baking!
- Don’t stress if the filling looks rustic—those little veggie bits make every bite special.
<lifor ahead.
Troubleshooting: If tartlet shells shrink, try chilling the dough rounds in the pan for 10 minutes before baking. If the filling bubbles over, use a spoon to gently push it back in while still warm (I’ve had my share of overzealous fillings—still tasty!).
Cooking Tips & Techniques
Making fall appetizer tartlets is mostly straightforward, but I’ve picked up a few tricks over the years that really make a difference. Here are my best tips:
- Blind Bake for Crispiness: Always blind bake the shells, even if you’re short on time. It keeps the crust flaky and avoids that dreaded soggy bottom.
- Don’t Overfill: Resist the urge to heap on the filling—leave a little space at the top. Otherwise, you’ll end up with spillage (I learned that one the hard way at my first Friendsgiving!).
- Use Room-Temperature Ingredients: Cheese, eggs, and cream blend more smoothly when they’re not ice cold. This gives you a creamier filling.
- Roast Veggies Properly: High heat brings out sweetness and keeps the veggies from getting mushy. Toss halfway through roasting for even caramelization.
- Multitasking: While veggies roast, prep your pastry shells. It keeps you moving and gets these tartlets done faster.
- Watch the Oven: Tartlets bake quickly—a few extra minutes can mean burnt edges. Set a timer and trust your nose!
- Let Them Rest: Cooling for a few minutes helps the filling set and makes them easier to lift out—plus, flavors meld together for a richer taste.
Personal lesson: I once tried to shortcut the blind bake and ended up with gummy, undercooked dough. Never again! Patience pays off here. If you’re baking for a crowd, double the recipe and freeze half the shells in advance. It’s a lifesaver for party prep.
Consistency tip: Measure ingredients by weight if you can—it’s more reliable, especially for pastry. And don’t worry about perfection; rustic tartlets always look (and taste) inviting!
Variations & Adaptations
One of the best things about fall appetizer tartlets is how easily you can tweak them to suit different tastes and dietary needs. Here are my favorite variations:
- Gluten-Free: Use your favorite gluten-free pie dough or pastry mix. I like Bob’s Red Mill gluten-free crust—it’s sturdy and tastes great.
- Vegetarian: The main recipe is already vegetarian, but skip the cheese for a vegan version, using dairy-free cheese and coconut cream.
- Seasonal Swaps: In early fall, try roasted apples or pears with blue cheese. Later in the season, swap in Brussels sprouts or rosemary-roasted potatoes.
- Meaty Additions: Add cooked bacon bits or shredded chicken for extra protein (just reduce the cheese a bit to keep things balanced).
- Spicy Kick: Toss roasted veggies with a pinch of chili flakes or smoked paprika.
Cooking methods: If you don’t have tartlet pans, use mini muffin tins for bite-size versions or make one large tart and slice it up. For air fryer fans, bake tartlets at 350°F (175°C) for 8-10 minutes—watch carefully, as they cook fast.
Allergen swaps: Use almond milk and vegan cheese for dairy-free tartlets. Nut allergy? Stick to regular pastry and avoid almond-based crusts.
Personal variation: Last Thanksgiving, I added a layer of fig jam under the veggies—wow, that sweet-savory combo was a hit!
Serving & Storage Suggestions
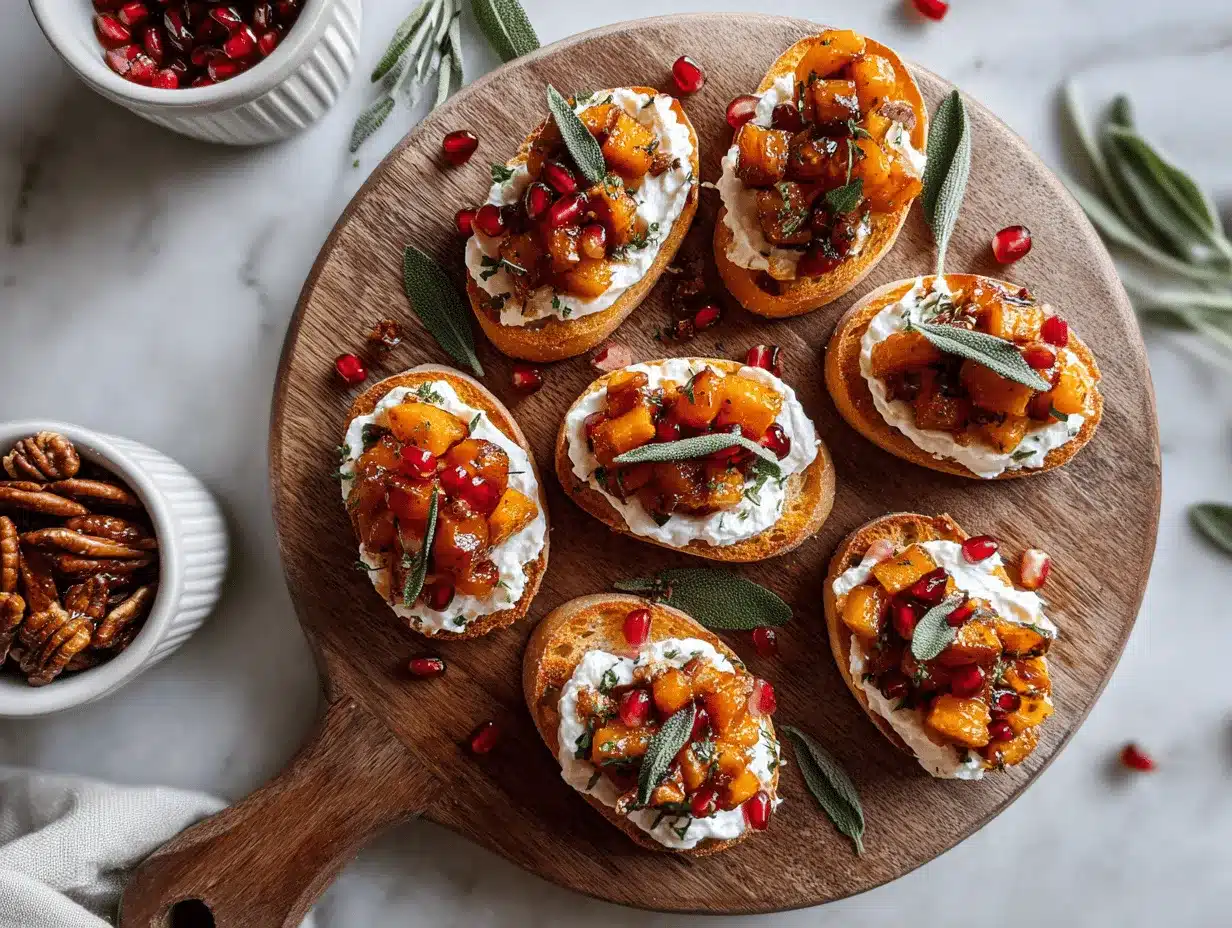
Serve these fall appetizer tartlets warm or at room temperature—they’re tasty either way. I like to arrange them on a rustic wooden board, sprinkled with fresh thyme and a drizzle of honey for a little autumn sparkle.
Pair them with sparkling cider, mulled wine, or a crisp Chardonnay for a true seasonal vibe. They’re great alongside roasted nuts, cheese boards, or even a simple green salad.
Storage tips:
- Refrigerator: Store cooled tartlets in an airtight container for up to 3 days. Reheat in a 350°F (175°C) oven for 8 minutes to crisp up.
- Freezer: Freeze baked (or unbaked) shells for up to 1 month. Thaw overnight in the fridge, then bake or reheat as usual.
- Reheating: Avoid microwaving if you want to keep the crust flaky—use the oven or toaster oven instead.
Flavor note: The flavors deepen as they sit, so leftovers taste even better the next day. I’ve even packed them for lunches—they hold up beautifully and always get compliments!
Nutritional Information & Benefits
Each tartlet (based on the main recipe) contains approximately:
- Calories: 120
- Protein: 4g
- Carbohydrates: 12g
- Fat: 7g
- Fiber: 2g
Key ingredients like butternut squash and mushrooms are loaded with vitamins, minerals, and antioxidants, making these fall appetizer tartlets a nourishing choice. Goat cheese adds protein and calcium, while the use of olive oil keeps things heart-healthy.
Dietary notes: This recipe is vegetarian and easily adapted for gluten-free and dairy-free diets. If you have nut allergies, stick to traditional pastry and avoid nut-based alternatives.
From a wellness perspective, I love how these tartlets deliver big flavor without feeling heavy. They’re perfect for portion control and sneaking extra veggies into your party spread!
Conclusion
If you’re searching for an easy, crowd-pleasing autumn appetizer, these fall appetizer tartlets hit the mark every time. They combine all the best seasonal flavors—roasted vegetables, creamy cheese, and buttery pastry—into a bite-sized treat that’s as beautiful as it is delicious.
Don’t be afraid to play with the fillings or switch things up for different occasions. Honestly, that’s half the fun! Whether you’re hosting a big gathering or just want a cozy snack, these tartlets will make your autumn a little more special.
I love this recipe because it brings people together, sparks conversation, and always leaves guests smiling. If you try these fall appetizer tartlets, please let me know in the comments how you customized them—and feel free to share your own tips or party stories! Happy baking, and here’s to making your autumn gatherings extra tasty.
FAQs
Can I make fall appetizer tartlets ahead of time?
Yes! Bake them up to 1 day in advance and store in the fridge. Reheat in the oven before serving for best texture.
What pastry works best for tartlets?
Store-bought pie dough is easy, but homemade butter pastry gives a richer flavor. Gluten-free and vegan alternatives work too!
How do I prevent soggy tartlet bottoms?
Blind bake the shells before adding filling. This keeps the crust crisp and delicious.
Can I freeze tartlets?
Absolutely. Freeze baked or unbaked tartlets for up to 1 month. Thaw in the fridge and reheat as needed.
What other fillings can I use?
Try roasted apples, pears, different cheeses, or even shredded chicken for variety. The base recipe is very flexible!
Pin This Recipe!
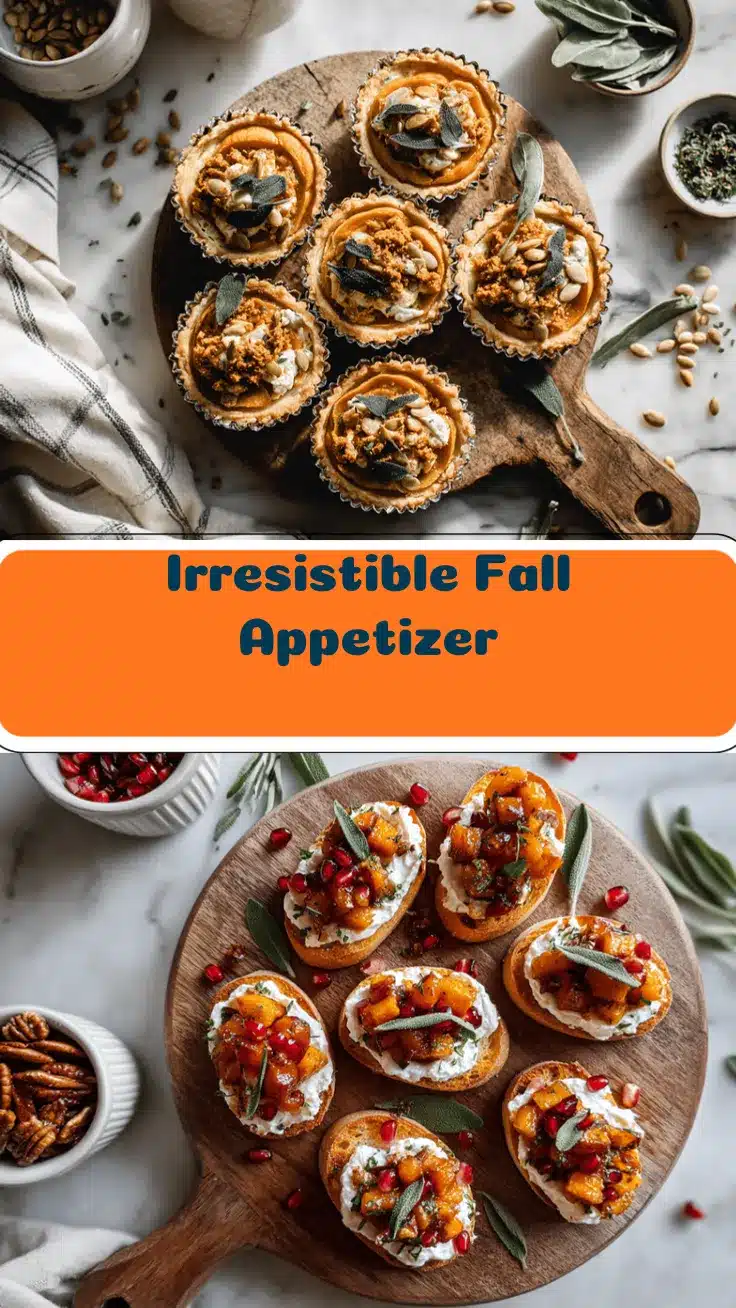

Fall Appetizer Tartlets Recipe: Easy Homemade Autumn Party Bites
- Total Time: 45 minutes
- Yield: 12 tartlets 1x
Description
These cozy fall appetizer tartlets feature a buttery pastry shell filled with roasted autumn vegetables, creamy cheese, and fresh herbs. Perfect for parties, gatherings, or a comforting seasonal snack, they’re easy to customize and always a crowd-pleaser.
Ingredients
- 1 package refrigerated pie dough (or homemade)
- Flour for dusting
- Butter for greasing tartlet pans
- 1 cup butternut squash, diced and roasted (or sweet potato)
- 1 cup cremini mushrooms, finely chopped
- 1 small red onion, thinly sliced
- 1 tablespoon olive oil
- 1/2 teaspoon sea salt
- 1/4 teaspoon freshly ground black pepper
- 1/2 teaspoon dried thyme (or 1 teaspoon fresh thyme, chopped)
- 2 ounces goat cheese, crumbled (or feta)
- 1/2 cup shredded Gruyère cheese
- 1 large egg
- 2 tablespoons heavy cream (or milk; non-dairy if needed)
- Fresh thyme sprigs (optional, for garnish)
- Drizzle of honey (optional, for garnish)
- Cracked black pepper (for garnish)
Instructions
- Preheat oven to 400°F (200°C). Toss diced butternut squash, mushrooms, and onions with olive oil, salt, pepper, and thyme on a baking sheet. Roast for 15-20 minutes until tender and golden, stirring halfway.
- Roll out pie dough on a floured surface to about 1/8-inch thick. Cut rounds to fit tartlet pans or muffin tin wells (about 3 inches diameter). Press into greased pans and trim excess. Prick bottoms with a fork.
- Blind bake shells: Place parchment and dried beans or pie weights in each shell. Bake at 400°F for 8 minutes, remove weights, and bake 2 more minutes until barely golden.
- In a bowl, whisk together egg and cream. Fold in goat cheese, Gruyère, and roasted veggies. Mixture should be creamy but chunky.
- Spoon veggie-cheese mixture evenly into each shell, leaving a little space at the top.
- Bake filled tartlets at 375°F (190°C) for 12-15 minutes, until filling is set and tops are golden.
- Cool tartlets in pan for 5 minutes, then gently lift out. Garnish with fresh thyme, honey drizzle, and cracked pepper.
Notes
Blind baking the shells ensures a crisp crust. The filling is flexible—swap veggies or cheeses as desired. For gluten-free or dairy-free versions, use appropriate pastry and cheese substitutes. Tartlets can be made ahead and reheated in the oven. Freeze baked or unbaked shells for up to 1 month.
- Prep Time: 20 minutes
- Cook Time: 25 minutes
- Category: Appetizer
- Cuisine: American
Nutrition
- Serving Size: 1 tartlet
- Calories: 120
- Sugar: 2
- Sodium: 180
- Fat: 7
- Saturated Fat: 3
- Carbohydrates: 12
- Fiber: 2
- Protein: 4
Keywords: fall appetizer, tartlets, autumn party bites, roasted vegetables, goat cheese, Gruyère, vegetarian, easy appetizer, party food, autumn recipes