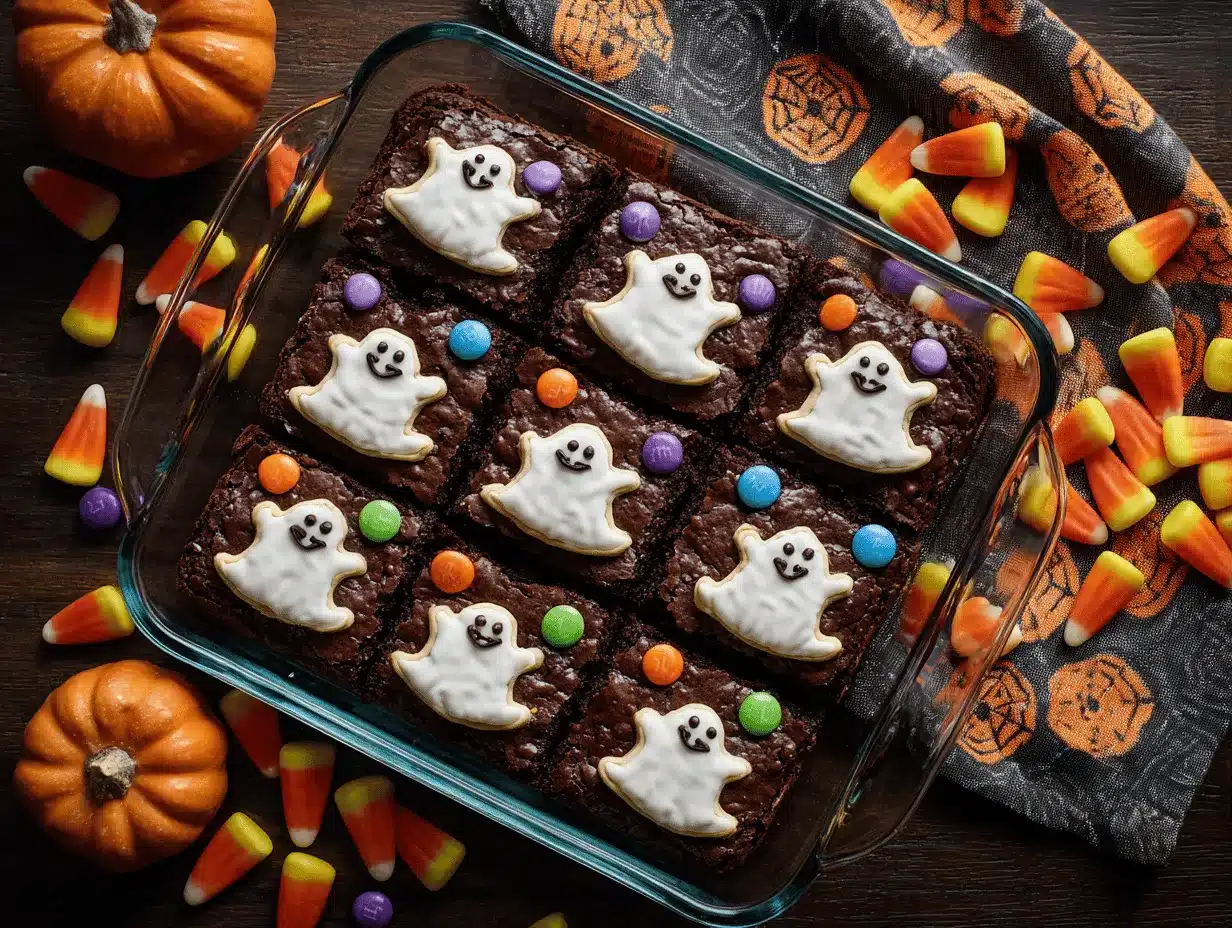
Sticky fingers, giggling kids, and a kitchen dusted with flour—that’s the scene every October when I whip up a batch of Halloween Ghost Sugar Cookie Brownie Bars. There’s something about the scent of chocolate mingling with vanilla that turns any ordinary day into a celebration. You know the moment: when you pull out the pan, the brownie base is all fudgy, and those sugar cookie ghosts are grinning up at you. I first made these ghost bars as a last-minute party treat (let’s face it, I wanted something cute and easy), and they’ve been a hit ever since.
This recipe was born out of necessity during a busy Halloween season—brownies for my chocolate-loving crew, sugar cookies for the kids who love decorating, and a festive twist that made everyone smile. I’m all about desserts that bring people together, and these bars do exactly that. The ghost-shaped sugar cookies perched atop rich brownies are almost too adorable to eat (almost!). Plus, they’re way less fussy than making separate batches of cookies and brownies. As someone who’s tested dozens of Halloween desserts, I can say these are foolproof. You’ll get both the wow factor and the satisfying taste in every square.
If you’ve got a busy schedule, picky eaters, or just need a show-stopping treat for your Halloween spread, this is the recipe for you. Honestly, Halloween Ghost Sugar Cookie Brownie Bars are more than just a dessert—they’re a tradition now in my house, and I bet they’ll become one in yours too.
Why You’ll Love This Recipe
- Quick & Easy: Comes together in under an hour, perfect for last-minute party prep or spontaneous baking sessions.
- Simple Ingredients: Uses basic pantry staples—no weird specialty items. If you bake, you probably have everything you need.
- Perfect for Halloween: Ideal for class parties, trick-or-treating gatherings, or cozy movie nights.
- Crowd-Pleaser: Kids love decorating the ghost cookies, grown-ups love the brownie base. It’s a win-win.
- Unbelievably Delicious: The combo of fudgy brownie and soft sugar cookie is just dreamy.
What sets my Halloween Ghost Sugar Cookie Brownie Bars apart? Honestly, it’s the way the sugar cookie ghosts hold their shape (thanks to chilling the dough), and the brownies stay moist even after baking with the cookie layer on top. I’ve tried versions with premade dough and boxed brownies, but making both layers from scratch is worth it—trust me. The ghosts don’t get lost in the chocolate, and every bite is balanced, not overly sweet. You get that playful look without sacrificing flavor. Plus, you can get creative with the ghost faces—each bar can have its own personality!
These bars are more than just a treat—they’re an experience. Decorating together is half the fun, and sharing them with friends makes Halloween extra special. Whether you’re a baking newbie or a seasoned pro, this recipe takes the pressure off while still delivering a treat that feels homemade and heartfelt. Making these every year is a little tradition that never gets old.
Ingredients Needed
This recipe uses classic ingredients for both the sugar cookie and brownie layers, plus a few extras for decorating. I like keeping things simple so you’re not running to the store for anything fancy. Here’s what you’ll need:
- For the Brownie Layer:
- 1/2 cup (115g) unsalted butter, melted (adds richness)
- 1 cup (200g) granulated sugar
- 2 large eggs, room temperature
- 1 teaspoon vanilla extract
- 1/3 cup (40g) unsweetened cocoa powder
- 1/2 cup (65g) all-purpose flour
- 1/4 teaspoon salt
- 1/4 teaspoon baking powder
- For the Sugar Cookie Ghosts:
- 1/2 cup (115g) unsalted butter, softened
- 3/4 cup (150g) granulated sugar
- 1 large egg
- 1 teaspoon vanilla extract
- 1 3/4 cups (220g) all-purpose flour
- 1/2 teaspoon baking powder
- 1/4 teaspoon salt
- For Decorating:
- White royal icing or store-bought white icing (for ghost shapes)
- Mini chocolate chips or black gel icing (for ghost faces)
- Optional colored sprinkles (for a festive look)
If you’re gluten-free, swap the all-purpose flour for a cup-for-cup gluten-free baking flour (I’ve used Bob’s Red Mill and it works well). For dairy-free, use vegan butter—Earth Balance is my go-to. You can make the ghosts with egg replacer if needed (just follow package directions). If you want to use a boxed brownie mix, go for it—just make sure the pan size matches, and bake according to package instructions. For extra chocolatey flavor, toss in a handful of chocolate chips to the brownie batter—no one will complain!
During Halloween, I sometimes swap the sprinkles for orange and black confetti, or use colored icing for the ghost faces. If you’re baking with the kids, let them pick their favorite decorations. You can get creative without messing up the recipe. Whatever you do, don’t skip the chilling step for the cookie dough—it helps the ghosts keep their shape!
Equipment Needed
You don’t need any fancy gadgets for these Halloween Ghost Sugar Cookie Brownie Bars, but a few basics make the process easier. Here’s what I use:
- 9×13-inch (23x33cm) baking pan (glass or metal)
- Mixing bowls (at least two—one for brownies, one for cookies)
- Electric mixer or a sturdy whisk (I’ve used both, hand mixer is easiest)
- Measuring cups and spoons (accuracy matters for both layers)
- Rubber spatula (for scraping bowls and spreading batter)
- Rolling pin (for sugar cookie dough)
- Ghost-shaped cookie cutter (or use a knife to cut shapes freehand—works in a pinch!)
- Wire cooling rack
- Parchment paper or nonstick spray
If you don’t have a ghost cookie cutter, just use a small glass or make your own template from cardboard. For mixing, I’ve used a whisk when my mixer was on the fritz—just takes a little more elbow grease! Keep your baking pan well-greased, or line it with parchment for easy removal. If you’re using older tools, check for loose handles or rust—I’ve learned the hard way that a wobbly rolling pin can wreck your cookie shapes. Budget tip: Dollar store baking pans and spatulas work fine for this recipe!
Preparation Method
- Make the Brownie Layer:
- Preheat your oven to 350°F (180°C). Line a 9×13-inch (23x33cm) pan with parchment paper or spray with nonstick spray.
- In a large bowl, whisk together melted butter and sugar until smooth. Add eggs and vanilla, whisking until just combined.
- In a separate bowl, sift together cocoa powder, flour, salt, and baking powder.
- Gradually fold dry ingredients into wet mixture. Mix until no streaks remain, but don’t overmix (brownies can get tough!).
- Pour batter into prepared pan. Smooth out evenly with a spatula. Set aside.
- Prepare the Sugar Cookie Ghosts:
- In a medium bowl, beat softened butter and sugar until light and fluffy (about 2 minutes).
- Add egg and vanilla, mixing until combined.
- Stir in flour, baking powder, and salt. Mix just until dough forms.
- Shape dough into a disk, wrap in plastic, and chill in the fridge for at least 30 minutes (keeps ghost shapes crisp).
- Roll chilled dough on a lightly floured surface to 1/4-inch (6mm) thickness.
- Cut out ghost shapes using a cookie cutter or template. If dough gets sticky, pop it back in the fridge for 5 minutes.
- Assemble and Bake:
- Arrange ghost cookies evenly on top of brownie batter, pressing gently but not too deep.
- Bake in preheated oven for 25-30 minutes, or until brownies are set and cookies are just golden at the edges.
- If you notice brownies puffing unevenly, rotate pan halfway through baking.
- Let bars cool completely on a wire rack before decorating (warm brownies can melt icing).
- Decorate:
- Once cool, pipe white icing to fill in ghost shapes. Let icing set for 5-10 minutes.
- Add mini chocolate chips or black gel for eyes and mouths. Get creative—smiling, surprised, or spooky faces!
- (Optional) Sprinkle festive confetti or colored sprinkles around the ghosts.
- Slice & Serve:
- Lift bars from pan using parchment paper. Cut into squares, making sure each piece has a ghost on top.
- Serve and enjoy!
Troubleshooting: If your cookie ghosts spread too much, try chilling the dough longer or use less baking powder. Brownies too gooey? Bake for an extra 5 minutes, but don’t overbake. If you’re short on time, you can prep the cookie dough ahead and store it in the fridge overnight. For best results, use room temperature eggs and butter—things just mix better that way.
Cooking Tips & Techniques
This recipe may look playful, but there are a few pro tips to guarantee success. I’ve had my share of Halloween disasters (ghosts melting into blobs, brownies undercooked), so here’s what I’ve learned:
- Chill That Dough: Don’t rush the chilling step for sugar cookie dough. A cold dough keeps those ghost shapes crisp, even after baking on top of warm brownies.
- Even Layering: Spread the brownie batter as evenly as you can—uneven layers can cause ghost cookies to sink or tilt. Use a spatula to level it out.
- Watch the Bake: Ovens can vary (mine runs hot on the left side), so check at 25 minutes. Insert a toothpick in the brownie layer—some crumbs are okay, but no wet batter.
- Decorating Efficiency: Set up a decorating station with icing, chips, and sprinkles so kids can jump in. It’s messy fun, but keep wet wipes nearby!
- Common Mistakes: If ghosts lose their shape, it’s usually from warm dough or too much baking powder. If brownies are tough, it’s from overmixing. Gentle hands are key.
- Batch Prep: Double the recipe and bake in two pans if you’ve got a big group. I’ve learned the hard way—these disappear fast!
If you’re multitasking, prep the cookie dough first and chill while you mix the brownies. I’ve also decorated the ghosts the night before a party (just store in a cool spot). Don’t worry if every ghost isn’t perfect—quirky faces make for better Instagram photos! Consistency comes with practice, but honestly, the joy is in the process.
Variations & Adaptations
Halloween Ghost Sugar Cookie Brownie Bars are easy to customize for different needs or tastes. Here’s how you can mix things up:
- Gluten-Free: Use a 1:1 gluten-free flour blend for both layers. I’ve made them with Bob’s Red Mill and they’re just as tasty.
- Dairy-Free: Substitute vegan butter and dairy-free chocolate chips. Earth Balance is my favorite for baking, and the texture holds up.
- Flavor Twist: Add orange zest to the sugar cookie dough for a citrusy kick, or swirl peanut butter into the brownie batter for added depth.
- Seasonal Adaptations: Swap ghost shapes for pumpkins or bats if you want to switch up the theme for Thanksgiving or other holidays.
- Alternative Cooking Methods: If you don’t have an oven, you can bake individual brownies in a countertop toaster oven (just use smaller pans and reduce baking time).
- Allergen Substitutions: Use egg replacer for cookies and brownies if needed—just follow package directions for best results.
My personal favorite is a peppermint version: I add a few drops of peppermint extract to the brownie layer and decorate the ghosts with crushed candy canes—festive and surprisingly good! You can also let the kids decorate with colored icing for rainbow ghosts. Whatever you pick, the basic recipe stays the same, so you can get creative without worrying about messing up the texture.
Serving & Storage Suggestions
Serve these bars at room temperature for the best flavor and texture. I like to arrange them on a platter lined with Halloween-themed napkins—makes every ghost pop. Pair with milk, hot chocolate, or apple cider for a cozy treat. If it’s a party, set out extra sprinkles and let guests decorate their own bars.
To store, keep bars in an airtight container at room temperature for up to 3 days. For longer storage, refrigerate for up to a week—just let them come to room temp before serving so the brownies stay soft. You can freeze individual bars (wrap tightly in plastic, then foil) for up to 2 months. Thaw overnight in the fridge, then bring to room temp before eating. Reheat lightly in the microwave for 10-15 seconds if you like them warm (the icing may soften, but it’s still tasty).
Over time, the flavors meld and the brownies get even fudgier—so don’t be afraid to make them a day ahead. Just keep the decorated bars separate if stacking to avoid smudged ghost faces. Honestly, they’re just as good the next day, maybe even better!
Nutritional Information & Benefits
Each Halloween Ghost Sugar Cookie Brownie Bar packs about 220 calories, with 11g fat, 28g carbs, and 3g protein (based on a batch cut into 24 bars). The main allergens are wheat, eggs, and dairy—so check substitutions above if you need alternatives.
The recipe offers a sweet treat with a little fiber from the cocoa and protein from the eggs. If you use gluten-free or dairy-free swaps, it’s easy to make these fit special diets. The cocoa powder provides antioxidants, and you can control the sugar by using less in the cookie dough or icing. I always feel good sharing these—they’re homemade, so you know exactly what’s inside. Moderation is key, but hey, it’s Halloween!
From a wellness perspective, making treats with real ingredients (and sharing them with friends) is part of a balanced approach. These bars are a fun way to celebrate without going overboard.
Conclusion
If you’re looking to make a splash at your next Halloween party or just want a memorable afternoon with your family, Halloween Ghost Sugar Cookie Brownie Bars are the way to go. They’re easy, festive, and irresistibly delicious—a treat everyone can get behind. Whether you’re baking for fun, tradition, or just to satisfy a chocolate craving, these bars check all the boxes.
Customize them to your heart’s content—let the kids go wild with decorating, swap in flavors you love, or adjust for dietary needs. For me, these bars bring together everything I love about Halloween: creativity, sweetness, and a dash of spooky fun. I hope you’ll make them part of your own celebrations.
Got your own twist on these bars? Drop a comment below with your favorite variation or decorating tip. Share this recipe with your friends, pin it for later, and don’t forget to snap a photo of your ghostly creations! Happy Halloween, and happy baking!
Frequently Asked Questions
Can I use boxed brownie mix for this recipe?
Absolutely! If you’re pressed for time, boxed brownie mix works fine. Just make sure the pan size matches and follow the package directions for baking.
Do I need a ghost-shaped cookie cutter?
Nope. You can cut ghost shapes freehand with a knife or make a simple cardboard template. The fun is in making each ghost unique!
Can these bars be made gluten-free?
Yes! Substitute a 1:1 gluten-free flour blend in both the brownies and sugar cookie dough. I’ve tested this with Bob’s Red Mill and it turns out great.
How far in advance can I make these bars?
You can bake and decorate the bars up to 2 days ahead. Store in an airtight container, and add any delicate decorations (like sprinkles) just before serving for best results.
What’s the best way to decorate the ghosts?
I use royal icing for a smooth finish and mini chocolate chips or black gel for eyes and mouths. Let the icing set before adding faces so nothing smudges.
Pin This Recipe!
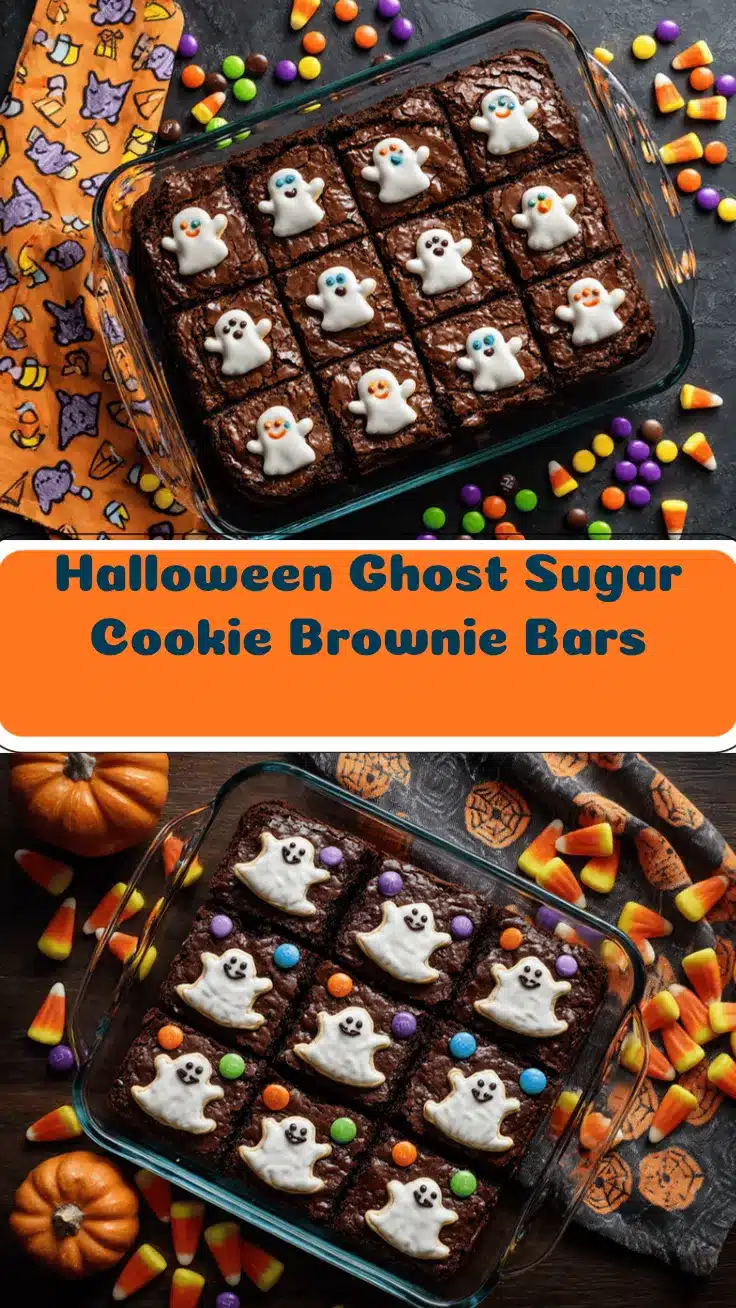
Halloween Ghost Sugar Cookie Brownie Bars
- Total Time: 55 minutes
- Yield: 24 bars 1x
Description
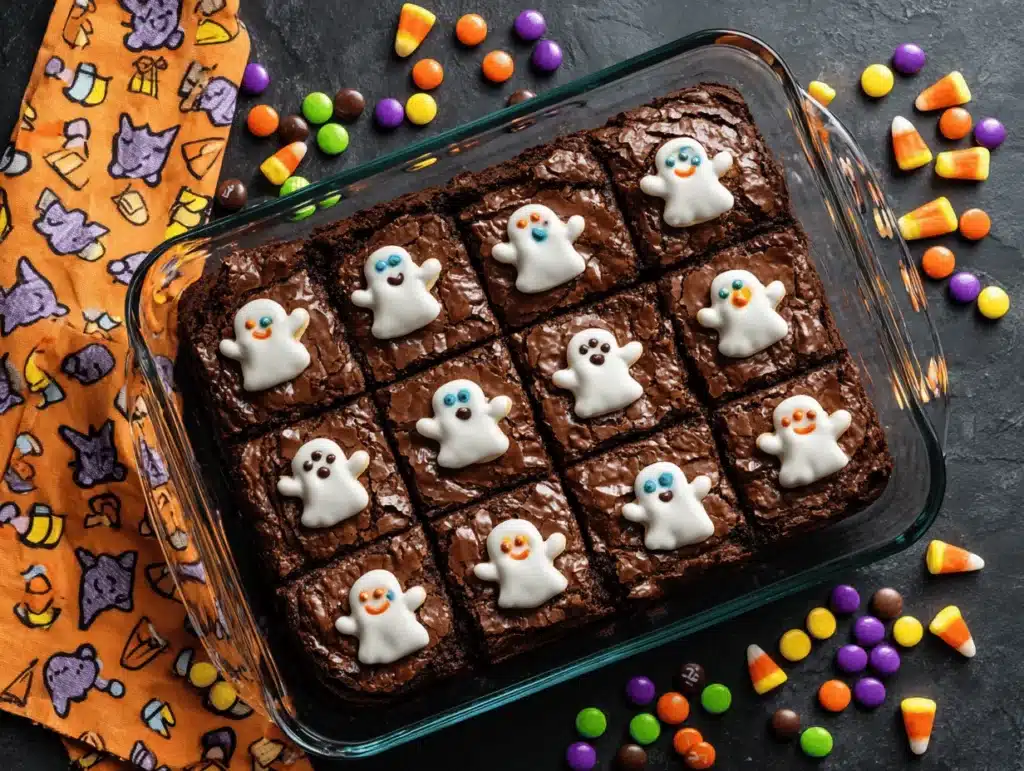
These festive bars combine fudgy brownies with adorable ghost-shaped sugar cookies on top, making them a perfect treat for Halloween parties or family baking traditions. Easy to make and fun to decorate, they’re a crowd-pleaser for kids and adults alike.
Ingredients
- 1/2 cup unsalted butter, melted (brownie layer)
- 1 cup granulated sugar (brownie layer)
- 2 large eggs, room temperature (brownie layer)
- 1 teaspoon vanilla extract (brownie layer)
- 1/3 cup unsweetened cocoa powder (brownie layer)
- 1/2 cup all-purpose flour (brownie layer)
- 1/4 teaspoon salt (brownie layer)
- 1/4 teaspoon baking powder (brownie layer)
- 1/2 cup unsalted butter, softened (sugar cookie ghosts)
- 3/4 cup granulated sugar (sugar cookie ghosts)
- 1 large egg (sugar cookie ghosts)
- 1 teaspoon vanilla extract (sugar cookie ghosts)
- 1 3/4 cups all-purpose flour (sugar cookie ghosts)
- 1/2 teaspoon baking powder (sugar cookie ghosts)
- 1/4 teaspoon salt (sugar cookie ghosts)
- White royal icing or store-bought white icing (for ghost shapes)
- Mini chocolate chips or black gel icing (for ghost faces)
- Optional colored sprinkles (for decoration)
Instructions
- Preheat oven to 350°F (180°C). Line a 9×13-inch pan with parchment paper or spray with nonstick spray.
- In a large bowl, whisk together melted butter and sugar until smooth. Add eggs and vanilla, whisking until just combined.
- In a separate bowl, sift together cocoa powder, flour, salt, and baking powder.
- Gradually fold dry ingredients into wet mixture. Mix until no streaks remain, but don’t overmix.
- Pour brownie batter into prepared pan and smooth evenly with a spatula. Set aside.
- In a medium bowl, beat softened butter and sugar until light and fluffy (about 2 minutes).
- Add egg and vanilla, mixing until combined.
- Stir in flour, baking powder, and salt. Mix just until dough forms.
- Shape dough into a disk, wrap in plastic, and chill in the fridge for at least 30 minutes.
- Roll chilled dough on a lightly floured surface to 1/4-inch thickness.
- Cut out ghost shapes using a cookie cutter or template. If dough gets sticky, chill again for 5 minutes.
- Arrange ghost cookies evenly on top of brownie batter, pressing gently.
- Bake for 25-30 minutes, or until brownies are set and cookies are just golden at the edges. Rotate pan halfway through baking if needed.
- Let bars cool completely on a wire rack before decorating.
- Pipe white icing to fill in ghost shapes. Let icing set for 5-10 minutes.
- Add mini chocolate chips or black gel for eyes and mouths. Decorate with sprinkles if desired.
- Lift bars from pan using parchment paper. Cut into squares, ensuring each piece has a ghost on top.
- Serve and enjoy!
Notes
Chill the sugar cookie dough for crisp ghost shapes. Use room temperature eggs and butter for best mixing. Decorate with kids for a fun activity. For gluten-free or dairy-free, substitute flour and butter as needed. Store bars in an airtight container at room temperature for up to 3 days, or freeze for up to 2 months.
- Prep Time: 25 minutes
- Cook Time: 30 minutes
- Category: Dessert
- Cuisine: American
Nutrition
- Serving Size: 1 bar
- Calories: 220
- Sugar: 18
- Sodium: 90
- Fat: 11
- Saturated Fat: 7
- Carbohydrates: 28
- Fiber: 1
- Protein: 3
Keywords: Halloween, ghost bars, sugar cookie brownies, festive dessert, kid-friendly, party treat, easy baking, chocolate, holiday recipe