Introduction
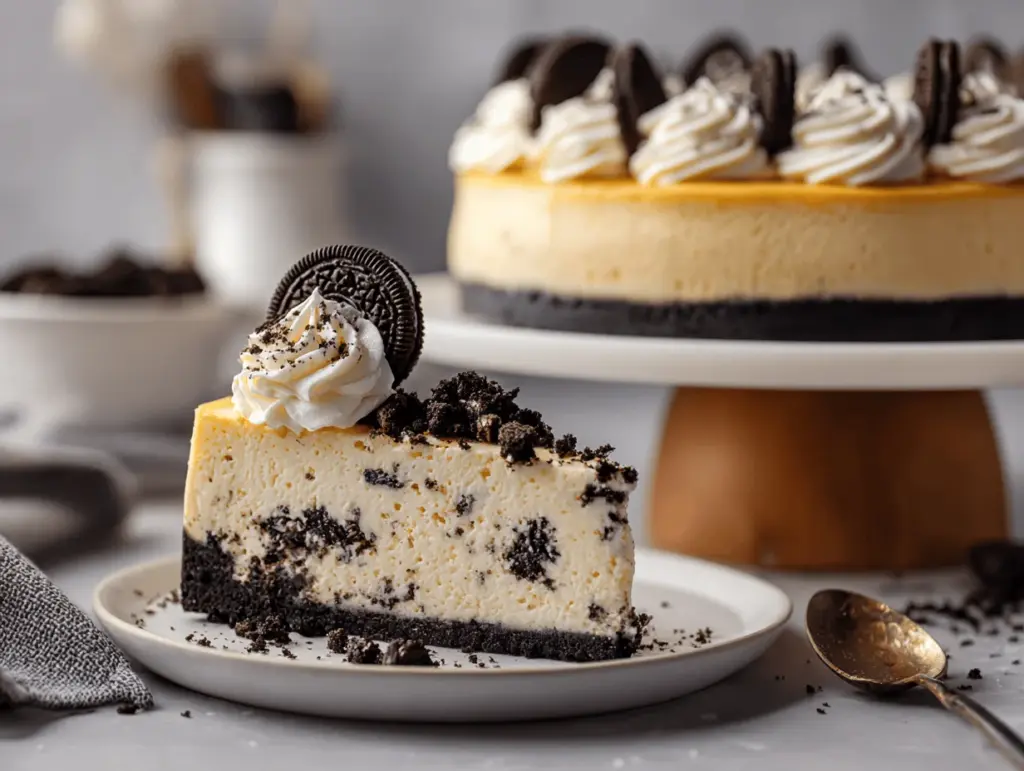
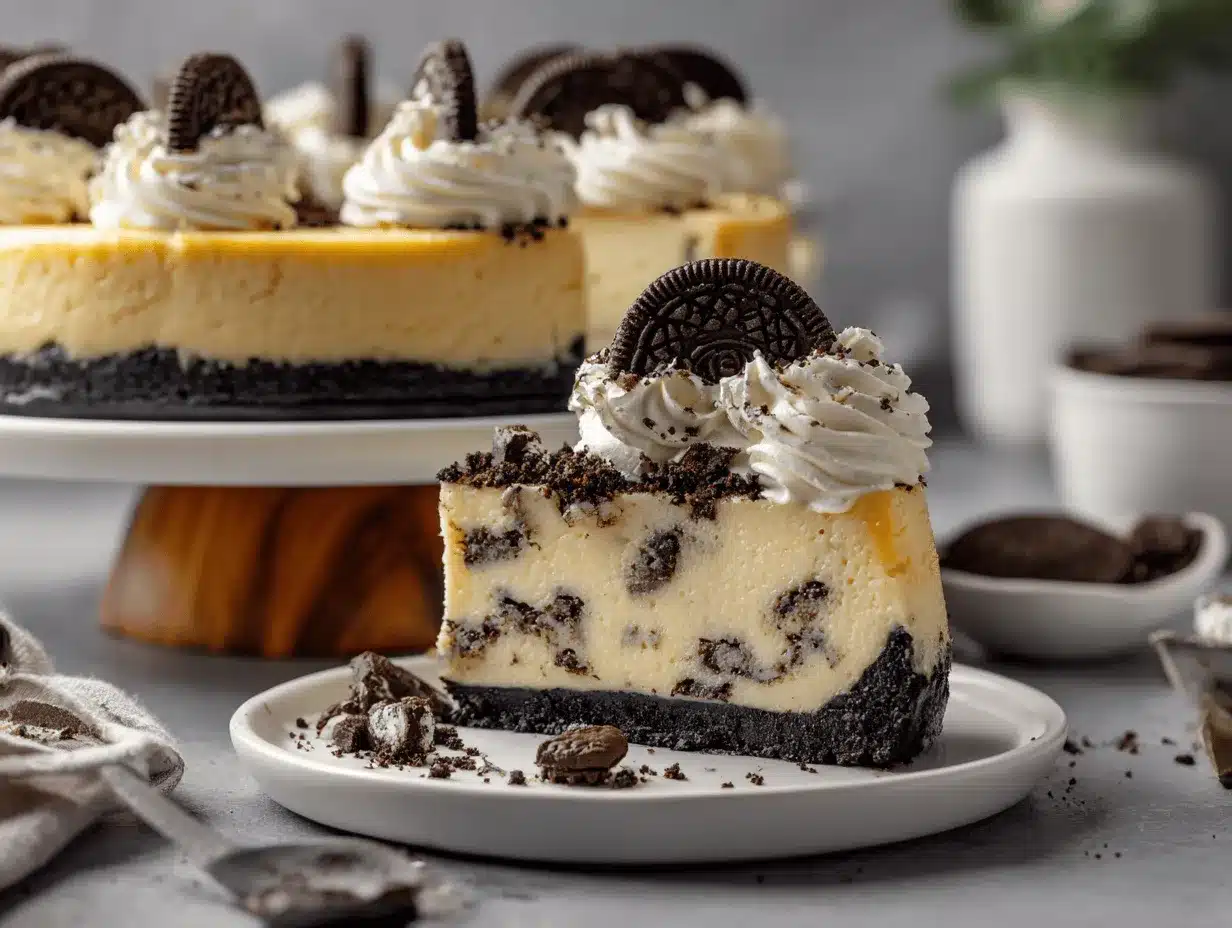
Oreos and cheesecake—honestly, that’s a match made in dessert heaven. I still remember the first time I whipped up this creamy Oreo cheesecake recipe for a family birthday; the look on everyone’s faces when they saw those velvety swirls of cookies and cream was priceless. The aroma of baked cheesecake mingling with that unmistakable chocolatey Oreo scent is something you just can’t forget.
This recipe came about during a snowstorm when all I had were some cream cheese blocks and a half-eaten package of Oreos left over from a midnight snack attack. Out of necessity (and a huge craving), I decided to experiment, and wow—it turned into this easy homemade dessert that’s now a staple in my kitchen. The best part? You don’t need fancy equipment or obscure ingredients. I’ve made this creamy Oreo cheesecake recipe for potlucks, birthdays, and even just a weeknight treat because, let’s face it, sometimes you need cheesecake on a Wednesday.
If you’re searching for a dessert that’s both indulgent and simple, this is it. It’s perfect for Oreo lovers, busy parents, or anyone who needs a little comfort food (with a twist). I’ve tested this recipe a dozen times, tweaking the Oreo-to-cheesecake ratio and adjusting the bake to get that melt-in-your-mouth texture. As someone who’s been baking for years, I can honestly say this creamy Oreo cheesecake recipe checks all the boxes—creamy, crunchy, and absolutely irresistible.
Why You’ll Love This Recipe
- Quick & Easy: You can get this creamy Oreo cheesecake ready for the oven in just about 20 minutes. No water bath required, no tricky steps—just mix, pour, bake, and chill.
- Simple Ingredients: Most of what you need is probably already in your pantry or fridge. Cream cheese, sugar, eggs, and Oreos—nothing fancy, nothing complicated.
- Perfect for Any Occasion: I’ve brought this cheesecake to birthday parties, holiday gatherings, and even casual Sunday brunch. It’s always a hit and looks gorgeous on any dessert table.
- Crowd-Pleaser: Kids and adults go wild for this creamy Oreo cheesecake. I’ve seen even the pickiest eaters sneak back for seconds!
- Unbelievably Delicious: The texture is rich and velvety, with crunchy bits of Oreo inside and out. Every bite is a little celebration.
Unlike basic cheesecakes, this version gets an upgrade from crushed Oreos blended right into the batter. You get a cookies-and-cream flavor that’s deep, not just sprinkled on top. I use a mix of whole and crushed Oreos in the crust and filling for maximum crunch and flavor. The technique is straightforward, but the payoff is huge—no dry or dense cheesecake here, just creamy perfection every time.
This creamy Oreo cheesecake recipe isn’t just another dessert; it’s the one people ask for again and again. If you’ve ever closed your eyes after that first bite of something truly special, you’ll know what I mean. It’s a comfort food that feels indulgent but is surprisingly simple to make. Whether you want to impress guests or just treat yourself, this is the recipe you need.
What Ingredients You Will Need
This creamy Oreo cheesecake recipe uses everyday ingredients and a hefty dose of Oreos for that signature flavor. If you’re like me, you probably have most of these on hand already—and if not, they’re easy to find at any grocery store.
- For the crust:
- 24 Oreo cookies (about 250g) – finely crushed (classic or Double Stuf, depending on your preference)
- 5 tbsp (70g) unsalted butter – melted (adds richness and helps bind the crust)
- For the cheesecake filling:
- 3 packages (24 oz / 675g) cream cheese – softened to room temperature (full-fat for best results)
- 1 cup (200g) granulated sugar
- 1 cup (240ml) sour cream – room temperature (adds tang and creaminess)
- 1 tsp pure vanilla extract
- 3 large eggs – room temperature
- 12 Oreo cookies (about 125g) – coarsely chopped (for folding into the batter)
- For optional topping:
- 6 Oreo cookies – halved or crushed, for garnish
- Whipped cream (store-bought or homemade, just for a little extra wow factor)
A few ingredient tips: I always use Philadelphia cream cheese for the creamiest texture, but store brands work too. If you want to make this creamy Oreo cheesecake recipe gluten-free, swap classic Oreos for gluten-free versions and use gluten-free cookies for the crust. For a lighter option, you can use reduced-fat cream cheese, but honestly, full-fat is best for that dreamy texture.
If you’re out of sour cream, plain Greek yogurt is a solid substitute. I’ve tried both, and while there’s a slight tang difference, both yield creamy results. You can even use coconut yogurt for a dairy-free twist, though the flavor changes a bit. And if you want an extra chocolatey kick, try adding a tablespoon of unsweetened cocoa powder to the crust mixture—totally optional, but delicious.
One more thing: Make sure your cream cheese and eggs are at room temperature. This helps avoid lumps and gives you that smooth, creamy Oreo cheesecake we’re after. If you’re in a rush, just leave them out while you prep the other ingredients.
Equipment Needed
- 9-inch (23cm) springform pan: Gives the cheesecake its classic shape and makes unmolding easy. If you don’t have one, you can use a deep pie dish, but the presentation won’t be quite as neat.
- Food processor or blender: For crushing the Oreo cookies. You can also use a zip-top bag and a rolling pin (my go-to on lazy days).
- Large mixing bowls: One for the crust, one for the filling.
- Electric mixer (stand or hand-held): Essential for beating the cream cheese to a smooth consistency. I’ve tried mixing by hand, but it’s tough to get that creamy Oreo cheesecake texture without a mixer.
- Rubber spatula: For scraping down the bowl and folding in Oreos.
- Measuring cups and spoons: Accuracy matters for that perfect set.
- Baking sheet: Place the springform pan on this to catch any drips in the oven.
- Parchment paper: Optional, but lining the bottom of your pan can help with easy removal.
I’ve used budget-friendly hand mixers for years with great results—no need for a fancy stand mixer unless you want one. Springform pans can be a little finicky, so check the bottom seal before pouring in your batter (no one likes a leaky cheesecake!). If you notice your pan has started to warp, a layer of foil around the outside protects against spills.
For cleaning, soak your springform pan immediately after use. Oreo crumbs tend to stick! And if you don’t have a food processor, the rolling pin method works just fine. Honestly, sometimes smashing cookies is half the fun.
Preparation Method
- Prep the crust (10 minutes):
- Preheat your oven to 325°F (163°C). Grease your springform pan lightly with butter or nonstick spray.
- Crush 24 Oreo cookies—use a food processor for fine crumbs or pop them in a zip-top bag and crush with a rolling pin.
- Combine Oreo crumbs with 5 tbsp (70g) melted butter. Stir until the mixture looks like wet sand.
- Press the crumb mixture firmly into the bottom of the pan. Use the back of a spoon or a flat-bottomed glass for an even layer. (If the crust seems too dry, add a touch more melted butter.)
- Bake the crust for 10 minutes. Remove from the oven and let it cool while you make the filling.
- Make the cheesecake batter (15 minutes):
- In a large bowl, beat 3 packages (24 oz / 675g) cream cheese using your electric mixer until smooth—about 2 minutes. Scrape down the sides to make sure there are no lumps.
- Add 1 cup (200g) granulated sugar and mix until combined, another minute.
- Blend in 1 cup (240ml) sour cream and 1 tsp vanilla extract. Mix until creamy.
- Add 3 large eggs, one at a time, mixing on low speed after each addition. Don’t overmix once the eggs are in—just until combined.
- Fold in 12 coarsely chopped Oreo cookies with a spatula. You want big chunks for that classic cookies-and-cream look!
- Assemble and bake (1 hour):
- Pour the batter over the cooled crust. Tap the pan gently on the counter to release any air bubbles.
- Bake at 325°F (163°C) for 55-65 minutes. The edges will be set, but the center should still jiggle slightly.
- If the top starts to brown too quickly, loosely cover with foil for the last 15 minutes.
- Turn off the oven and let the cheesecake sit inside with the door slightly open for 1 hour. This helps prevent cracks.
- Chill and garnish (at least 4 hours):
- Run a knife around the edge to loosen, then let the cheesecake cool completely at room temperature.
- Refrigerate for at least 4 hours, preferably overnight. Patience pays off—the texture gets creamier as it chills.
- Before serving, top with halved or crushed Oreos and whipped cream if you like.
Troubleshooting: If your cheesecake cracks, don’t stress—just cover with extra Oreos and whipped cream! If you notice lumps in your batter, it’s usually cold cream cheese; let it sit out longer next time. The perfect creamy Oreo cheesecake should wobble slightly in the middle after baking but set firm once chilled. And if your crust crumbles, try tamping it down harder or adding a smidge more butter.
My efficiency tip: Prep the crust while your cream cheese softens on the counter. That way, you’re not waiting around, and everything comes together quickly.
Cooking Tips & Techniques
Baking cheesecake isn’t rocket science, but there are a few tricks I’ve picked up over the years that make this creamy Oreo cheesecake recipe foolproof.
- Room temperature ingredients: Take your cream cheese, eggs, and sour cream out at least 30 minutes before you start. This helps the batter blend smoothly—no grainy texture here.
- Don’t overmix: Once you add the eggs, mix just until combined. Overmixing can incorporate too much air and cause cracks.
- Use a water bath if you’re nervous about cracking: Place the springform pan in a larger baking dish, add hot water halfway up the sides, and bake. I skip this step most of the time, but it does help keep the oven humidity up.
- Cool gradually: Rapid temperature changes make cheesecakes crack. Leave the cake in the oven with the door ajar for an hour after baking to help it set slowly.
- Crust hacks: If you want a crunchier crust, bake it for an extra 2-3 minutes before adding the filling. If you prefer it softer, stick to the original timing.
- Batter lumps? If you spot lumps, run your mixer for a few extra seconds before adding the eggs, but avoid overmixing once the eggs are in.
I’ve definitely had cheesecakes crack, sink, or go lumpy in the past. Most often, it was because the cream cheese was still cold or I rushed the chilling process. Now, I always let my cheesecake chill overnight and run a knife around the edge before unmolding. Multitasking tip: While the cheesecake bakes, clean up your kitchen and prep toppings. It makes serving a breeze!
Consistency comes from patience—don’t rush the chilling, and don’t skip the step of running a knife around the pan. These little things really do make a difference. And hey, even if it’s not picture-perfect, it’s still going to taste amazing!
Variations & Adaptations
This creamy Oreo cheesecake recipe is super flexible. Here are a few ways you can adapt it for different diets, flavors, and occasions.
- Gluten-free: Use gluten-free Oreos and check that your baking powder (if using) is gluten-free. I’ve made this swap for friends with celiac, and it’s just as delicious.
- Mint Oreo Cheesecake: Substitute regular Oreos with mint-flavored ones, and add a drop or two of peppermint extract to the filling. It’s refreshing and perfect for the holidays!
- Chocolate Lovers: Mix in 1/4 cup (25g) cocoa powder to the crust and sprinkle mini chocolate chips in the batter. The final result is super chocolatey and rich.
For dairy-free adaptations, use vegan cream cheese and dairy-free sour cream. Coconut yogurt works well for the tangy flavor, and vegan “Oreos” are easy to find at most stores. I’ve even made a peanut butter Oreo version—swap half the sour cream for creamy peanut butter and use peanut butter Oreos for the crust. It’s a little wild but seriously good.
You can also bake this creamy Oreo cheesecake recipe as mini cheesecakes using a muffin tin—just reduce the baking time to about 20 minutes. For a seasonal twist, top with fresh strawberries or raspberries in summer. Honestly, once you get the basics down, you can riff on this recipe a hundred ways. My personal favorite? Adding a handful of crushed pretzels to the crust for a salty-sweet combo.
Serving & Storage Suggestions
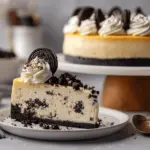
Serve this creamy Oreo cheesecake chilled, straight from the fridge. I like to cut thick slices and add a generous swirl of whipped cream plus a couple extra Oreo halves on top for drama (Pinterest-worthy, you know?).
For presentation, use a sharp knife dipped in warm water to slice cleanly. Wipe the blade between cuts for those perfect layers. This cheesecake pairs perfectly with a cup of coffee, cold milk, or even hot cocoa in winter. If you want to go all out, serve with a scoop of vanilla ice cream or a drizzle of chocolate syrup.
Store leftovers covered in the refrigerator for up to 5 days. The flavors actually deepen as it sits, making day two (or three) even better. For longer storage, wrap tightly in plastic wrap and freeze for up to 2 months. Thaw overnight in the fridge before serving; individual slices can be microwaved for 30 seconds, but the texture is best when chilled.
If you notice the crust gets a little soft after a few days, just pop it in the freezer for 20 minutes before serving. It’ll firm right back up. And honestly, this creamy Oreo cheesecake recipe never lasts that long in my house—it disappears quick!
Nutritional Information & Benefits
Each slice of this creamy Oreo cheesecake recipe (1/12 of the cake) delivers about 400 calories, 28g fat, 35g carbs, and 6g protein. Keep in mind, those numbers are estimated and can vary based on toppings and ingredient brands.
Cheesecake is definitely an indulgence, but there are some perks. Cream cheese is a good source of calcium and protein, while eggs add more protein and essential vitamins. Oreos, well, they’re mostly for joy!
This recipe is naturally nut-free and can be adapted for gluten-free or dairy-free diets with the right ingredient swaps. Allergens to watch: dairy, wheat (from Oreos), and eggs. From a wellness perspective, I treat this creamy Oreo cheesecake as a special treat—perfect for celebrations or sharing with friends. And you know what? A little dessert joy is good for the soul.
Conclusion
If you’re looking for a show-stopper dessert that’s easy to make and guaranteed to please, this creamy Oreo cheesecake recipe is it. It’s rich, creamy, and loaded with cookies—and honestly, you can customize it however you like.
Whether you stick to the classic or try out one of the variations, you’re in for something special. I love this recipe because it’s my go-to for celebrations and comfort food moments. There’s just something magical about cookies and cream, right?
So, grab your Oreos and give this recipe a try! Leave a comment below with your favorite twist, share your photos on Pinterest, or let me know how your family liked it. Happy baking—and remember, imperfect cheesecakes taste just as sweet!
FAQs
Can I make this creamy Oreo cheesecake recipe ahead of time?
Absolutely! It tastes even better the next day after chilling overnight. Just keep it covered in the fridge until you’re ready to serve.
Do I need a water bath for this cheesecake?
Nope, you can bake it without a water bath. If you want extra insurance against cracks, you can use one, but it’s not required for this creamy Oreo cheesecake recipe.
Can I freeze Oreo cheesecake?
Yes! Wrap it tightly in plastic wrap and freeze for up to 2 months. Thaw in the fridge before serving for best texture.
What’s the best way to slice cheesecake cleanly?
Use a sharp knife dipped in warm water, and wipe between cuts. This helps get those beautiful, neat slices for your Pinterest feed.
Can I use reduced-fat cream cheese or Greek yogurt?
You can! The texture will be slightly lighter, but the creamy Oreo cheesecake recipe still works. Full-fat gives the richest taste, though.
Pin This Recipe!

Creamy Oreo Cheesecake
- Total Time: 5 hours 30 minutes
- Yield: 12 servings 1x
Description
This creamy Oreo cheesecake is a rich, velvety dessert loaded with cookies and cream flavor. Easy to make and always a crowd-pleaser, it’s perfect for birthdays, potlucks, or any time you need a decadent treat.
Ingredients
- 24 Oreo cookies (about 250g) – finely crushed
- 5 tablespoons unsalted butter, melted
- 3 packages (24 oz) cream cheese, softened to room temperature
- 1 cup granulated sugar
- 1 cup sour cream, room temperature
- 1 teaspoon pure vanilla extract
- 3 large eggs, room temperature
- 12 Oreo cookies (about 125g) – coarsely chopped
- 6 Oreo cookies – halved or crushed, for garnish (optional)
- Whipped cream, for topping (optional)
Instructions
- Preheat oven to 325°F (163°C). Lightly grease a 9-inch springform pan.
- Crush 24 Oreo cookies into fine crumbs using a food processor or by hand.
- Combine Oreo crumbs with melted butter until mixture resembles wet sand.
- Press crumb mixture firmly into the bottom of the pan. Bake for 10 minutes, then let cool.
- In a large bowl, beat cream cheese until smooth (about 2 minutes).
- Add granulated sugar and mix until combined.
- Blend in sour cream and vanilla extract until creamy.
- Add eggs one at a time, mixing on low speed just until combined.
- Fold in coarsely chopped Oreos with a spatula.
- Pour batter over cooled crust and tap pan gently to release air bubbles.
- Bake at 325°F for 55-65 minutes, until edges are set and center jiggles slightly. Cover loosely with foil if browning too quickly.
- Turn off oven and let cheesecake sit inside with door slightly open for 1 hour.
- Run a knife around the edge to loosen, then cool completely at room temperature.
- Refrigerate for at least 4 hours, preferably overnight.
- Before serving, top with halved or crushed Oreos and whipped cream if desired.
Notes
For best results, use room temperature ingredients and avoid overmixing once eggs are added. Chill overnight for creamiest texture. Gluten-free Oreos and dairy-free substitutes can be used for dietary adaptations. If cracks appear, cover with extra Oreos and whipped cream.
- Prep Time: 20 minutes
- Cook Time: 1 hour 10 minutes
- Category: Dessert
- Cuisine: American
Nutrition
- Serving Size: 1 slice (1/12 of cake)
- Calories: 400
- Sugar: 26
- Sodium: 320
- Fat: 28
- Saturated Fat: 16
- Carbohydrates: 35
- Fiber: 1
- Protein: 6
Keywords: Oreo cheesecake, creamy cheesecake, cookies and cream, easy dessert, homemade cheesecake, birthday cake, potluck dessert, Oreo recipe