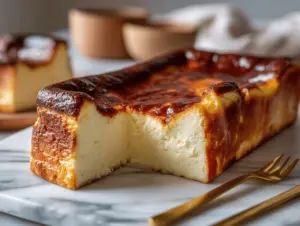
The first time I pulled a loaf pan Basque cheesecake out of my oven, the smell—sweet cream, toasted sugar, a hint of vanilla—floated through my tiny kitchen and made me grin like a kid. You know that feeling when you can’t wait for dessert, but you don’t want a huge batch? This recipe is honestly my go-to for those nights when I crave something rich, creamy, and downright cozy, but don’t want leftovers staring at me all week.
I discovered Basque cheesecake a couple years ago—after seeing those gorgeous burnt tops all over Pinterest (I’ll admit, I was skeptical at first). But the magic here is in the loaf pan: it’s just the right size for two, so you get all the drama of a classic Basque cheesecake, but scaled down for date night or those evenings when you want a little indulgence without going overboard. No springform pan, no water bath, no fuss.
The history of Basque cheesecake is kind of fascinating—it comes from San Sebastián, Spain, and is known for its caramelized top and creamy, custardy interior. I’ve made the big versions for parties, but for everyday life, this creamy Basque cheesecake loaf pan recipe has become my secret weapon. It’s so forgiving, you can whip it up with pantry staples, and every bite is pure comfort. If you’re new to cheesecake or just want an easy dessert for two, this is the one to try (I’ve tweaked and tested it more times than I can count!).
Whether you’re sharing with someone special or just treating yourself, this creamy Basque cheesecake loaf pan recipe is all about pleasure—simple ingredients, bold flavor, and that cozy glow you get when you settle in with a homemade dessert. Let’s face it, sometimes you just need a creamy slice of joy.
Why You’ll Love This Recipe
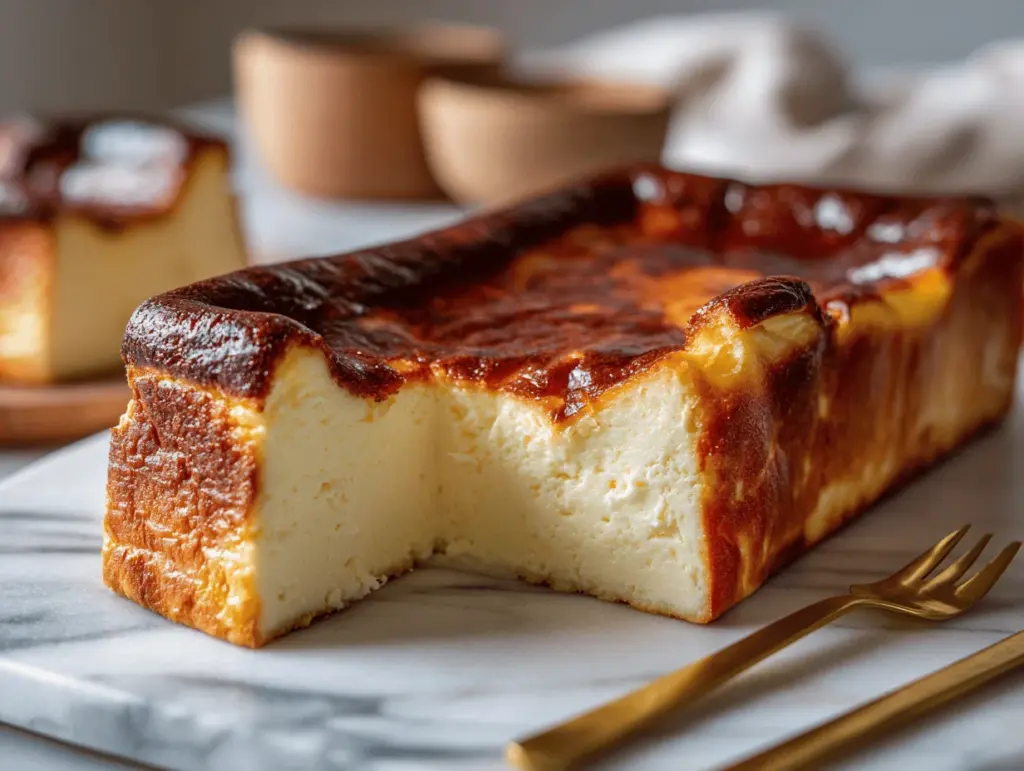
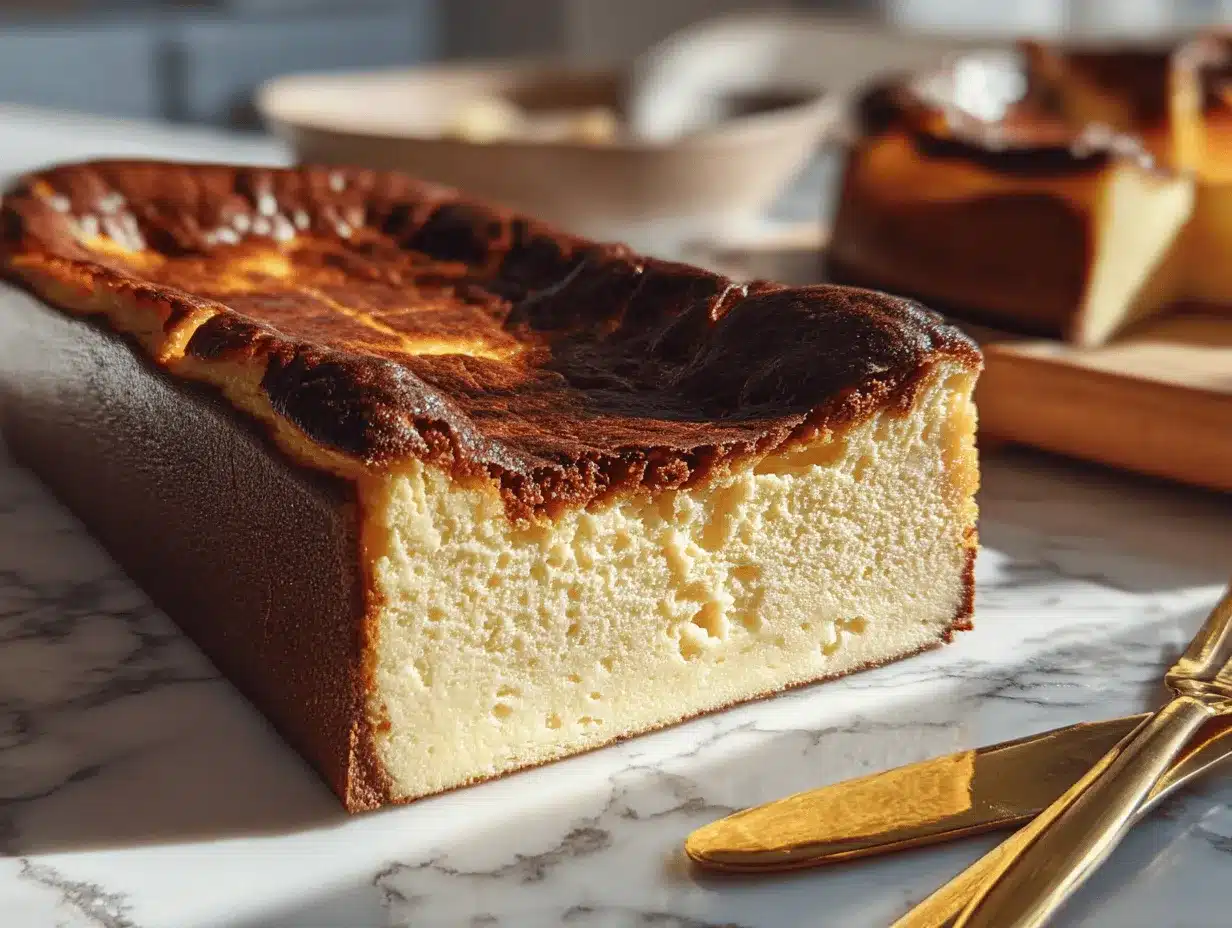
- Perfectly Creamy Texture: You get that signature Basque cheesecake silkiness, with a custardy center that melts in your mouth. I’ve tested the ratios so it’s always smooth—not too dense, not too runny.
- Small Batch Comfort: Designed for a loaf pan, this recipe makes just enough for two generous servings (or three if you’re feeling polite). No giant cheesecake leftovers lurking in the fridge.
- Easy Prep & No Fuss: No need for a water bath, fancy pans, or complicated techniques. Just mix, pour, and bake—so even beginners can nail it.
- Burnt Top Drama: That caramelized, almost “burnt” top is what sets Basque cheesecake apart. You get a rich, toasty flavor that balances the creamy interior. It’s like magic, honestly!
- Versatile Flavor Base: The classic vanilla and cream cheese combo is perfect as is, but you can tweak it with citrus zest, spices, or even a splash of rum for something special.
- Date Night Winner: This creamy loaf pan Basque cheesecake turns an ordinary evening into something memorable. It’s the kind of dessert that makes you slow down and savor each bite.
- Pinterest-Worthy Appearance: That dramatic top and creamy slice look gorgeous in photos. If you love sharing your bakes, this one’s a showstopper.
What makes this creamy Basque cheesecake loaf pan recipe stand out for me is how simple and forgiving it is. Unlike classic cheesecakes that can crack or require tricky steps, this one embraces imperfections—it’s supposed to look rustic and a little wild! The loaf pan size means you don’t have to fuss with springform pans, and you can bake it in almost any oven. Plus, every time I make it, my partner says it’s the “best cheesecake ever”—not kidding. It’s comfort food reimagined for real life: easy, cozy, and absolutely unforgettable.
What Ingredients You Will Need
This creamy Basque cheesecake loaf pan recipe comes together with simple, everyday ingredients. No weird specialty stuff—just pantry staples and fridge basics. Here’s what you’ll need:
- Cream Cheese (8 oz / 225 g, room temperature): Go for full-fat for ultra-creamy results. I usually grab Philadelphia or store brands—just avoid “whipped” or low-fat for best texture.
- Granulated Sugar (1/2 cup / 100 g): Adds sweetness and helps caramelize the top. I sometimes swap half for coconut sugar for a subtle twist.
- Heavy Cream (1/2 cup / 120 ml): This is what makes the cheesecake rich and smooth. You can use double cream if you’re in the UK, or even half-and-half for a lighter version.
- Large Eggs (2, room temperature): Eggs bind everything together and give that lovely custardy texture. If you’re out, you can try 1/4 cup Greek yogurt per egg—but the texture will change slightly.
- Vanilla Extract (1 tsp): Adds warmth and depth. I always use pure vanilla extract for best flavor.
- Salt (1/4 tsp): Just a pinch brings out all the flavors. Don’t skip it!
- All-Purpose Flour (1 tbsp / 8 g): Helps set the cheesecake without making it dense. For gluten-free, swap in oat flour or a 1:1 GF blend.
Optional Add-Ins:
- Lemon Zest (1/2 tsp): Adds brightness, especially nice in spring or summer.
- Espresso Powder (1/2 tsp): For a subtle coffee kick—totally optional, but great if you love mocha flavors.
If you want to go dairy-free, use vegan cream cheese and coconut cream (it works, but the flavor will be a bit different). For sugar, you can substitute honey or maple syrup—just reduce the cream a bit to keep the batter thick. I’ve tested versions with a spoonful of Greek yogurt for tang, and that works in a pinch too. Just keep the cream cheese as the star!
All these ingredients are easy to find and affordable. Trust me, you don’t need anything fancy to make this cheesecake shine. Just grab what you have, and don’t be afraid to experiment!
Equipment Needed
You really don’t need a lot for this creamy Basque cheesecake loaf pan recipe—just a few trusty tools:
- Loaf Pan (8.5 x 4.5-inch / 22 x 11 cm): The classic size for small-batch baking. Metal or glass works, but I prefer metal for a deeper caramelization on top.
- Parchment Paper: For easy lifting and cleanup. I always line the pan with an overhang—it makes serving simple.
- Mixing Bowl (medium): Any bowl works, as long as you have space to whisk everything together.
- Electric Mixer or Whisk: A hand mixer gives the smoothest results, but you can use a sturdy whisk if you’re feeling strong.
- Measuring Cups and Spoons: Precision is key for cheesecake! I use a digital scale for accuracy, but cups work too.
- Rubber Spatula: Helps scrape every bit of batter—don’t waste the good stuff.
If you don’t have a loaf pan, a small square or round cake pan (about 6-inch / 15 cm) will work, but the baking time may need adjustment. For mixing, I’ve used a fork in a pinch—just make sure the cream cheese is really soft. Clean your electric mixer well after each use; cream cheese can stick if you leave it out too long. For budget-friendly options, dollar store utensils do the trick—I’ve broken a few spatulas over the years, but the cheesecake always turns out great.
Preparation Method
-
Preheat your oven: Set to 425°F (220°C). This high heat is key for that signature burnt top! Line your loaf pan with parchment paper, letting the sides hang over for easy removal.
Tip: Crumple the paper first—makes it fit snugly in the pan. -
Soften the cream cheese: Place 8 oz (225 g) cream cheese in a bowl. Let it sit at room temp for 30 minutes, or microwave for 15 seconds if you’re in a rush.
Note: Cream cheese that’s too cold will lead to lumps, so don’t skip this step. -
Mix the cream cheese and sugar: Add 1/2 cup (100 g) granulated sugar. Beat with an electric mixer or whisk until completely smooth and creamy—about 2 minutes.
Sensory cue: The mixture should look thick, glossy, and lump-free. -
Add eggs, one at a time: Crack in 2 large eggs (room temperature), beating well after each addition. Scrape down the sides to fully incorporate.
Troubleshooting: If you see streaks of egg, keep mixing! -
Add cream, vanilla, and salt: Pour in 1/2 cup (120 ml) heavy cream, 1 tsp vanilla extract, and 1/4 tsp salt. Mix until fully blended.
Personal tip: If you want a tangy note, add 1 tbsp Greek yogurt here. -
Fold in the flour: Sift 1 tbsp (8 g) all-purpose flour over the batter and fold gently with a rubber spatula until just combined.
Warning: Don’t overmix—the cake should be creamy, not dense. -
Pour and smooth: Pour the batter into your lined loaf pan. Tap the pan gently on the counter to release air bubbles and smooth the top.
Sensory cue: The batter will be silky and slightly thick. -
Bake: Place the pan on the center rack and bake at 425°F (220°C) for 20-25 minutes. The top should be deep golden brown (almost burnt), and the center will still jiggle when you shake the pan.
Time estimate: Mine usually takes 22 minutes, but ovens vary.
Troubleshooting: If the top isn’t dark enough, broil for 1-2 minutes—keep an eye out, it can brûlée fast! -
Cool: Let the cheesecake cool in the pan for 10 minutes, then lift it out with the parchment and cool to room temp.
Personal tip: Don’t rush the cooling—warm cheesecake can be too gooey. - Chill (optional): For best texture, refrigerate for at least 2 hours before serving. If you’re impatient (like me), you can eat it slightly warm—it’ll be extra creamy!
- Slice and serve: Lift the cheesecake out, peel off the parchment, and cut into thick slices. Dust with powdered sugar or serve as is.
Cooking Tips & Techniques
After baking a dozen Basque cheesecakes (some perfect, some questionable), here’s what I’ve learned:
- Room Temperature Ingredients: This is crucial for a smooth batter. Cold eggs or cream cheese can cause lumps—trust me, I’ve tried to cheat this step, and regret it every time.
- High Heat for the Top: Don’t be afraid of the burnt look—that’s where the flavor happens! The caramelized layer adds a subtle bitterness that balances the sweet, creamy filling.
- Watch the Jiggle: The cheesecake is done when the edges are set but the center jiggles like jelly. It might look underbaked, but it will firm up as it cools. If you bake until fully set, you’ll miss out on that creamy middle.
- Handling Parchment Paper: I always crumple it first before lining the pan. It makes the paper fit better and prevents leaks.
- Let It Rest: You can eat Basque cheesecake warm, but chilling it for a couple hours gives you the best texture. Overnight is even better—the flavors mellow and the texture becomes ultra-smooth.
- Avoid Overmixing: Once you add the flour, mix just until combined. Overworking the batter can make the cheesecake dense instead of creamy.
- Personal Failures: Once, I forgot the flour and ended up with a gooey mess (still tasted good, just not sliceable). Another time, I used low-fat cream cheese—the cheesecake cracked and tasted chalky. Full-fat is the way to go!
- Multitasking: While the cheesecake bakes, I tidy the kitchen or prep coffee for serving. The short bake time means you can get everything ready while dessert cooks.
Consistency comes from following the steps but also trusting your senses—look for the jiggle, smell for the toasty top, and don’t be afraid of a little imperfection. That’s the Basque cheesecake way!
Variations & Adaptations
One of the best things about this creamy Basque cheesecake loaf pan recipe is how easy it is to customize. Here are some favorite tweaks:
- Gluten-Free: Swap all-purpose flour for a 1:1 gluten-free blend or oat flour. The texture stays creamy, and nobody will know the difference.
- Citrus Twist: Add lemon or orange zest to the batter for a bright, zippy flavor. Perfect for spring brunches or summer dinners.
- Chocolate Swirl: Fold in 2 tbsp melted dark chocolate before baking for a marbled effect. The bitterness pairs beautifully with the caramelized top.
- Dairy-Free: Use vegan cream cheese and coconut cream. The texture will be a bit softer, but still delicious. I’ve tried it with brands like Violife and it works well.
- Nutty Crunch: Sprinkle chopped hazelnuts or almonds on top before baking for a bit of texture.
- Personal Adaptation: I sometimes stir in a spoonful of espresso powder—my partner loves the mocha vibes, especially on chilly nights!
For different cooking methods, you can bake in a toaster oven (just check the pan fits), or use a mini cake pan for round slices. For allergen substitutions, try almond flour instead of wheat, or coconut sugar for a lower glycemic option. Taste preferences? Add a pinch of cinnamon or cardamom for warmth. It’s all about making this creamy Basque cheesecake loaf pan recipe fit your mood.
Serving & Storage Suggestions
This creamy Basque cheesecake loaf pan recipe is best served slightly chilled, but honestly, warm slices are irresistible too. Here’s how I like to serve it:
- Serving Temperature: Chill for at least 2 hours for classic texture, or serve warm for extra creaminess.
- Presentation: Slice thick and place on a small plate. Dust with powdered sugar or top with fresh berries for a pop of color.
- Pairings: A hot cup of coffee, espresso, or a sweet dessert wine makes a dreamy combo. For brunch, serve with fresh fruit or a dollop of whipped cream.
- Storage: Wrap leftovers tightly in plastic wrap and refrigerate for up to 3 days. The flavor deepens over time, and the texture becomes even silkier.
- Freezing: Slice and freeze in airtight containers for up to 1 month. Thaw in the fridge overnight before serving.
- Reheating: Warm slices gently in the microwave (10 seconds) or let sit at room temp for 30 minutes.
- Flavor Notes: The caramelized top stays toasty, and the vanilla flavor intensifies after a day or two.
This cheesecake is perfect for sharing, but it also keeps beautifully for solo treats throughout the week. Every bite feels special!
Nutritional Information & Benefits
Here’s a quick look at the nutritional profile for this creamy Basque cheesecake loaf pan recipe (per serving, assuming two servings):
- Calories: Approx. 400-450
- Protein: 8-10g
- Fat: 30g
- Carbs: 30g
- Sugar: 20g
Health Benefits: Cream cheese provides calcium and protein, while eggs offer healthy fats and more protein. The dessert is naturally gluten-free if you use alternative flour, and you can lower sugar by swapping in coconut sugar or honey.
Dietary Considerations: Contains dairy, eggs, and wheat (unless adapted). For nut allergies, just skip the nut toppings. As someone who watches carbs, I love that you can easily make this lower-carb or gluten-free!
Wellness Perspective: Dessert should be joyful. This recipe is all about balance—indulgent, but portioned for two, so you get comfort without overdoing it. A treat you can feel good about!
Conclusion
If you’re looking for a cozy, creamy dessert that feels special but is secretly simple, this creamy Basque cheesecake loaf pan recipe is the answer. It’s got all the drama of a classic Basque cheesecake—the burnt top, the silky middle—but scaled down for two. I love how this recipe turns everyday ingredients into something genuinely memorable (and let’s be honest, the leftovers never last long in my house).
Customize it any way you like—add citrus, chocolate, or a pop of spice. Whether you’re baking for date night, a friend, or just yourself, this cheesecake always delivers comfort and flavor. I hope you’ll give it a try and make it your own!
Leave a comment below if you bake this creamy Basque cheesecake loaf pan recipe, or share your favorite twist! Pin it, bookmark it, or tag me on social—I love seeing your bakes. Here’s to sweet moments and simple pleasures—one cozy slice at a time.
Frequently Asked Questions
Can I make this Basque cheesecake ahead of time?
Absolutely! It actually tastes best after chilling for a few hours or overnight. Just cover and refrigerate until you’re ready to serve.
What if I don’t have a loaf pan?
No problem—use a small cake pan (6-inch) or even a deep pie plate. Just check for doneness a few minutes earlier or later, depending on the pan shape.
Can I add fruit or chocolate to the batter?
Yes! Fold in berries, chocolate chips, or a swirl of jam before baking. Just don’t overload—about 1/4 cup is perfect for this small batch.
How do I know when the cheesecake is done?
The top should be deep golden brown, and the center will jiggle when the pan is gently shaken. Don’t worry if it looks a bit underbaked—it’ll firm up as it cools.
Is this recipe gluten-free?
It can be! Just swap the flour for a gluten-free blend or oat flour. Everything else is naturally gluten-free, so it’s easy to adapt.
Pin This Recipe!


Creamy Basque Cheesecake Loaf Pan Recipe – Easy Dessert for Two
- Total Time: 2 hours 47 minutes
- Yield: 2 generous servings 1x
Description
This small-batch Basque cheesecake is rich, creamy, and features a dramatic caramelized top. Baked in a loaf pan, it’s the perfect cozy dessert for two with minimal fuss and maximum flavor.
Ingredients
- 8 oz (225 g) full-fat cream cheese, room temperature
- 1/2 cup (100 g) granulated sugar
- 1/2 cup (120 ml) heavy cream
- 2 large eggs, room temperature
- 1 tsp vanilla extract
- 1/4 tsp salt
- 1 tbsp (8 g) all-purpose flour
- Optional: 1/2 tsp lemon zest
- Optional: 1/2 tsp espresso powder
Instructions
- Preheat oven to 425°F (220°C). Line an 8.5 x 4.5-inch loaf pan with parchment paper, letting the sides hang over for easy removal.
- Place cream cheese in a bowl and let sit at room temperature for 30 minutes, or microwave for 15 seconds to soften.
- Add sugar to the cream cheese and beat with an electric mixer or whisk until smooth and creamy, about 2 minutes.
- Add eggs one at a time, beating well after each addition and scraping down the sides.
- Pour in heavy cream, vanilla extract, and salt. Mix until fully blended.
- Sift flour over the batter and fold gently with a rubber spatula until just combined.
- Pour batter into the lined loaf pan. Tap gently to release air bubbles and smooth the top.
- Bake on the center rack for 20-25 minutes, until the top is deep golden brown and the center jiggles.
- Let cool in the pan for 10 minutes, then lift out with parchment and cool to room temperature.
- Refrigerate for at least 2 hours before serving for best texture, or serve slightly warm.
- Slice and serve, dusting with powdered sugar or topping with fresh berries if desired.
Notes
Use room temperature ingredients for a smooth batter. The high baking temperature creates the signature burnt top. For gluten-free, substitute flour with oat flour or a 1:1 gluten-free blend. Chill for best texture, but warm slices are extra creamy. Customize with citrus zest, chocolate, or spices.
- Prep Time: 15 minutes
- Cook Time: 22 minutes
- Category: Dessert
- Cuisine: Spanish
Nutrition
- Serving Size: 1/2 loaf (about 1 thick slice per person)
- Calories: 425
- Sugar: 20
- Sodium: 350
- Fat: 30
- Saturated Fat: 18
- Carbohydrates: 30
- Protein: 9
Keywords: Basque cheesecake, loaf pan cheesecake, small batch dessert, creamy cheesecake, easy cheesecake, dessert for two, Spanish cheesecake, burnt top cheesecake