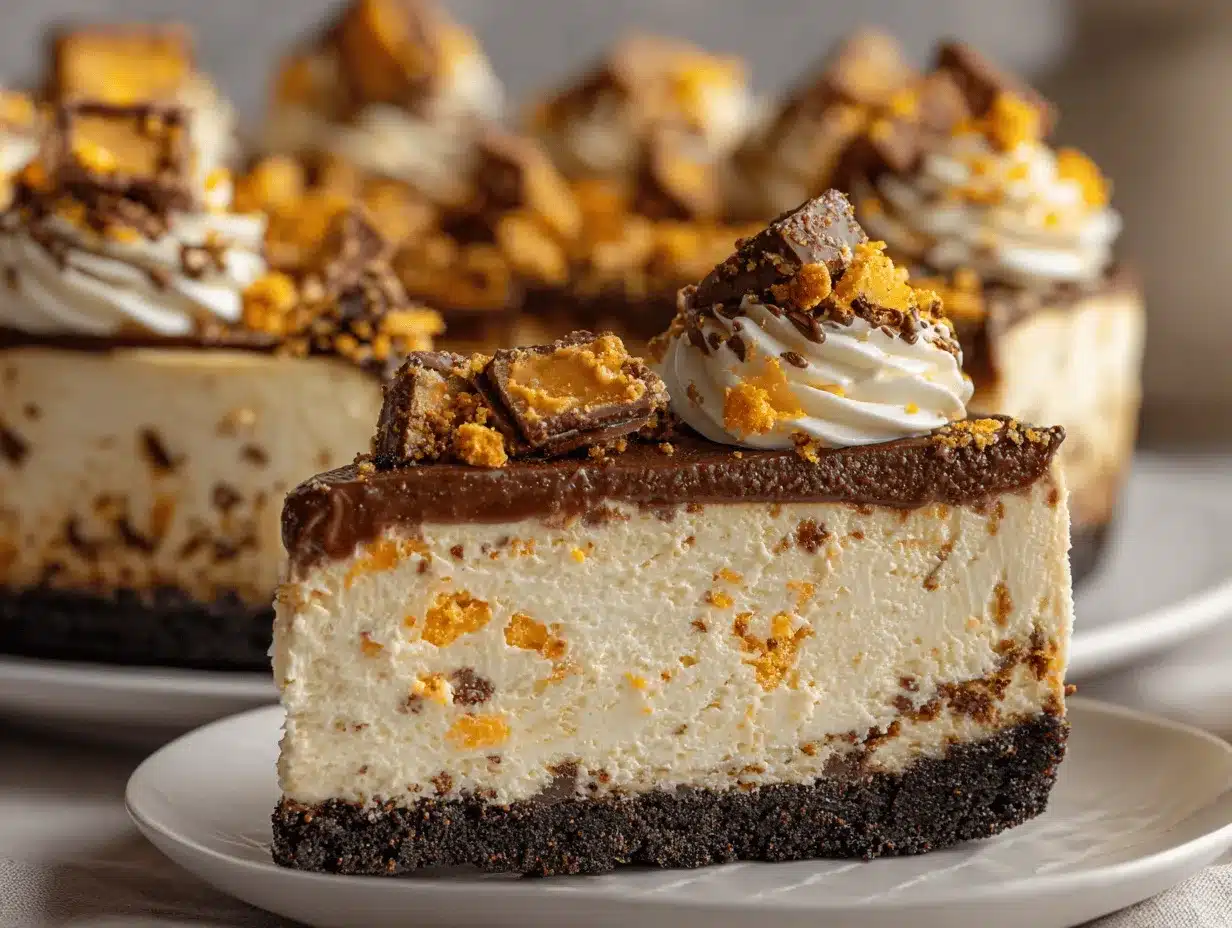
The snap of a cold Butterfinger bar always reminds me of childhood movie nights. You know, that perfect blend of creamy peanut butter and crunchy chocolate? Well, I decided to take that magic and turn it into the ultimate dessert: Butterfinger Cheesecake with an easy ganache topping. The first time I made this, my kitchen smelled like a candy shop and, honestly, my family hovered around the oven like hungry cartoon characters. If you love the idea of melding chocolate, peanut butter, and cheesecake into one slice, this Butterfinger Cheesecake recipe is about to become a household favorite.
It all started when I was looking for a show-stopping dessert for my niece’s birthday. She’s obsessed with Butterfingers, and let’s face it—so am I. After a few rounds of tweaking (the crust, the filling, the topping—oh my!), I finally landed on a version that’s creamy, decadent, and packed with Butterfinger chunks. The ganache on top is the cherry on the cake, literally. It’s glossy, rich, and takes just minutes to whip up.
This Butterfinger Cheesecake isn’t just for candy addicts. It’s perfect for anyone who wants to impress guests, treat their loved ones, or simply indulge in a dreamy dessert after a long day. Whether you’re baking for a special occasion or just because, this recipe ticks all the boxes—easy steps, familiar ingredients, and flavors that will make you close your eyes and smile. Trust me, after testing this recipe more times than I can count, I can say with confidence: it’s a keeper. Let’s dig in and make some dessert memories together!
Why You’ll Love This Butterfinger Cheesecake Recipe
- Quick & Easy: You can prep the cheesecake in about 25 minutes, then let the oven and fridge do the work. No fancy techniques needed!
- Simple Ingredients: Most items are pantry staples—cream cheese, eggs, sugar, and of course, Butterfinger bars. You probably have everything you need right now.
- Perfect for Celebrations: This dessert shines at birthday parties, potlucks, and holiday gatherings. It’s also perfect for a Friday night treat when you want something a little special.
- Crowd-Pleaser: Kids and adults both rave about the crunch and creaminess. I’ve yet to meet someone who doesn’t ask for seconds!
- Unbelievably Delicious: The flavor is rich, balanced, and downright addictive. Every bite delivers that perfect combo of smooth cheesecake, peanut-buttery crunch, and chocolate ganache.
What makes this Butterfinger Cheesecake different? For starters, I blend chunks of Butterfinger straight into the filling—no skimping. The crust is buttery and crisp, while the ganache topping adds a glossy, chocolatey finish that’s easy but impressive. I always blend the cream cheese until it’s ultra-smooth (no lumps allowed!) for that bakery-style texture.
If you’ve tried other cheesecake recipes and found them bland, this one will surprise you. It’s comfort food, but with a twist that feels extra-special. I’ve baked it for family reunions, dessert swaps, and even just for myself on a rainy Saturday. Every time, it disappears in record time. There’s something about the way Butterfinger pieces soften in the creamy filling, then crunch in each bite, that keeps people coming back for more.
This Butterfinger Cheesecake recipe isn’t just a dessert—it’s a memory-maker. Whether you’re sharing it or keeping it all to yourself (I don’t judge), you’ll love how easy it is to create a masterpiece in your own kitchen.
What Ingredients You Will Need
This Butterfinger Cheesecake recipe uses familiar, everyday ingredients—nothing fancy, just pure comfort and flavor. Here’s everything you’ll need to pull together this dreamy dessert:
- For the Crust:
- Graham cracker crumbs (1 3/4 cups / 175g) – I use honey grahams, but chocolate grahams also work if you want a richer base.
- Unsalted butter, melted (1/2 cup / 115g) – Adds richness and binds the crumbs.
- Granulated sugar (2 tbsp / 25g) – Just enough for a touch of sweetness.
- Pinch of salt – Balances the flavor.
- For the Cheesecake Filling:
- Cream cheese, softened (3 packages / 24 oz / 675g) – Use full-fat for the creamiest result.
- Granulated sugar (1 cup / 200g) – Sweetens the filling perfectly.
- Sour cream (1/2 cup / 120g) – Adds tang and prevents dryness.
- Large eggs, room temperature (3) – Binds and gives structure.
- Vanilla extract (2 tsp / 10ml) – For warmth and depth.
- Butterfinger bars, chopped (1 1/2 cups / about 6 regular bars / 175g) – Reserve some for topping. I like larger chunks for more texture.
- For the Ganache Topping:
- Semi-sweet chocolate chips (1 cup / 175g) – You can use dark chocolate for a less sweet finish.
- Heavy cream (3/4 cup / 180ml) – Makes the ganache silky and pourable.
- Optional Garnish:
- Extra chopped Butterfinger bars (about 1/2 cup / 60g) – For that candy shop look.
- Whipped cream (store-bought or homemade) – Adds lightness and looks great on slices.
If you need to swap ingredients, go for it! Gluten-free graham crackers make this recipe safe for those avoiding wheat. Dairy-free cream cheese (like Kite Hill or Tofutti) and coconut cream work for non-dairy diets. You can even switch Butterfinger for other candy bars in a pinch. Just keep the ratios the same for perfect results.
When picking cream cheese, I always reach for Philadelphia—it’s consistently smooth and never gritty. For the chocolate, Ghirardelli chips melt beautifully. And if you want extra crunch, use the fun-size Butterfinger bars, unwrapped and chopped. They’re adorable and just the right size for topping.
Equipment Needed
- 9-inch (23cm) springform pan – Essential for easy release and classic cheesecake shape. If you don’t have one, a deep pie dish works (just line with parchment for lifting out).
- Mixing bowls – One large for the filling, one medium for the crust, and one small for ganache.
- Hand mixer or stand mixer – I’ve used both. Hand mixers are perfect if you don’t want to drag out the stand mixer. Just scrape the bowl often for even mixing.
- Rubber spatula – For scraping down the sides and smoothing the top.
- Measuring cups and spoons – Accurate measurements are key for cheesecake.
- Sharp knife – For chopping Butterfinger bars. I prefer a serrated knife to avoid crushing them.
- Heavy-duty aluminum foil – Especially helpful if you want to bake in a water bath (prevents leaks).
- Wire rack – For cooling before chilling in the fridge.
If you’re missing a springform pan, don’t panic. Just use a well-greased cake pan lined with parchment, leaving extra paper as handles. For the ganache, a heatproof bowl is best—microwave or double boiler works. I keep a cheap hand mixer on hand for quick jobs; honestly, it’s lasted years with minimal fuss. Clean your mixer’s beaters right away—cream cheese can get sticky if left to dry!
Preparation Method
- Prep and Preheat:
Heat your oven to 325°F (163°C). Line the bottom of your springform pan with parchment paper for easy removal. Lightly grease the sides.
- Make the Graham Cracker Crust:
In a medium bowl, combine graham cracker crumbs (1 3/4 cups / 175g), melted unsalted butter (1/2 cup / 115g), granulated sugar (2 tbsp / 25g), and a pinch of salt. Mix until the texture resembles wet sand—if it’s too dry, add 1 tbsp extra melted butter.
Press mixture firmly into the bottom of the pan. Use the flat bottom of a measuring cup to get it even. Bake for 10 minutes, then cool while you make the filling.
- Prepare the Cheesecake Filling:
In a large mixing bowl, beat the softened cream cheese (3 packages / 24 oz / 675g) until completely smooth, about 2 minutes. Add granulated sugar (1 cup / 200g) and beat until fluffy—don’t rush this part!
Add sour cream (1/2 cup / 120g) and vanilla extract (2 tsp / 10ml); mix just until combined. Scrape down the sides as you go.
Beat in eggs, one at a time, mixing on low speed. Over-mixing can cause cracks, so be gentle! Fold in chopped Butterfinger bars (1 1/2 cups / 175g) using a spatula.
- Fill and Bake:
Pour the filling over the cooled crust, smoothing the top. If you want, tap the pan gently on the counter to release air bubbles.
Place your pan on a baking sheet. Bake for 50-60 minutes until the edges are set but the center jiggles slightly. If you see browning, tent loosely with foil.
Turn off the oven, crack the door, and let the cheesecake cool inside for 1 hour—this helps prevent cracks. Then transfer to a wire rack.
- Chill:
Refrigerate for at least 6 hours, preferably overnight. Don’t rush this step—cheesecake sets best when it’s cold.
- Make the Ganache Topping:
In a small heatproof bowl, add chocolate chips (1 cup / 175g). Heat heavy cream (3/4 cup / 180ml) until steaming but not boiling, then pour over chocolate. Let sit for 2 minutes, then stir until smooth and glossy. If lumps remain, microwave for 10 seconds and stir again.
- Finish and Serve:
Remove cheesecake from pan and place on a serving platter. Pour cooled ganache over the top, letting it drip down the sides. Sprinkle with reserved chopped Butterfinger bars (about 1/2 cup / 60g). Chill for 30 minutes to set the ganache.
Slice with a hot, clean knife for neat pieces. Wipe the blade between cuts!
Troubleshooting Tips: If your cheesecake cracks, don’t worry—the ganache will cover it. If the crust is too crumbly, try pressing harder or adding a tad more butter. For extra-smooth filling, always use room temperature ingredients. If the ganache seizes, add 1-2 tsp warm cream and whisk gently.
Cooking Tips & Techniques
Professional Technique: Always mix cream cheese and sugar until completely lump-free before adding eggs. This guarantees a silky filling—trust me, I learned the hard way after a few chunky cheesecakes!
Common Mistakes & Fixes: Overmixing after adding eggs can cause cracks. Just blend gently on low. If you forget to soften your cream cheese, microwave it in 10-second intervals until just soft (don’t melt it!).
I once used cold eggs and my cheesecake came out dense—not the dreamy texture I wanted. Room temperature eggs and sour cream are key for that classic, airy bite. Also, make sure to chop Butterfinger bars right before mixing them in. If you do it too early, they get sticky and clump together.
If you want to multitask, prep the crust while the oven preheats, then chop Butterfinger bars during baking. I always line my springform pan with parchment to avoid sticking, especially for sticky fillings like this. For ganache, pour cream straight from the stovetop—don’t let it boil, or the chocolate may seize.
If you’re worried about cheesecake sticking to the pan, run a thin knife around the edge before releasing the springform. For consistent slices, wipe your knife between cuts and use a gentle sawing motion. If you want extra-shiny ganache, add a teaspoon of corn syrup—totally optional, but it works!
Variations & Adaptations
- Gluten-Free Butterfinger Cheesecake: Swap regular graham crackers for gluten-free ones. Use the same method and measurements—no need to adjust anything else.
- Dairy-Free Option: Use plant-based cream cheese, coconut cream for ganache, and vegan Butterfinger-style bars (like Unreal or Ocho). The flavor is a little different, but still delicious!
- Flavor Swaps: Substitute Butterfinger bars with other candy bars like Snickers, Heath, or Reese’s for a new twist. You can also add 1/4 cup (30g) mini chocolate chips to the filling for extra chocolate flavor.
- Seasonal Adaptation: For fall, mix in 1/2 tsp cinnamon and top with caramel drizzle instead of ganache. In summer, serve with fresh berries and whipped cream for a lighter finish.
- Cooking Method: If you prefer a no-bake version, use a no-bake cheesecake filling (cream cheese, whipped cream, sugar) and chill overnight. Ganache and Butterfinger topping still work perfectly!
My personal favorite? Swapping some Butterfinger bars for peanut butter cups. That extra hit of chocolate and peanut butter is pure heaven. You can also swirl a bit of peanut butter into the filling for a marbled effect—just dollop and swirl before baking.
If you need to avoid nuts, choose candy bars that are nut-free (like milk chocolate bars or cookie bars). For egg-free diets, use a cornstarch-based filling—just Google “eggless cheesecake” for ratios. There’s always a way to make this recipe fit your needs!
Serving & Storage Suggestions
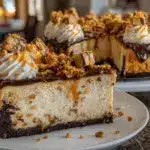
Serve this Butterfinger Cheesecake chilled for best texture—right out of the fridge is ideal. If you prefer a softer bite, let slices sit at room temperature for 20 minutes before serving. I love to present slices on a white platter, topped with whipped cream swirls and extra Butterfinger pieces for that Pinterest-perfect look.
This dessert pairs beautifully with coffee, cold milk, or even a scoop of vanilla ice cream. For special occasions, add a drizzle of caramel sauce or sprinkle crushed peanuts on top. It’s also a hit at potlucks; just slice and pack the pieces in cupcake liners for easy sharing.
Store leftover cheesecake tightly wrapped in the refrigerator for up to 5 days. For longer storage, freeze individual slices wrapped in plastic and foil—up to 2 months. Thaw overnight in the fridge, then add fresh ganache or whipped cream before serving.
When reheating, use the microwave in short 10-second bursts. If the ganache gets too soft, let it set again in the fridge. Honestly, flavors deepen after a day or two—Butterfinger pieces soften a bit and the cheesecake tastes even richer!
Nutritional Information & Benefits
Each generous slice of Butterfinger Cheesecake (1/12th of the cake) contains approximately:
- Calories: 480
- Total Fat: 31g
- Carbohydrates: 45g
- Protein: 8g
- Sugar: 34g
Cream cheese and eggs provide a solid source of protein and calcium, while Butterfinger bars add a little energy boost from carbs. If you use Greek yogurt instead of sour cream, you’ll bump up the protein even more. The recipe is naturally gluten-free if you choose suitable crackers and Butterfinger bars.
Allergens: Contains dairy, eggs, peanuts, and gluten (unless adapted). For nut-free, swap Butterfinger for a safe candy. As part of a balanced diet, this cheesecake is more of a treat—one that’s worth every bite, in my opinion!
Conclusion
This Butterfinger Cheesecake recipe with ganache topping is pure dessert joy. It’s creamy, crunchy, chocolatey, and totally impressive—yet simple enough for any home baker to master. The flavor combination is the kind of comfort food that brings people together and turns ordinary moments into celebrations.
Customize to fit your cravings, swap candies, or tweak the crust—make it yours! I love this recipe for its reliability and show-stopping looks, but mostly because it brings smiles every single time I serve it.
If you try this Butterfinger Cheesecake, let me know how it turns out in the comments. Share your adaptations, tag me in your Pinterest creations, and—most importantly—enjoy every delicious, crumbly, chocolatey bite. Happy baking!
Frequently Asked Questions
Can I make Butterfinger Cheesecake ahead of time?
Absolutely! You can prepare it a day or two before serving. It needs time to chill and set, so making it ahead actually makes it taste better.
Do I need a water bath for this cheesecake?
I usually skip the water bath for Butterfinger Cheesecake since the filling is creamy and forgiving. If you want extra insurance against cracks, wrap your pan in foil and bake in a shallow water bath.
Can I freeze Butterfinger Cheesecake?
Yes! Slice and wrap pieces tightly in plastic and foil, then freeze for up to 2 months. Thaw overnight in the fridge before serving.
What if I don’t have Butterfinger bars?
You can swap in similar candy bars like Heath, Snickers, or Reese’s. The texture and flavor will change, but the method stays the same.
How do I get clean slices?
Use a hot, clean knife and wipe between cuts. For extra neat slices, chill the cheesecake and let the ganache set firmly before slicing.
Pin This Recipe!
Butterfinger Cheesecake Recipe – Easy Ganache Topping for Perfect Dessert
- Total Time: 8 hours
- Yield: 12 servings 1x
Description
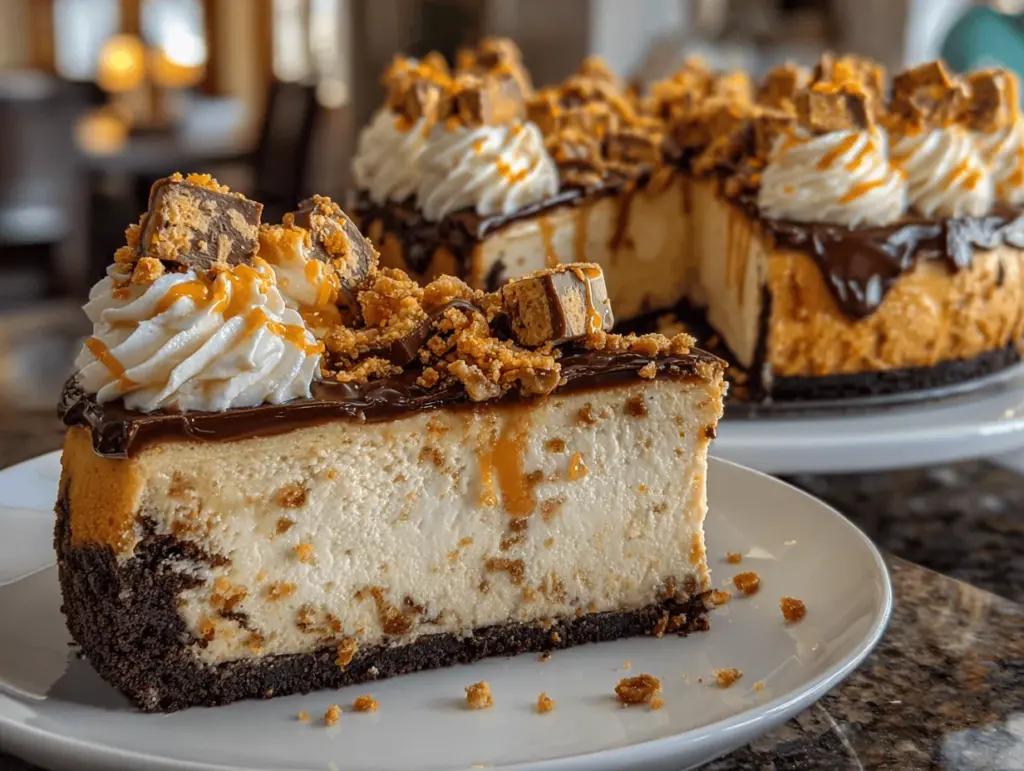
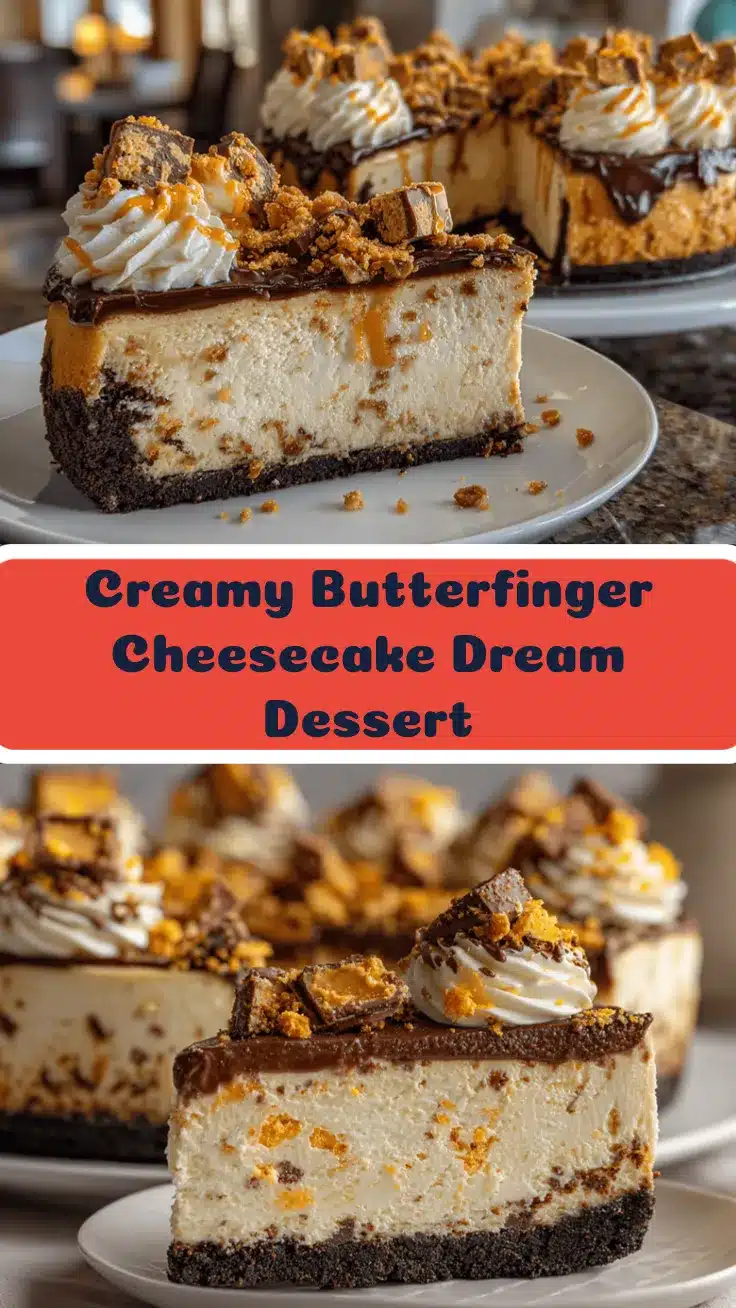
This Butterfinger Cheesecake is a decadent dessert featuring a buttery graham cracker crust, creamy cheesecake filling packed with Butterfinger chunks, and a glossy chocolate ganache topping. It’s easy to make, perfect for celebrations, and guaranteed to impress with its rich, crunchy, and creamy layers.
Ingredients
- 1 3/4 cups graham cracker crumbs (about 14 sheets)
- 1/2 cup unsalted butter, melted
- 2 tablespoons granulated sugar
- Pinch of salt
- 3 packages (8 oz each) cream cheese, softened
- 1 cup granulated sugar
- 1/2 cup sour cream
- 3 large eggs, room temperature
- 2 teaspoons vanilla extract
- 1 1/2 cups chopped Butterfinger bars (about 6 regular bars)
- 1 cup semi-sweet chocolate chips
- 3/4 cup heavy cream
- 1/2 cup extra chopped Butterfinger bars (for topping)
- Whipped cream (optional, for garnish)
Instructions
- Preheat oven to 325°F (163°C). Line the bottom of a 9-inch springform pan with parchment paper and lightly grease the sides.
- In a medium bowl, mix graham cracker crumbs, melted butter, sugar, and salt until the texture resembles wet sand. Press firmly into the bottom of the pan. Bake for 10 minutes, then cool.
- In a large mixing bowl, beat softened cream cheese until smooth (about 2 minutes). Add sugar and beat until fluffy.
- Mix in sour cream and vanilla extract until just combined. Scrape down the sides as needed.
- Add eggs one at a time, mixing gently on low speed. Do not overmix.
- Fold in chopped Butterfinger bars with a spatula.
- Pour filling over cooled crust and smooth the top. Tap pan gently to release air bubbles.
- Place pan on a baking sheet and bake for 50-60 minutes, until edges are set but center jiggles slightly. Tent with foil if browning.
- Turn off oven, crack door, and let cheesecake cool inside for 1 hour. Transfer to wire rack.
- Refrigerate for at least 6 hours, preferably overnight.
- For ganache: Place chocolate chips in a heatproof bowl. Heat heavy cream until steaming, then pour over chocolate. Let sit 2 minutes, then stir until smooth and glossy. Microwave in 10-second bursts if needed.
- Remove cheesecake from pan and place on serving platter. Pour cooled ganache over top, letting it drip down sides. Sprinkle with reserved chopped Butterfinger bars.
- Chill for 30 minutes to set ganache. Slice with a hot, clean knife, wiping between cuts.
- Garnish with whipped cream if desired. Serve chilled.
Notes
For best results, use room temperature ingredients and blend cream cheese until completely smooth before adding eggs. If cracks appear, the ganache topping will cover them. Gluten-free and dairy-free adaptations are possible. Chill cheesecake overnight for optimal texture. Clean knife between slices for neat presentation.
- Prep Time: 25 minutes
- Cook Time: 60 minutes
- Category: Dessert
- Cuisine: American
Nutrition
- Serving Size: 1 slice (1/12th of cheesecake)
- Calories: 480
- Sugar: 34
- Sodium: 320
- Fat: 31
- Saturated Fat: 18
- Carbohydrates: 45
- Fiber: 1
- Protein: 8
Keywords: Butterfinger cheesecake, chocolate ganache, candy bar dessert, easy cheesecake, birthday dessert, peanut butter cheesecake, creamy cheesecake, party dessert