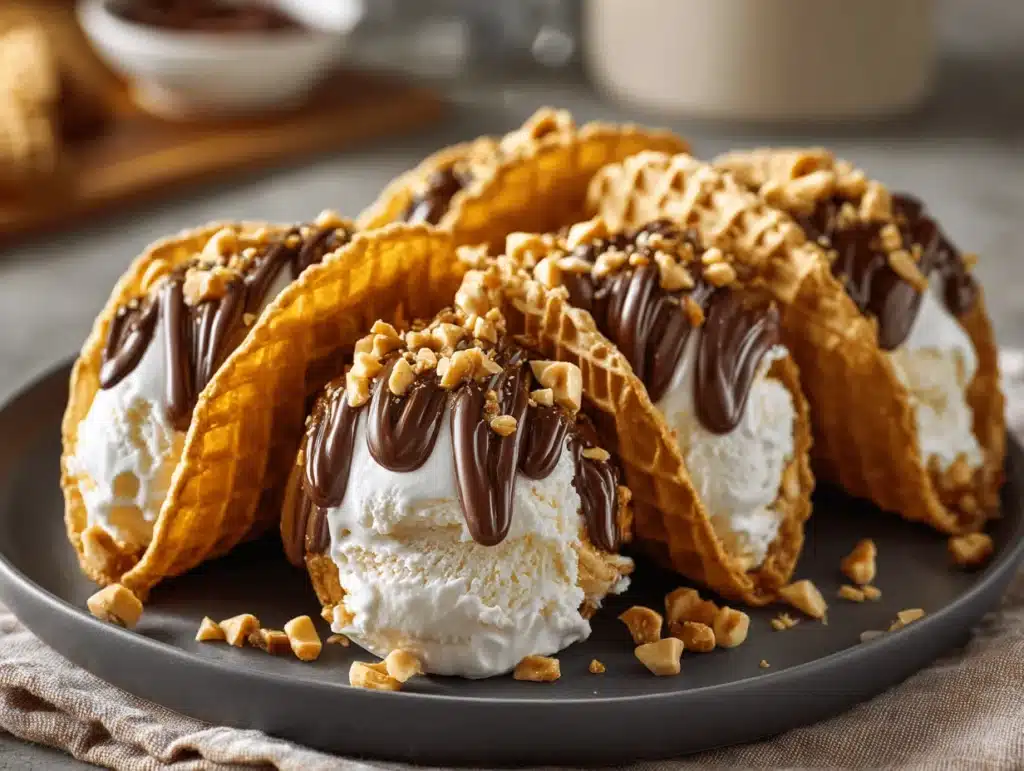
The first time I bit into a homemade choco taco, I swear my kitchen filled with pure joy—the crisp waffle shell had that perfect snap, the creamy ice cream center oozed just enough, and the chocolate coating? Oh, it was everything. If you’ve ever chased after the ice cream truck as a kid (or, let’s face it, as an adult), you know the thrill of discovering choco tacos tucked away in the freezer. But imagine making your own choco tacos at home, with easy waffle shells that are golden and fresh—way better than store-bought. Honestly, this recipe has become my go-to for parties, family cookouts, and those random Tuesday nights when dessert is mandatory.
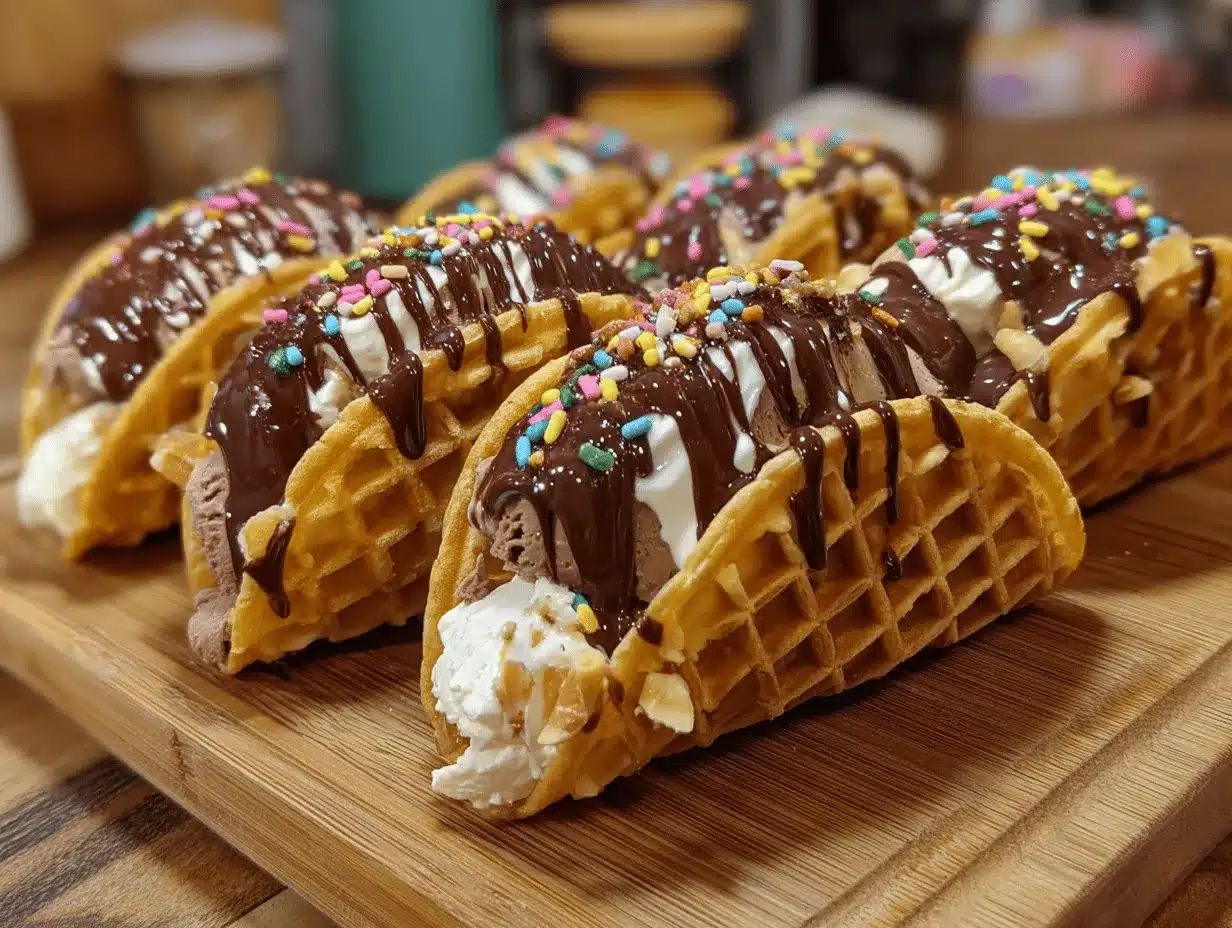
I actually stumbled on the idea during a summer potluck when my waffle iron was out and I had leftover ice cream. A little experimenting later, I found that homemade waffle shells are shockingly simple and make this dessert totally next-level. Plus, you get to choose your favorite ice cream flavors and toppings (hello, rainbow sprinkles and crushed cookies!). Each batch I bake brings me back to those classic ice cream truck moments, but with a homemade twist that feels special. Choco tacos aren’t just delicious—they’re a showstopper, and everyone gets excited when they see them on a dessert tray.
This choco tacos recipe is perfect when you want something fun, customizable, and a little nostalgic. It’s an easy homemade waffle shell dessert that’s ideal for parties, sleepovers, or just treating yourself. If you love ice cream sandwiches, you’re going to love these. I’ve tested this recipe countless times, played with different fillings, and I’m always amazed by how simple and rewarding the process is. So grab your ingredients, dust off your waffle iron, and let’s make the best choco tacos you’ve ever tasted!
Why You’ll Love This Recipe
Let’s be real—desserts should be fun, memorable, and totally crave-worthy. After making choco tacos for every birthday and backyard bash in recent memory, I can confidently say this is a recipe you’ll want on repeat. Here’s why these homemade choco tacos steal the show every single time:
- Quick & Easy: The waffle shells come together in under 30 minutes. No fancy tricks required—just simple steps you can master in a snap.
- Simple Ingredients: No wild grocery runs. You likely have everything you need in your pantry already (eggs, flour, sugar, cocoa, and a bit of butter).
- Perfect for Parties: Whether it’s a summer birthday, a sleepover, or a family BBQ, these look impressive but are super easy to assemble ahead of time.
- Crowd-Pleaser: Kids lose their minds over them, and adults get that delightful hit of nostalgia. Even picky eaters jump for seconds!
- Unbelievably Delicious: The combo of crispy waffle, creamy ice cream, and rich chocolate is pure comfort food. Every bite is a little celebration.
This choco tacos recipe stands out because the waffle shell is homemade—not the usual store-bought cone. It’s thin, slightly chewy, and holds up beautifully to freezing. I use a simple batter and a waffle iron, but you can also shape them right off a griddle. I’ve even tried swapping out regular flour for almond flour, and it works for gluten-free friends. Plus, you get to customize with any ice cream you love—mint chip, strawberry, or classic vanilla.
Honestly, these choco tacos are the kind of dessert that makes you pause mid-bite and smile. They’re easy enough for weeknights but fancy enough for special occasions. If you want a dessert that feels homemade, heartfelt, and a little magical, this recipe is for you. Trust me, after your first batch, you’ll be making them again and again—no ice cream truck needed!
Ingredients Needed
This recipe uses simple, wholesome ingredients to deliver bold flavor and satisfying texture without the fuss. Most are pantry staples, and you can tweak them to suit your taste or dietary needs. Here’s what you’ll need for your homemade choco tacos:
- For the Waffle Shells:
- 1 cup (120g) all-purpose flour (use almond flour for gluten-free)
- 2 large eggs (room temperature)
- 1/2 cup (100g) granulated sugar
- 1/4 cup (60ml) unsalted butter, melted (adds richness)
- 1/4 cup (60ml) milk (any milk works—even oat or almond for dairy-free)
- 1 tsp vanilla extract (for flavor)
- Pinch of salt (balances sweetness)
- For the Filling:
- 3 cups (about 700g) ice cream, softened (choose your favorite flavors—vanilla, chocolate, mint chip, strawberry, you name it!)
- For the Chocolate Coating:
- 1 cup (170g) semisweet chocolate chips (milk or dark chocolate also works)
- 2 tbsp coconut oil (makes the coating smooth and snappy)
- Toppings (optional):
- Rainbow sprinkles
- Crushed nuts (peanuts, almonds, or hazelnuts)
- Mini chocolate chips
- Crushed cookies (Oreos or graham crackers)
- Shredded coconut
Ingredient Tips: For the best waffle shells, use fresh eggs and a high-quality vanilla extract. If you want a dairy-free option, swap the butter for coconut oil and use plant-based milk. For the chocolate coating, I usually reach for Ghirardelli chips—they melt beautifully and set up with a nice snap. Feel free to experiment with different ice cream flavors—sometimes I’ll swirl two together for a fun twist. And don’t skip the toppings! They add crunch and color, especially for party trays.
If you’re feeling adventurous, try adding a pinch of cinnamon or espresso powder to the waffle batter for a little extra flavor. And if you want to make these choco tacos ahead for a crowd, the shells and chocolate can be prepped and frozen—so easy!
Equipment Needed
You don’t need a fancy kitchen setup to make choco tacos, but a few key tools make things easier. Here’s what I use (and some budget-friendly alternatives):
- Waffle Iron or Pizzelle Maker: A classic waffle iron works best, but a pizzelle maker or even a nonstick griddle will do in a pinch. I’ve used all three—each gives a slightly different texture, but they all work.
- Bowl & Whisk: For mixing the batter. A hand mixer is optional if you want extra fluffiness.
- Spatula: Helps spread the batter evenly and lift shells off the iron.
- Baking Sheet: For cooling the shells and assembling tacos.
- Small Saucepan: For melting chocolate and coconut oil.
- Ice Cream Scoop: Makes filling the shells a breeze (but you can use a spoon, too).
- Wax Paper or Parchment Paper: Helps prevent sticking when freezing assembled choco tacos.
Tip: If you’re using a waffle iron, give it a quick wipe-down before starting—old batter can mess with your shell texture. For the saucepan, I always use a heavy-bottomed one to prevent burning the chocolate. If you’re on a budget, you can skip the scoop and parchment—just work carefully and freeze on a plate. Maintenance-wise, I always let my waffle iron cool fully before cleaning, and I never use harsh scrubbers to keep the nonstick coating in good shape.
Preparation Method
Ready to make choco tacos? Here’s a step-by-step guide that’ll get you crispy waffle shells, creamy ice cream, and that signature chocolate crunch. I’ve added tips and warnings at each stage so you can avoid the classic mishaps (trust me, I’ve made them all!).
- Make the Waffle Shells:
- In a medium bowl, whisk together 2 large eggs and 1/2 cup (100g) sugar until pale and thick—about 2 minutes.
- Add 1/4 cup (60ml) melted butter, 1/4 cup (60ml) milk, and 1 tsp vanilla extract. Mix until combined.
- Sift in 1 cup (120g) flour and a pinch of salt. Stir gently until you get a smooth batter (don’t overmix—lumps are okay!).
- Preheat your waffle iron or pizzelle maker to medium heat. If using a griddle, set to medium and grease lightly.
- For each shell, drop about 2 tbsp (30g) batter onto the iron and spread to a thin circle (about 5”/13cm wide).
- Cook for 2-3 minutes, until golden brown with crisp edges. Shell should smell toasty and feel pliable—not brittle.
- Immediately (while still warm), drape shell over a thick-handled spoon or small rolling pin to shape into a taco. Hold for 30 seconds until set.
- Cool shells completely on a wire rack. If shells harden before shaping, microwave for 10 seconds to soften.
- Prep the Ice Cream Filling:
- Let 3 cups (700g) ice cream soften until scoopable but not melted—about 10 minutes at room temp.
- Scoop or spoon ice cream into each shell, pressing gently to fill.
- Place filled shells on a parchment-lined baking sheet and freeze for 30 minutes, or until firm.
- Make the Chocolate Coating:
- In a small saucepan (low heat), melt 1 cup (170g) chocolate chips with 2 tbsp coconut oil, stirring until smooth and glossy.
- Cool the chocolate slightly—should feel warm but not hot (about 90°F/32°C).
- Dip and Decorate:
- Remove tacos from freezer. Dip the ice cream end of each taco halfway into the melted chocolate.
- Quickly sprinkle with toppings—rainbow sprinkles, nuts, mini chips, or anything you fancy.
- Place dipped tacos back on parchment and freeze for another 15 minutes, until chocolate sets.
- Serve:
- Enjoy your homemade choco tacos straight from the freezer, or let stand for a few minutes for a softer bite.
Troubleshooting: If shells crack when shaping, they’re overcooked or too cool—try working faster or microwaving briefly. For melty ice cream, pop the tacos back in the freezer between steps. Chocolate too thick? Add a touch more coconut oil. Sensory cues help—waffle shells should smell sweet and buttery, and chocolate should look shiny. For efficiency, I like to make shells ahead and freeze, then fill and dip right before serving.
Cooking Tips & Techniques
I wish someone had told me these tricks when I started making choco tacos! Here’s what I’ve learned after countless batches (and a few hilarious fails):
- Shell Texture: The key to crispy, flexible shells is to cook them just until golden—don’t walk away! If you overbake, they get brittle and crack when shaping. I always hover nearby and do a gentle bend test right off the iron.
- Shaping Speed: You have about 30 seconds to shape a shell after it comes off the iron. I set up my “taco form” station ahead (rolling pins, spoons, or even a thick glass) so I’m ready to go.
- Chocolate Coating: If your chocolate seizes (gets grainy), you probably overheated it. Keep it low and slow, and always stir in coconut oil off the heat for best results.
- Ice Cream Tips: Use ice cream that’s firm but scoopable. If it’s too soft, freeze the filled tacos longer before dipping. I learned the hard way that melty ice cream makes for messy tacos!
- Multitasking: While shells cool, prep your chocolate and toppings. Assembly goes much quicker, and you’ll avoid sticky fingers.
- Consistency: Always measure ingredients carefully—flour can make or break shell texture. I use a kitchen scale for accuracy (especially for flour and chocolate chips).
- Common Mistakes: Don’t overload the shells with ice cream—they’ll split. Also, let the dipped tacos set fully in the freezer so chocolate hardens with a nice snap.
I once tried skipping the coconut oil in the chocolate, and the coating ended up chunky and dull. Lesson learned: coconut oil gives that smooth, professional finish. If you’re making a big batch, keep everything cold. And don’t stress if you crack a shell—just patch with a little melted chocolate. That’s part of the homemade fun!
Variations & Adaptations
Choco tacos are super customizable! Here are some of my favorite twists and swaps—great if you’re working around dietary needs or just feeling creative:
- Gluten-Free Choco Tacos: Swap the all-purpose flour for almond flour or a gluten-free blend. Shells will be a bit chewier but still delicious.
- Dairy-Free Option: Use plant-based butter and milk in the waffle shells, and fill with coconut milk ice cream. Chocolate coating works with dairy-free chips.
- Seasonal Flavors: In summer, fill shells with strawberry or peach ice cream and top with crushed graham crackers. In fall, try pumpkin spice ice cream and a sprinkle of cinnamon sugar.
- Cooking Methods: Don’t have a waffle iron? Use a griddle and shape thin pancakes into shells while warm. Texture will be slightly softer, but still holds up.
- Nut-Free Version: Skip nut toppings and use seed-based ice cream (like sunflower butter swirls).
- Personal Favorite: I love swirling two flavors—half coffee ice cream, half vanilla—then drizzling with caramel before dipping in chocolate. It’s a hit at adult gatherings!
For chocolate lovers, add a dash of cocoa powder to the waffle batter. And if you’re catering to allergies, always double-check ingredient labels—especially for toppings and ice cream. The best part? Everyone can make their own choco taco exactly how they like it!
Serving & Storage Suggestions
Choco tacos are best served straight from the freezer for maximum crunch and creamy texture. Arrange them on a chilled platter or a fun ice cream tray—kids love grabbing them right off the plate. For parties, I sometimes wrap each taco in wax paper and tie with a ribbon for a cute grab-and-go dessert.
If you want to get fancy, drizzle a little extra melted chocolate over the top, or serve with bowls of toppings so guests can decorate their own. I like pairing choco tacos with fresh berries, a pitcher of cold milk, or even iced coffee for a grown-up twist. They’re a great finish to a BBQ or sleepover, and honestly, they disappear fast!
Storage: Store assembled choco tacos in an airtight container, separated by wax paper, in the freezer. They’ll keep for up to 2 weeks. For longer storage, wrap individually in plastic wrap. To reheat shells (if making ahead), pop them in a 250°F (120°C) oven for 2 minutes, then cool and fill. Flavors deepen over time, so leftovers are never a bad idea.
If shells get soft, you can re-crisp them in the oven before filling. And for best results, keep chocolate-dipped tacos chilled until serving—otherwise, the coating will melt and make a mess (learned that one the hard way!).
Nutritional Information & Benefits
Each choco taco (with vanilla ice cream and chocolate coating) has roughly:
- Calories: 280
- Fat: 14g
- Carbs: 34g
- Protein: 5g
This varies depending on your ice cream and toppings choices. The waffle shells offer a touch of protein from eggs, and you can easily make these lower-carb by using almond flour and sugar substitutes. Coconut oil in the chocolate coating provides healthy fats, and using dark chocolate boosts antioxidants.
If you’re gluten-free or dairy-free, adapt the ingredients to fit your needs—there are plenty of options. Possible allergens include dairy, eggs, gluten, and nuts (if using certain toppings). Personally, I like serving choco tacos as a treat after active days with the family. It’s dessert, but with a little more wholesome goodness thanks to real ingredients and customizable options.
Conclusion
If you’re searching for a dessert that’s easy, crowd-pleasing, and totally gorgeous for Pinterest, this choco tacos recipe is your answer. The homemade waffle shells are crisp and simple, the ice cream filling is endlessly customizable, and the chocolate coating makes every bite a party. Whether you’re hosting a birthday, a summer cookout, or just want to surprise your kids after school, these choco tacos deliver every time.
Don’t be afraid to play with flavors, swap toppings, or make them mini for a snack-size treat. The recipe is flexible, forgiving, and always fun to share. I love making a big batch and watching everyone smile as they dig in—there’s something about homemade desserts that just bring people together.
So try these easy homemade choco tacos for your next party or family night, and let me know how you customize them! Drop a comment below, share your creations on social media, or tell me your favorite flavor combos. Happy taco-making—and happy snacking!
FAQs
Can I make choco tacos without a waffle iron?
Yes! Use a nonstick griddle or skillet to cook thin pancakes from the batter, then shape them into shells while warm. Texture will be a bit softer but still tasty.
How do I keep the waffle shells from cracking?
Shape the shells immediately after cooking, while they’re still warm and pliable. If they cool too quickly, microwave for 10 seconds to soften before shaping.
Can I use store-bought ice cream for the filling?
Absolutely! Any ice cream works—just let it soften slightly before scooping into the shells. Mix and match flavors for variety.
What’s the best way to store choco tacos?
Place choco tacos in an airtight container, separated by wax paper, and freeze. They’ll stay fresh for up to 2 weeks and taste great straight from the freezer.
Are choco tacos suitable for gluten-free or dairy-free diets?
Yes! Use almond flour or a gluten-free blend for the shells, and choose plant-based ice cream and butter. There are plenty of ways to adapt the recipe for dietary needs.
Pin This Recipe!


Choco Tacos Recipe: Easy Homemade Waffle Shell Dessert for Parties
- Total Time: 1 hour
- Yield: 8 choco tacos 1x
Description
These homemade choco tacos feature crisp waffle shells, creamy ice cream centers, and a snappy chocolate coating. Perfect for parties, cookouts, or nostalgic treats, they’re easy to customize and guaranteed to delight kids and adults alike.
Ingredients
- 1 cup all-purpose flour (or almond flour for gluten-free)
- 2 large eggs, room temperature
- 1/2 cup granulated sugar
- 1/4 cup unsalted butter, melted
- 1/4 cup milk (any milk, including oat or almond for dairy-free)
- 1 teaspoon vanilla extract
- Pinch of salt
- 3 cups ice cream, softened (any flavor)
- 1 cup semisweet chocolate chips (milk or dark chocolate also works)
- 2 tablespoons coconut oil
- Rainbow sprinkles (optional)
- Crushed nuts (peanuts, almonds, or hazelnuts, optional)
- Mini chocolate chips (optional)
- Crushed cookies (Oreos or graham crackers, optional)
- Shredded coconut (optional)
Instructions
- In a medium bowl, whisk together eggs and sugar until pale and thick, about 2 minutes.
- Add melted butter, milk, and vanilla extract; mix until combined.
- Sift in flour and a pinch of salt; stir gently until smooth (do not overmix).
- Preheat waffle iron or pizzelle maker to medium heat. If using a griddle, set to medium and lightly grease.
- For each shell, drop about 2 tablespoons batter onto the iron and spread to a thin circle (about 5 inches wide).
- Cook for 2-3 minutes, until golden brown and crisp but pliable.
- Immediately drape shell over a thick-handled spoon or rolling pin to shape into a taco; hold for 30 seconds until set.
- Cool shells completely on a wire rack. If shells harden before shaping, microwave for 10 seconds to soften.
- Let ice cream soften until scoopable but not melted, about 10 minutes at room temperature.
- Scoop or spoon ice cream into each shell, pressing gently to fill.
- Place filled shells on a parchment-lined baking sheet and freeze for 30 minutes, or until firm.
- In a small saucepan over low heat, melt chocolate chips with coconut oil, stirring until smooth and glossy.
- Cool chocolate slightly until warm but not hot (about 90°F).
- Remove tacos from freezer. Dip the ice cream end of each taco halfway into the melted chocolate.
- Quickly sprinkle with desired toppings.
- Place dipped tacos back on parchment and freeze for another 15 minutes, until chocolate sets.
- Serve straight from the freezer or let stand for a few minutes for a softer bite.
Notes
For gluten-free, use almond flour. For dairy-free, use plant-based butter, milk, and ice cream. Shape shells immediately after cooking for best results. Customize with your favorite ice cream flavors and toppings. Store in the freezer for up to 2 weeks. If shells crack, microwave briefly to soften before shaping.
- Prep Time: 20 minutes
- Cook Time: 10 minutes
- Category: Dessert
- Cuisine: American
Nutrition
- Serving Size: 1 choco taco
- Calories: 280
- Sugar: 22
- Sodium: 90
- Fat: 14
- Saturated Fat: 8
- Carbohydrates: 34
- Fiber: 2
- Protein: 5
Keywords: choco tacos, homemade ice cream tacos, waffle shell dessert, party dessert, nostalgic treat, easy dessert, customizable dessert, gluten-free option, dairy-free option, chocolate dipped tacos