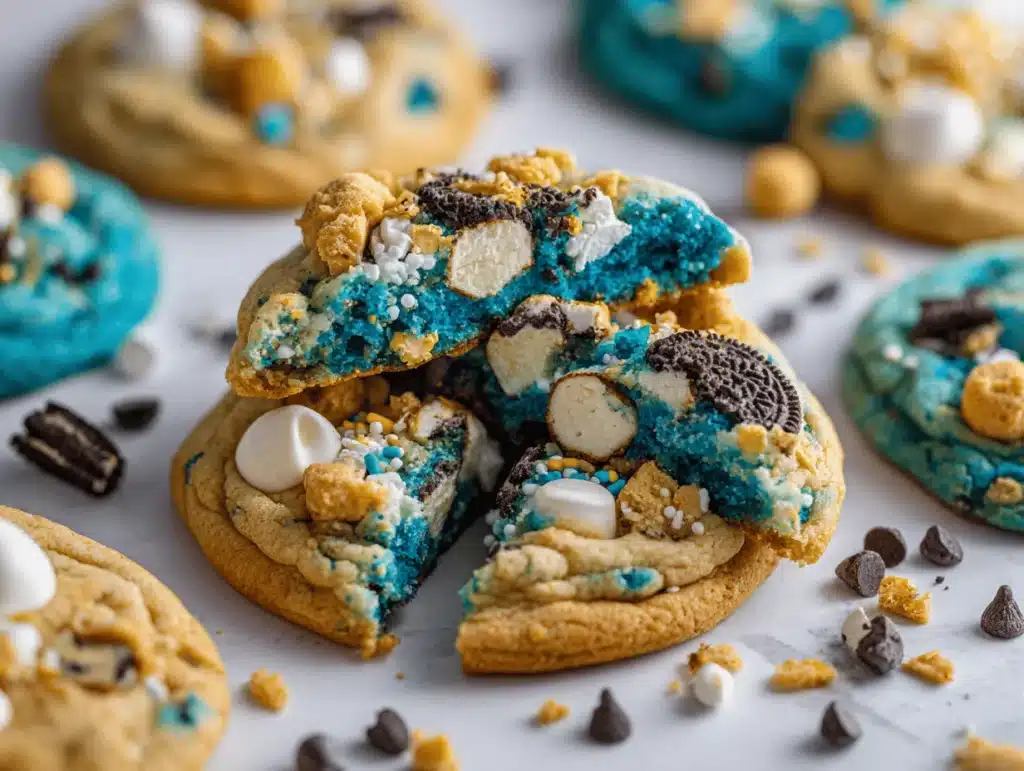
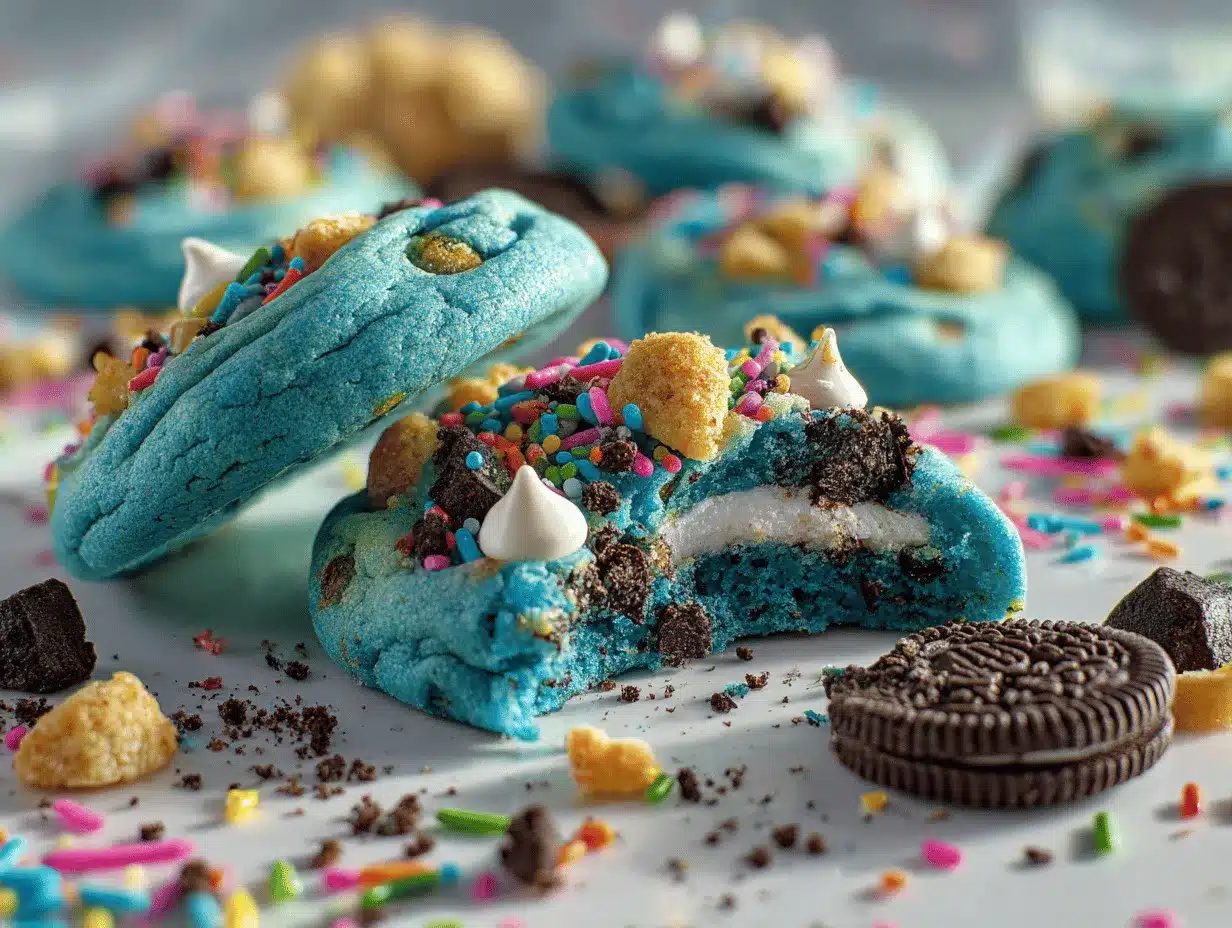
Blue fingers, rainbow sprinkles everywhere, and the irresistible scent of freshly baked cookies—yep, that’s what happens every time I whip up a batch of Cookie Monster Funfetti Cookies. Honestly, these cookies are like a party in every bite! The first time I made them, it was a rainy Saturday, and my nephew begged for “the blue cookies with all the stuff inside.” Turns out, that’s code for chewy, bright cookies loaded with chocolate chips, Oreos, and heaps of colorful sprinkles. I know you’re probably thinking, “Can cookies really be this fun?” Trust me, Cookie Monster Funfetti Cookies are not just a treat—they’re a whole vibe.
This recipe is more than just a blue-hued sweet; it’s a way to turn any kitchen into a celebration zone. Whether you’ve got little ones who adore Sesame Street or you simply love playful desserts, these cookies hit the spot. I’ve tweaked the recipe over time (after too many batches that were too dry, too flat, or not blue enough!), and now I’m sharing the best version—a chewy, thick cookie that’s loaded with mix-ins and guaranteed to light up any room. You don’t need fancy skills, just a bit of enthusiasm and maybe some extra napkins for those cookie crumbs.
Why do I keep coming back to Cookie Monster Funfetti Cookies? For one, they’re a huge hit at birthday parties and school bake sales. But honestly, it’s the smiles and blue tongues that make it worth every minute. If you’re like me and love your cookies extra loaded, grab your sprinkles and Oreos and let’s get baking. The joy is in the mess—and in every chewy, chocolatey bite!
Why You’ll Love This Recipe
If you’re searching for a cookie that’s more than just a sweet treat, Cookie Monster Funfetti Cookies are your answer. I’ve baked dozens of batches—yes, even at midnight when a craving hit—and these cookies always come out perfect. Here’s why they’re a must-make:
- Quick & Easy: You’ll have bright, chewy cookies in under 30 minutes (seriously, no chilling required).
- Simple Ingredients: No need for a grocery marathon; most items are already in your pantry.
- Perfect for Parties: These are showstoppers for birthdays, bake sales, and any event where you want maximum fun.
- Crowd-Pleaser: Kids and adults go wild for the mix of Oreos, chocolate chips, and sprinkles. There’s something for everyone.
- Unbelievably Delicious: The combo of soft cookie, creamy chips, crunchy cookies, and rainbow sprinkles is pure comfort food.
What sets my Cookie Monster Funfetti Cookies apart? The dough is tinted just enough for that iconic blue, but it’s not artificial-tasting. I use cream cheese for extra chewiness and blend the Oreos right into the dough for texture in every bite. And you know, after plenty of trial and error, I figured out the secret—don’t overmix once the flour goes in, and always use room temperature butter (keeps them thick and soft!).
These cookies aren’t just yummy—they’re a mood booster. There’s something magical about watching sprinkles melt into the dough and seeing the surprise on someone’s face when they bite into a chunk of Oreo. Cookie Monster Funfetti Cookies are the kind of treat you make for fun and end up making for every occasion. If you want to bake something joyful, nostalgic, and just a little bit messy, this recipe is for you!
Ingredients Needed
Cookie Monster Funfetti Cookies are all about bold flavors and textures, but the ingredients are surprisingly simple. You probably have most of them already! Here’s what you’ll need:
- For the cookie dough:
- 2 1/4 cups (280g) all-purpose flour (can swap with gluten-free blend if needed)
- 1/2 teaspoon baking soda
- 1/2 teaspoon salt
- 1/2 cup (115g) unsalted butter, room temperature (I like Kerrygold for richness)
- 4 ounces (113g) cream cheese, softened (adds chewiness and moisture)
- 1 cup (200g) granulated sugar
- 1/2 cup (100g) light brown sugar, packed
- 1 large egg, room temperature
- 2 teaspoons pure vanilla extract
- Blue gel food coloring (about 1/2 teaspoon, more for deeper color—avoid liquid food color for best results)
- Mix-ins:
- 1 cup (120g) mini chocolate chips (semisweet or milk chocolate)
- 1 cup (80g) chopped Oreo cookies (about 8 cookies, cream and all)
- 1/2 cup (90g) white chocolate chips
- 1/2 cup (80g) rainbow sprinkles (jimmies work best—they don’t bleed color)
- Optional:
- Extra sprinkles and Oreo pieces for topping
- Pinch of almond extract for a hint of bakery flavor
If you need to make these dairy-free, swap out the butter and cream cheese for plant-based versions (I’ve tried Earth Balance—works well!). For nut-free, just skip any nutty mix-ins. And for a lower sugar option, you can use coconut sugar in place of brown sugar, though the color turns a bit darker. These ingredients are flexible—just don’t skimp on the mix-ins. That’s where the Cookie Monster magic happens!
Quick tip: Use mini chips and jimmies sprinkles for the best texture. Nonpareils tend to bleed (and honestly, they get a bit crunchy). For Oreos, the classic variety is perfect, but feel free to use golden or any fun flavor. The recipe is as playful as you want it to be!
Equipment Needed
- Large mixing bowl: Essential for creaming butter and mixing dough. If you’ve got a stand mixer, that’s even better—saves your arm!
- Hand mixer or stand mixer: For beating butter, cream cheese, and sugars. If you don’t have one, a sturdy wooden spoon and some elbow grease work in a pinch.
- Rubber spatula: Helpful for folding in mix-ins and scraping down the bowl.
- Measuring cups and spoons: For accuracy—especially with flour and baking soda.
- Baking sheets: Line with parchment paper for easy cleanup and perfect bottoms.
- Parchment paper or silicone baking mats: Prevent sticking and keep cookies soft.
- Ice cream scoop or cookie scoop: For even portions (trust me, this keeps cookies uniform and chewy).
- Cooling rack: To cool cookies quickly and keep them from getting soggy.
If you’re missing a stand mixer, don’t worry—my early batches were all hand-mixed. Just make sure the butter and cream cheese are super soft. For budget-friendly options, I’ve found basic aluminum baking sheets work just fine, as long as you use parchment paper. Maintenance tip: Keep your cookie scoop clean and dry after each use—sticky dough can jam the spring mechanism!
Preparation Method
- Preheat your oven: Set to 350°F (175°C). Line two baking sheets with parchment paper or silicone mats. This step keeps your cookies from sticking and helps them bake evenly.
- Mix dry ingredients: In a medium bowl, whisk together 2 1/4 cups (280g) flour, 1/2 tsp baking soda, and 1/2 tsp salt. Set aside. (Tip: Sifting isn’t necessary, but whisking adds air and helps with even baking.)
- Cream butter, cream cheese, and sugars: In a large bowl or stand mixer, beat 1/2 cup (115g) butter and 4 oz (113g) cream cheese until smooth and creamy—about 2 minutes. Add 1 cup (200g) granulated sugar and 1/2 cup (100g) brown sugar; beat another 1-2 minutes until light and fluffy. (If the mixture looks curdled, the cream cheese may be too cold—just keep beating, it’ll smooth out.)
- Add wet ingredients: Beat in 1 large egg and 2 tsp vanilla extract until well combined. Scrape down sides of the bowl to make sure everything’s mixed. If using, add blue gel food coloring now (start with 1/2 tsp and add more for deeper color). The dough should be bright blue—think Cookie Monster!
- Combine dry and wet ingredients: Add the flour mixture to the wet mixture in two additions. Mix just until combined—don’t overmix or cookies will be tough. (If dough feels sticky, add a tablespoon more flour.)
- Fold in mix-ins: Use a rubber spatula to gently fold in 1 cup mini chocolate chips, 1 cup chopped Oreos, 1/2 cup white chocolate chips, and 1/2 cup sprinkles. The dough will be thick and chunky. (Tip: Save a few mix-ins for pressing on top before baking!)
- Portion dough: Scoop dough by heaping tablespoons or use a medium cookie scoop (about 2 tbsp each) and drop onto prepared baking sheets, spacing about 2 inches (5 cm) apart. For extra visual pop, press a few more sprinkles or Oreo chunks on top of each cookie.
- Bake: Place trays in the oven (center rack) and bake for 10-12 minutes, until edges are set but centers still look slightly soft. (Every oven is different—start checking at 10 minutes.)
- Cool: Let cookies sit on the baking sheet for 5 minutes (they firm up as they cool), then transfer to wire racks. The cookies will continue to set as they cool, so don’t worry if they seem a bit underdone.
- Enjoy! Serve warm for maximum gooeyness, or let cool completely. Store any leftovers in an airtight container.
Preparation Notes: If your cookies spread too much, chill the dough for 30 minutes next time. For extra-thick cookies, mound the dough higher when scooping. You’ll know they’re done when the edges look set and the middle jiggles just a bit. And yes, you’ll get blue hands—embrace the mess!
Cooking Tips & Techniques
Baking Cookie Monster Funfetti Cookies isn’t rocket science, but a few tricks make all the difference. Over the years, I’ve had my fair share of cookie fails (flat cookies, pale cookies, dry cookies—been there!). Here’s what I’ve learned:
- Room Temperature Ingredients: Butter and cream cheese blend better when soft. Cold ingredients can cause uneven mixing and tough dough.
- Don’t Overmix: Once you add the flour, mix just until combined. Overmixing = tough cookies.
- Chill for Extra Thickness: If you want bakery-style cookies, chill the dough for 30-60 minutes before baking.
- Use Gel Food Coloring: Liquid colors make the dough runny and can affect texture. Gel keeps it vivid without extra moisture.
- Mix-Ins at the End: Fold in Oreos, chips, and sprinkles gently with a spatula. Be gentle—overworking breaks up the cookies.
- Cookie Scoop for Uniform Cookies: Not only does this help with even baking, but it also makes the cookies chewy in the middle.
- Watch the Bake Time: Cookies should look just set on the edges and soft in the center. They’ll finish setting as they cool.
- Oven Troubles: If your cookies bake unevenly, rotate the tray halfway through. (Trust me, I learned this after a batch half raw, half burnt!)
Multitasking tip: While one tray bakes, start prepping the next. And if you want to get fancy, sprinkle extra mix-ins right after baking for that Pinterest-worthy look. Consistency is all about measuring properly and not rushing the mixing—take your time, and you’ll get perfect Cookie Monster Funfetti Cookies every time.
Variations & Adaptations
Cookie Monster Funfetti Cookies are super flexible—you can customize them for just about anyone. Here are my favorite twists:
- Gluten-Free: Swap all-purpose flour for a 1:1 gluten-free blend (like Bob’s Red Mill). No one will know the difference!
- Dairy-Free: Use plant-based butter and vegan cream cheese. I’ve tried Miyoko’s—works like a charm.
- Holiday Edition: Switch up the sprinkles for themed colors—red and green for Christmas, orange and black for Halloween. (I did this for Halloween last year, and the kids loved it!)
- Flavor Swap: Try golden Oreos or flavored Oreos (birthday cake is wild!), or use butterscotch or peanut butter chips instead of white chocolate.
- Nut-Free: Skip any nutty mix-ins and double up on sprinkles or chips.
If you have a crowd with allergies, always check the labels on sprinkles and Oreos—some brands sneak in unexpected nuts or dairy. For baking method, you can air-fry small batches at 325°F (165°C) for about 7 minutes (they get extra chewy!). My personal favorite variation? Adding mini marshmallows for gooey surprises. Experiment and make these Cookie Monster Funfetti Cookies your own!
Serving & Storage Suggestions
Cookie Monster Funfetti Cookies are best served fresh and slightly warm—let’s be honest, nothing beats gooey chocolate and melty sprinkles! Stack them on a pretty platter for parties or serve on a blue napkin for extra Cookie Monster vibes. Pair with a glass of cold milk, hot cocoa, or even a scoop of vanilla ice cream if you’re feeling indulgent.
Leftovers (if you have any!) keep well in an airtight container at room temperature for up to 4 days. They’ll stay soft and chewy. For longer storage, freeze baked cookies in layers separated by parchment paper; thaw at room temp, or zap in the microwave for 10 seconds for fresh-from-the-oven taste. The dough itself can be frozen for up to a month—just scoop and freeze, then bake straight from frozen, adding a minute or two to the bake time.
Over time, the flavors actually get better. The Oreos soften, and the sprinkles meld into the dough, making each bite even more magical. If you’re gifting, tie up a bag with a blue ribbon and pop in a cute tag. Trust me, Cookie Monster Funfetti Cookies are the ultimate “just because” treat!
Nutritional Information & Benefits
Each Cookie Monster Funfetti Cookie comes in around 180 calories, with 3g protein, 8g fat, and 25g carbs (give or take depending on mix-ins). Not exactly diet food, but they’re packed with happiness! Key ingredients like cream cheese add a bit of calcium and protein, and you can boost fiber by using whole wheat flour.
These cookies are nut-free as written, and can be made gluten-free or dairy-free—just check the mix-ins. The recipe contains wheat, dairy, and eggs (and traces of soy in most chocolate chips and Oreos). If you’re watching sugar, you can cut back the sprinkles or use sugar-free chips.
From my perspective, Cookie Monster Funfetti Cookies are all about balance—a treat that cheers you up, brings people together, and offers a little moment of joy. Make them your way and enjoy every crumb!
Conclusion
If you’re looking for a cookie that’s playful, chewy, and loaded with all the good stuff, Cookie Monster Funfetti Cookies are it. They’re not just another blue cookie—they’re the kind of treat you make once and end up baking for every celebration. I love how easy they are to customize and how every batch feels like a mini party.
Don’t be afraid to throw in your favorite mix-ins or switch up the colors. This recipe is all about having fun in the kitchen and making something that makes people smile. Honestly, I can’t stop myself from grabbing one (or three) every time I walk past the cookie jar.
If you try these Cookie Monster Funfetti Cookies, leave a comment below with your twist! Share your photos, pin to Pinterest, or tag me on social—let’s see how your cookies turn out. Happy baking, and remember: blue fingers and big smiles are all part of the fun!
FAQs
How do I get the perfect Cookie Monster blue color?
Use gel food coloring and add a little at a time until the dough is bright blue. I usually start with 1/2 teaspoon and add more if needed. Liquid coloring tends to be too pale and can thin out the dough.
Can I use regular-sized chocolate chips instead of minis?
Absolutely! Minis just distribute more evenly, but regular chips add big melty pockets. Go with what you’ve got.
Do I need to chill the dough before baking?
Nope! You can bake right away for chewy cookies. If you want them extra thick, chilling for 30-60 minutes helps, but it’s optional.
Can I make these cookies ahead of time?
Yes! Bake and store in an airtight container for up to 4 days, or freeze for up to a month. They stay chewy and delicious.
What’s the best way to store leftover Cookie Monster Funfetti Cookies?
Keep them in an airtight container at room temperature. For longer storage, freeze and reheat in the microwave for 10 seconds for fresh-baked taste.
Pin This Recipe!


Cookie Monster Funfetti Cookies
- Total Time: 27 minutes
- Yield: 20 cookies 1x
Description
Chewy, thick, and vibrantly blue cookies packed with chocolate chips, Oreos, and rainbow sprinkles. These playful treats are perfect for parties, bake sales, or any time you want a fun, nostalgic dessert.
Ingredients
- 2 1/4 cups (280g) all-purpose flour
- 1/2 teaspoon baking soda
- 1/2 teaspoon salt
- 1/2 cup (115g) unsalted butter, room temperature
- 4 ounces (113g) cream cheese, softened
- 1 cup (200g) granulated sugar
- 1/2 cup (100g) light brown sugar, packed
- 1 large egg, room temperature
- 2 teaspoons pure vanilla extract
- 1/2 teaspoon blue gel food coloring (more for deeper color)
- 1 cup (120g) mini chocolate chips
- 1 cup (80g) chopped Oreo cookies (about 8 cookies)
- 1/2 cup (90g) white chocolate chips
- 1/2 cup (80g) rainbow sprinkles (jimmies)
- Extra sprinkles and Oreo pieces for topping (optional)
- Pinch of almond extract (optional)
Instructions
- Preheat oven to 350°F (175°C). Line two baking sheets with parchment paper or silicone mats.
- In a medium bowl, whisk together flour, baking soda, and salt. Set aside.
- In a large bowl or stand mixer, beat butter and cream cheese until smooth and creamy, about 2 minutes.
- Add granulated sugar and brown sugar; beat another 1-2 minutes until light and fluffy.
- Beat in egg and vanilla extract until well combined. Scrape down sides of the bowl. Add blue gel food coloring and mix until dough is bright blue.
- Add flour mixture to wet mixture in two additions. Mix just until combined; do not overmix.
- Gently fold in mini chocolate chips, chopped Oreos, white chocolate chips, and sprinkles with a rubber spatula.
- Scoop dough by heaping tablespoons or use a medium cookie scoop (about 2 tbsp each) onto prepared baking sheets, spacing about 2 inches apart. Press extra sprinkles or Oreo chunks on top if desired.
- Bake for 10-12 minutes, until edges are set but centers still look slightly soft.
- Let cookies cool on the baking sheet for 5 minutes, then transfer to wire racks to cool completely.
- Serve warm or store leftovers in an airtight container.
Notes
For extra-thick cookies, chill the dough for 30-60 minutes before baking. Use gel food coloring for best color and texture. Mini chips and jimmies sprinkles work best. Cookies can be made gluten-free or dairy-free with appropriate substitutions. Store in an airtight container for up to 4 days or freeze for longer storage.
- Prep Time: 15 minutes
- Cook Time: 12 minutes
- Category: Dessert
- Cuisine: American
Nutrition
- Serving Size: 1 cookie
- Calories: 180
- Sugar: 16
- Sodium: 110
- Fat: 8
- Saturated Fat: 5
- Carbohydrates: 25
- Fiber: 1
- Protein: 3
Keywords: Cookie Monster cookies, funfetti cookies, blue cookies, party cookies, chewy cookies, Oreo cookies, sprinkle cookies, kid-friendly dessert, bake sale cookies, birthday cookies