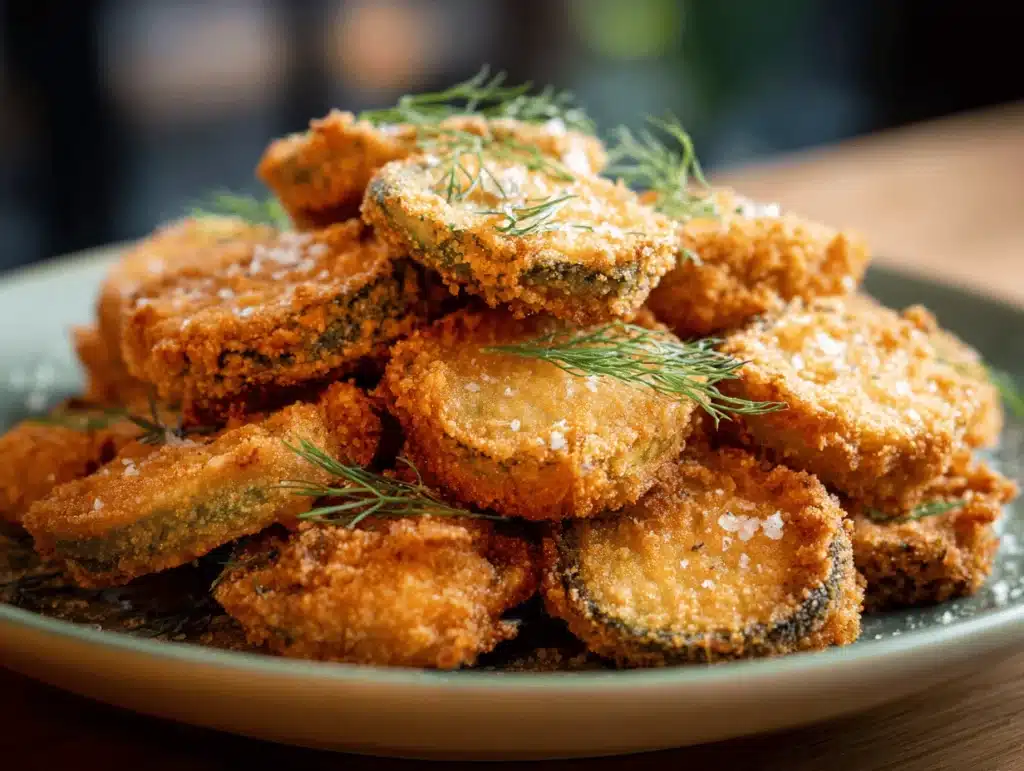
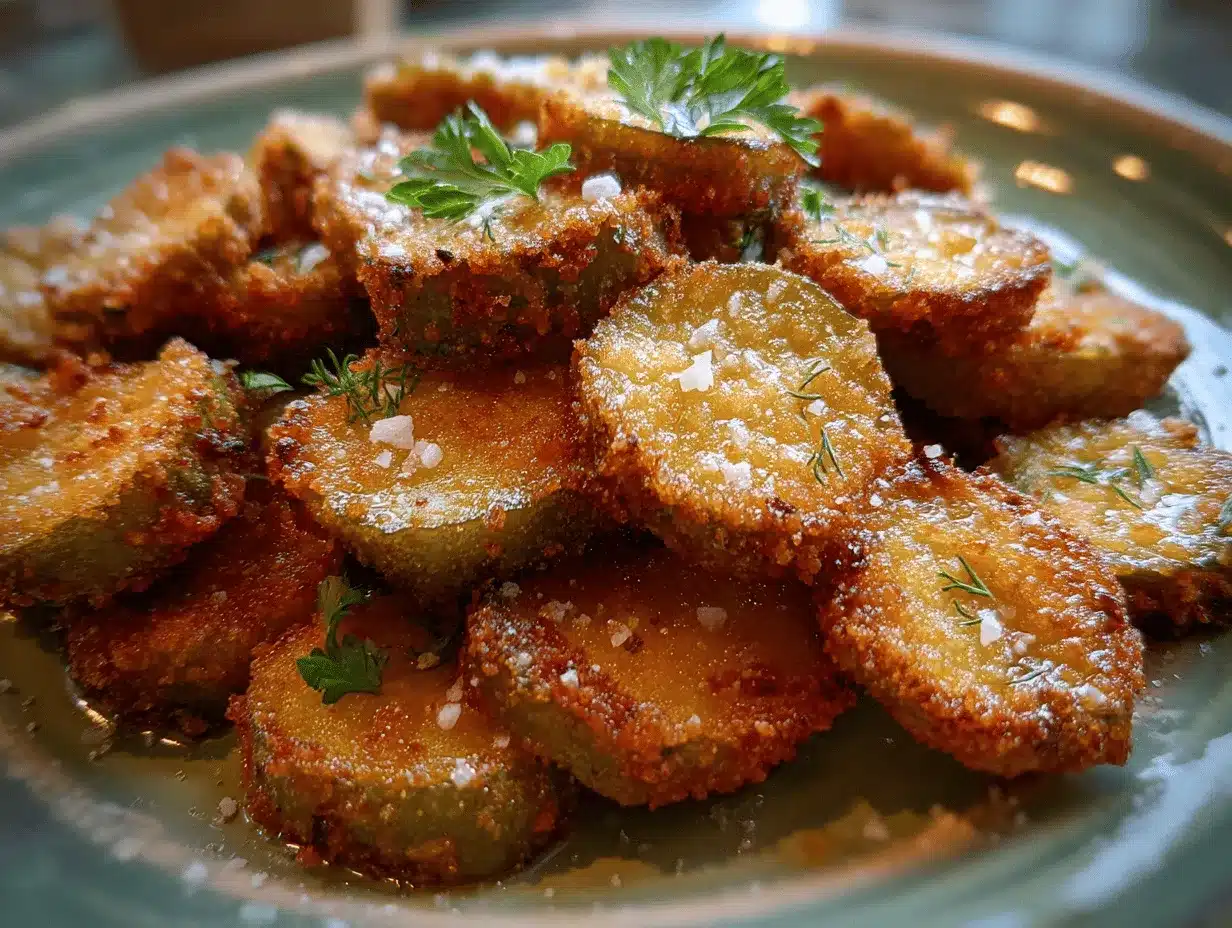
That first crunch when you bite into a golden, crispy fried pickle—oh man, it’s pure joy. The tangy snap of the pickle wrapped in a crackling blanket of spiced breading is basically snack heaven. I’ve got a soft spot for fried pickles, and honestly, I can’t count how many batches I’ve whipped up for game days, backyard BBQs, or just those random nights when salty cravings strike and you need something fun.
I actually stumbled onto my favorite fried pickles recipe by accident. One summer, my fridge was packed full of pickles (thanks to a bulk-buying phase—don’t ask), and I was desperate to use them up. I’d had fried pickles at a few restaurants, but making them at home felt kind of intimidating. Turns out, it’s way easier than you’d think. And you know what? Homemade fried pickles are crunchier, hotter, and a million times fresher. The best part? You only need about 20 minutes from start to finish.
This fried pickles recipe is the kind you’ll want to show off on Pinterest—seriously, the breading comes out perfectly crispy every single time. Whether you’re making them as an appetizer for a party, a snack for movie night, or even a cheeky side dish, these little guys are always a hit. They’re awesome for picky eaters, too (my youngest swears they taste better than potato chips). And if you’re into quick, crowd-pleasing recipes, trust me—this is the one.
I’ve tested this fried pickles recipe more times than I care to admit, tweaking the breading, the spices, and even the type of pickles (you’d be surprised how much difference a spear versus a chip makes). As someone who’s spent years developing easy snacks and appetizers, I can promise you: this is the best crispy homemade fried pickles recipe you’ll find. Ready to dive in? Let’s get frying!
Why You’ll Love This Fried Pickles Recipe
I’ve made fried pickles for everything from birthday parties to lazy Sunday afternoons, and there’s a reason this recipe keeps showing up. Here’s why you’re about to fall in love with it:
- Quick & Easy: You can whip these up in about 20 minutes—no complicated steps, no fuss. Perfect for last-minute cravings or unexpected guests.
- Simple Ingredients: Most of what you need is probably already in your pantry and fridge. No hunting down weird spices or specialty items—just basic, good stuff.
- Perfect for Any Occasion: These fried pickles work for game day snacks, summer cookouts, holiday potlucks, or just a Netflix night in. They fit right in everywhere.
- Crowd-Pleaser: I’ve served these to adults, kids, and everyone in between. They disappear fast, and people always ask for the recipe (I get texts about them weeks later!).
- Irresistibly Delicious: The contrast of tangy pickle and crunchy breading is so satisfying, you might just eat the whole batch yourself. The flavor combo is next-level comfort food.
What makes this fried pickles recipe stand out? It’s all about the breading technique. I use a double-dip method with seasoned flour and panko breadcrumbs for that ultra-crispy crunch—no soggy spots, ever. Plus, the spice blend gives just enough kick without overpowering the pickle’s natural zing. Some recipes use just flour or a simple batter, but honestly, the panko makes a world of difference.
There’s something nostalgic about fried pickles, too—they remind me of county fairs and summer festivals. But making them at home means you can tweak every bite to suit your taste. Whether you’re after a spicy snack or a classic appetizer, this recipe hits all the right notes. And let’s face it: there’s nothing like a hot, homemade fried pickle to turn an ordinary day into something special.
So, if you want a snack that’s crispy, flavorful, and totally addictive, this fried pickles recipe is your new go-to. I promise, you’re going to crave them again and again.
Ingredients Needed
This fried pickles recipe uses straightforward ingredients for maximum crunch and flavor. Here’s what you’ll need—plus a few tips to get the best results:
- Dill pickle chips or spears (about 1 1/2 cups, drained and patted dry; I like Claussen for their crunch, but any brand works)
- All-purpose flour (1 cup / 120g; helps the breading stick—substitute gluten-free flour if needed)
- Panko breadcrumbs (1 cup / 60g; for extra crispiness—regular breadcrumbs work, but panko is unbeatable)
- Cornmeal (1/3 cup / 40g; adds a subtle crunch and golden color)
- Eggs (2 large; room temperature is best, for easier whisking)
- Milk (1/2 cup / 120ml; whole milk gives a richer breading, but any milk or non-dairy alternative works)
- Garlic powder (1 tsp / 4g; for savory depth)
- Paprika (1 tsp / 4g; adds color and a hint of smokiness)
- Cayenne pepper (1/4 tsp / 1g; optional—for a spicy kick)
- Salt (1/2 tsp / 3g; adjust to taste)
- Black pepper (1/2 tsp / 2g; freshly ground is best)
- Vegetable oil (for frying; about 2 cups / 475ml—canola or peanut oil works great for their high smoke points)
If you want to mix things up, try bread and butter pickles for a sweeter twist, or spicy pickles for extra heat. For gluten-free fried pickles, swap in almond flour and gluten-free panko (I’ve done this—works perfectly!).
You can use pickle chips for bite-sized snacks, or spears for a bigger crunch. Just make sure to pat them dry really well, or the breading won’t stick as nicely. If you’re out of cornmeal, it’s fine to use extra panko or just flour, but the cornmeal is worth it for that little bit of grit and color.
This fried pickles recipe is all about flexibility. If you want to go dairy-free, use almond milk or oat milk. And if you’re running low on eggs, a splash of buttermilk works as a binder. I’ve tried every combo under the sun, and honestly, they all taste awesome—just pick what suits your pantry.
Equipment Needed
The right tools make this fried pickles recipe a breeze. Here’s what you’ll need, plus a few alternatives and tips from my own kitchen adventures:
- Heavy skillet or Dutch oven (I use a cast iron skillet for even heat—any deep pan works)
- Slotted spoon or spider strainer (for easy retrieval—if you don’t have one, a regular spoon plus a fork does the trick)
- Three shallow bowls (for the breading station; pie plates work too)
- Cooling rack (set over a baking sheet to drain excess oil—paper towels are a budget-friendly alternative)
- Tongs (for flipping and moving pickles safely)
- Thermometer (for checking oil temp—if you don’t have one, toss in a breadcrumb to test for sizzle)
Cast iron is my favorite for frying—holds heat steady and gets those pickles nice and crisp. If you’re new to deep frying, go with a Dutch oven for extra safety. For the breading process, use whatever shallow dishes you’ve got—even dinner plates in a pinch.
Pro tip: a cooling rack keeps your fried pickles crunchy as they drain. If you use paper towels, just eat them quick—otherwise, they can get a touch soggy underneath. And hey, you don’t need fancy gadgets. I’ve fried pickles with thrift store pans and kitchen tongs, and they turned out great.
Preparation Method
Ready to make the best fried pickles recipe ever? Here’s my step-by-step guide (with tips and sensory cues along the way):
-
Prep the pickles: Drain 1 1/2 cups (about 225g) of dill pickle chips or spears. Pat them dry on a paper towel. (Seriously, don’t skip this—wet pickles = soggy breading.)
Time: 2 minutes -
Set up your breading station: In three shallow bowls, arrange as follows:
– Bowl 1: 1 cup (120g) all-purpose flour, 1/3 cup (40g) cornmeal, 1/2 tsp salt, 1/2 tsp black pepper, 1 tsp garlic powder, 1 tsp paprika, 1/4 tsp cayenne.
– Bowl 2: 2 large eggs, lightly beaten with 1/2 cup (120ml) milk.
– Bowl 3: 1 cup (60g) panko breadcrumbs.
Time: 2 minutes -
Heat the oil: Pour about 2 cups (475ml) vegetable oil into a heavy skillet or Dutch oven. Heat to 350°F (175°C). If you don’t have a thermometer, drop in a breadcrumb—it should sizzle and bubble immediately.
Time: 4 minutes -
Bread the pickles: Dredge each pickle slice first in the flour mixture (shake off excess), then dip in the egg-milk mixture, and finally coat with panko. Press gently so the breading sticks. (Tip: Use one hand for wet, one for dry to avoid clumps.)
Time: 5 minutes -
Fry the pickles: Add pickles to the hot oil in batches, being careful not to crowd the pan. Fry for 1–2 minutes per side, until golden brown and crispy.
Warning: The oil will bubble up, so don’t add too many at once.
Time: 6 minutes -
Drain and cool: Use a slotted spoon or tongs to transfer fried pickles to a cooling rack or a paper towel-lined plate. Sprinkle with a pinch of salt while hot for extra flavor.
Time: 1 minute - Troubleshooting: If breading falls off, your pickles may be too wet, or you didn’t press the panko on firmly enough. If oil smokes, lower the heat or wait for it to cool a bit. For uneven browning, rotate your pan and check the oil temperature.
- Serve: Best eaten fresh and hot! Serve with ranch, spicy mayo, or your favorite dipping sauce.
Personal tip: I always fry a test pickle first to check oil temp and breading texture. If it’s pale or soggy, crank the heat a little and make sure those pickles are bone dry before breading. And don’t stress—practice makes perfect, and honestly, even the “ugly” ones taste awesome!
Cooking Tips & Techniques
Making crispy fried pickles isn’t rocket science, but a few pro tips really make a difference. Here’s what I’ve learned (sometimes the hard way):
- Dry pickles = crispy breading: Pat those pickles dry like your life depends on it. Damp pickles will make the breading slide right off and mess up the texture.
- Double-dip for crunch: The combo of flour-cornmeal and panko gives unbeatable crunch. Don’t skip the panko—it’s the secret weapon here.
- Batch frying is key: Only fry in small batches, or you’ll drop the oil temp and end up with greasy pickles. I learned this the hard way in my early kitchen days!
- Oil temp matters: Too hot and the pickles burn, too cool and they get soggy. 350°F (175°C) is your sweet spot.
- Test one before frying the whole batch: I always fry a single pickle first to check seasoning and crunch—sometimes I tweak the salt or spice after that first taste.
- Flip gently with tongs: Avoid piercing the breading, or it’ll fall off. Tongs or a spider strainer work best.
- Troubleshooting soggy breading: If you’re getting soggy fried pickles, either the oil isn’t hot enough or the breading wasn’t pressed on firmly. Try pressing the panko in more next time.
Multitasking tip: While the first batch fries, bread the next batch so you can keep the process moving. Just don’t walk away—fried pickles go from pale to perfect in seconds.
Consistency tip: Same size pickles fry evenly, so slice spears into uniform pieces if needed. And don’t be afraid to tweak the spice level—make it yours!
I’ve messed up fried pickles plenty—overcrowded pans, soggy breading, burnt edges. But every batch taught me something, and now, they’re reliably crispy and golden every time. Don’t stress if your first batch isn’t Instagram-perfect. They’ll taste amazing anyway!
Variations & Adaptations
This fried pickles recipe is super versatile—here are some fun ways to switch things up:
- Gluten-Free: Swap all-purpose flour for almond flour or gluten-free blend, and use gluten-free panko. I’ve tried this for friends with allergies, and it works great.
- Spicy Kick: Use spicy pickles or add extra cayenne and a pinch of chili powder to the breading. For even more heat, serve with sriracha mayo.
- Sweet & Tangy: Use bread and butter pickles instead of dill, and add a dash of brown sugar to the flour mix. This is a hit for people who love sweet-savory combos.
- Baked Fried Pickles: Spray breaded pickles lightly with oil and bake at 425°F (220°C) for 12–15 minutes, flipping halfway. Not quite as crunchy, but way lighter.
- Air Fryer Method: Arrange pickles in a single layer in your air fryer basket, spray with oil, and cook at 400°F (200°C) for 8–10 minutes. Super crispy, less oil.
Customizing for taste: Change up the spices—try Old Bay for a seafood vibe, or toss in dried dill for extra pickle flavor. Don’t be afraid to experiment. I once made these with smoked paprika and garlic salt, and they tasted like BBQ chips!
For allergies, skip the eggs and use buttermilk or a dairy-free milk as the binder. I’ve made vegan versions with oat milk and aquafaba, and the breading held up surprisingly well.
My favorite personal variation is using spicy jalapeño pickles and tossing the finished pickles in a little hot sauce before serving. It’s wild, but if you love heat, you’ll be hooked!
Serving & Storage Suggestions
These fried pickles are best when served piping hot and extra crispy. Here’s how I like to do it:
- Serving: Pile fried pickles on a platter lined with parchment or butcher paper. Serve with ranch, blue cheese dressing, or spicy mayo. A squeeze of lemon on top adds brightness.
- Presentation: For Pinterest-worthy style, stack pickles in a small basket or mason jar and garnish with fresh dill or a few extra pickle slices. People love the rustic look!
- Pairings: These go great with burgers, pulled pork sandwiches, or cold beer. I also like to serve them alongside wings for ultimate snack vibes.
- Storage: Store leftovers in an airtight container in the fridge for up to 2 days. They’ll lose a little crunch, but the flavor stays strong.
- Reheating: Re-crisp in the oven at 425°F (220°C) for 5–6 minutes, or pop them in the air fryer for 3–4 minutes. Avoid microwaving—they get soggy fast.
- Flavor over time: The breading holds up surprisingly well, but pickles can leach moisture. Eat them fresh if possible, but leftover fried pickles make a pretty good midnight snack, trust me!
If you want to freeze them, lay fried pickles on a baking sheet, freeze until solid, then transfer to a zip-top bag. Reheat from frozen in the oven or air fryer for best crunch.
Honestly, these fried pickles never stick around long enough to worry about storage—they’re always gone in minutes!
Nutritional Information & Benefits
Here’s a quick breakdown of what you’re getting with this fried pickles recipe:
| Serving Size | Calories | Protein | Carbs | Fat |
|---|---|---|---|---|
| 6–8 pickles | ~180 kcal | 3g | 19g | 9g |
Pickles are naturally low in calories, and they pack a punch of flavor without much fat. The breading adds carbs and a touch of protein. If you use gluten-free flour or bake/air fry, the calories drop a bit.
Dill pickles offer probiotics (thanks to fermentation), and they’re a good source of vitamin K. If you use veggie oil, you’re getting some healthy fats, too. Just a heads up, this recipe contains eggs, wheat, and dairy (if using regular milk)—so check your ingredients if you have allergies.
From a wellness angle, fried pickles are more about joy than nutrition, but with smart swaps, you can make them lighter or allergy-friendly. I see them as a fun treat—enjoy in moderation, and savor every crunch!
Conclusion
If you’re after the perfect crispy appetizer, this fried pickles recipe is seriously tough to beat. It’s quick, easy, and packed with flavor—and that breading crunch is downright addictive. Whether you’re making snacks for friends, a cozy night in, or just treating yourself, these fried pickles promise maximum satisfaction with minimal effort.
Don’t be afraid to customize—change up the spices, try different pickles, or test out a baked or air-fried version. The best recipes are the ones you make your own. I keep coming back to this one because it’s reliable, fun, and always gets rave reviews (even from hard-to-please eaters in my family).
I genuinely love sharing this fried pickles recipe—it’s become a staple in my kitchen, and I hope it becomes one in yours, too. If you try it, drop a comment below, share your own twist, or pin it for later. Happy frying—and enjoy every crispy bite!
Frequently Asked Questions
Can I bake fried pickles instead of frying them?
Yes! Just bread as usual, spray lightly with oil, and bake at 425°F (220°C) for 12–15 minutes, flipping halfway. They’ll be lighter but still crunchy.
What kind of pickles work best for this recipe?
Dill pickle chips are the easiest for even frying, but spears work if you slice them into uniform pieces. Bread and butter pickles are great for a sweeter taste.
How do I keep the breading from falling off?
Make sure pickles are very dry before breading, and press the panko on gently. Double-dipping in flour and egg helps the breading stick.
Can I make fried pickles ahead of time?
You can prep and bread the pickles ahead, but fry right before serving for best crunch. Reheat leftovers in the oven or air fryer.
What dipping sauce goes best with fried pickles?
Ranch dressing is classic, but spicy mayo, blue cheese, or even honey mustard are delicious. Try a few and see which you love best!
Pin This Recipe!
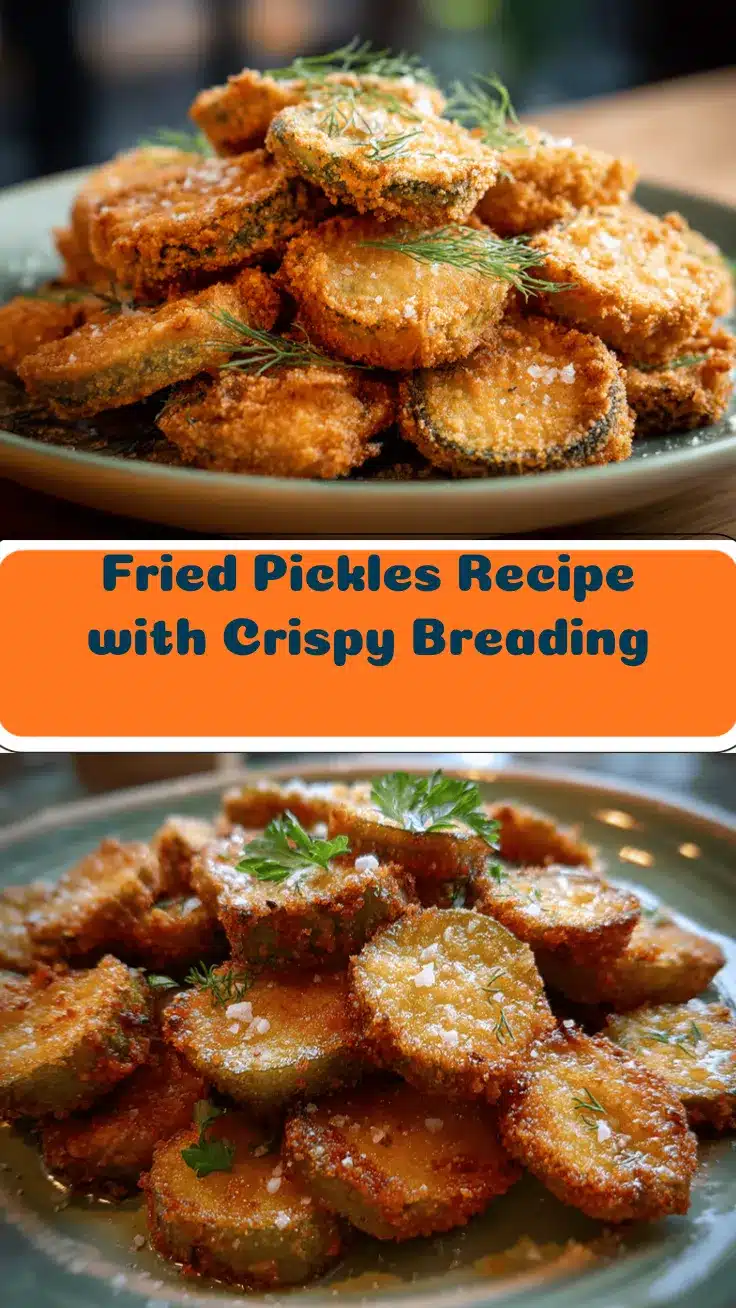
Fried Pickles Recipe: Best Crispy Homemade Appetizer in 20 Minutes
- Total Time: 20 minutes
- Yield: 4 servings 1x
Description
These crispy fried pickles are the ultimate homemade appetizer, featuring tangy pickles wrapped in a perfectly spiced, crunchy breading. Ready in just 20 minutes, they’re a crowd-pleasing snack for game days, parties, or any time salty cravings strike.
Ingredients
- 1 1/2 cups dill pickle chips or spears, drained and patted dry
- 1 cup all-purpose flour
- 1 cup panko breadcrumbs
- 1/3 cup cornmeal
- 2 large eggs
- 1/2 cup milk
- 1 teaspoon garlic powder
- 1 teaspoon paprika
- 1/4 teaspoon cayenne pepper (optional)
- 1/2 teaspoon salt
- 1/2 teaspoon black pepper
- Vegetable oil for frying (about 2 cups)
Instructions
- Drain and pat dry 1 1/2 cups of dill pickle chips or spears with paper towels.
- Set up three shallow bowls: Bowl 1 with flour, cornmeal, salt, black pepper, garlic powder, paprika, and cayenne; Bowl 2 with eggs beaten with milk; Bowl 3 with panko breadcrumbs.
- Pour about 2 cups vegetable oil into a heavy skillet or Dutch oven and heat to 350°F (175°C).
- Dredge each pickle slice in the flour mixture, then dip in the egg-milk mixture, and finally coat with panko breadcrumbs. Press gently to help breading stick.
- Fry pickles in batches for 1–2 minutes per side, until golden brown and crispy. Do not overcrowd the pan.
- Transfer fried pickles to a cooling rack or paper towel-lined plate using a slotted spoon or tongs. Sprinkle with a pinch of salt while hot.
- Serve immediately with ranch, spicy mayo, or your favorite dipping sauce.
Notes
For best results, make sure pickles are very dry before breading. Double-dipping in flour and egg helps the breading stick. Fry in small batches to maintain oil temperature and crispiness. For gluten-free, use almond flour and gluten-free panko. You can bake or air fry for a lighter version. Serve hot for maximum crunch.
- Prep Time: 10 minutes
- Cook Time: 10 minutes
- Category: Appetizer
- Cuisine: American
Nutrition
- Serving Size: 6–8 pickles
- Calories: 180
- Sugar: 2
- Sodium: 650
- Fat: 9
- Saturated Fat: 2
- Carbohydrates: 19
- Fiber: 2
- Protein: 3
Keywords: fried pickles, crispy appetizer, snack, game day, party food, easy recipe, homemade, vegetarian option, gluten-free option