Introduction
Let’s be real: the first chilly breeze of fall hits, and all I want is pumpkin everything. The scent of spiced gingersnaps and creamy pumpkin filling? That’s pure comfort in dessert form! These no-bake pumpkin cheesecake bars with gingersnap crust are my go-to treat when I crave fall flavors without the oven hassle. Honestly, I first whipped these up on a late October afternoon—my oven was packed with dinner, but my sweet tooth didn’t want to wait. So, I grabbed a bag of gingersnap cookies, some cream cheese, and a can of pumpkin, and the rest is history.
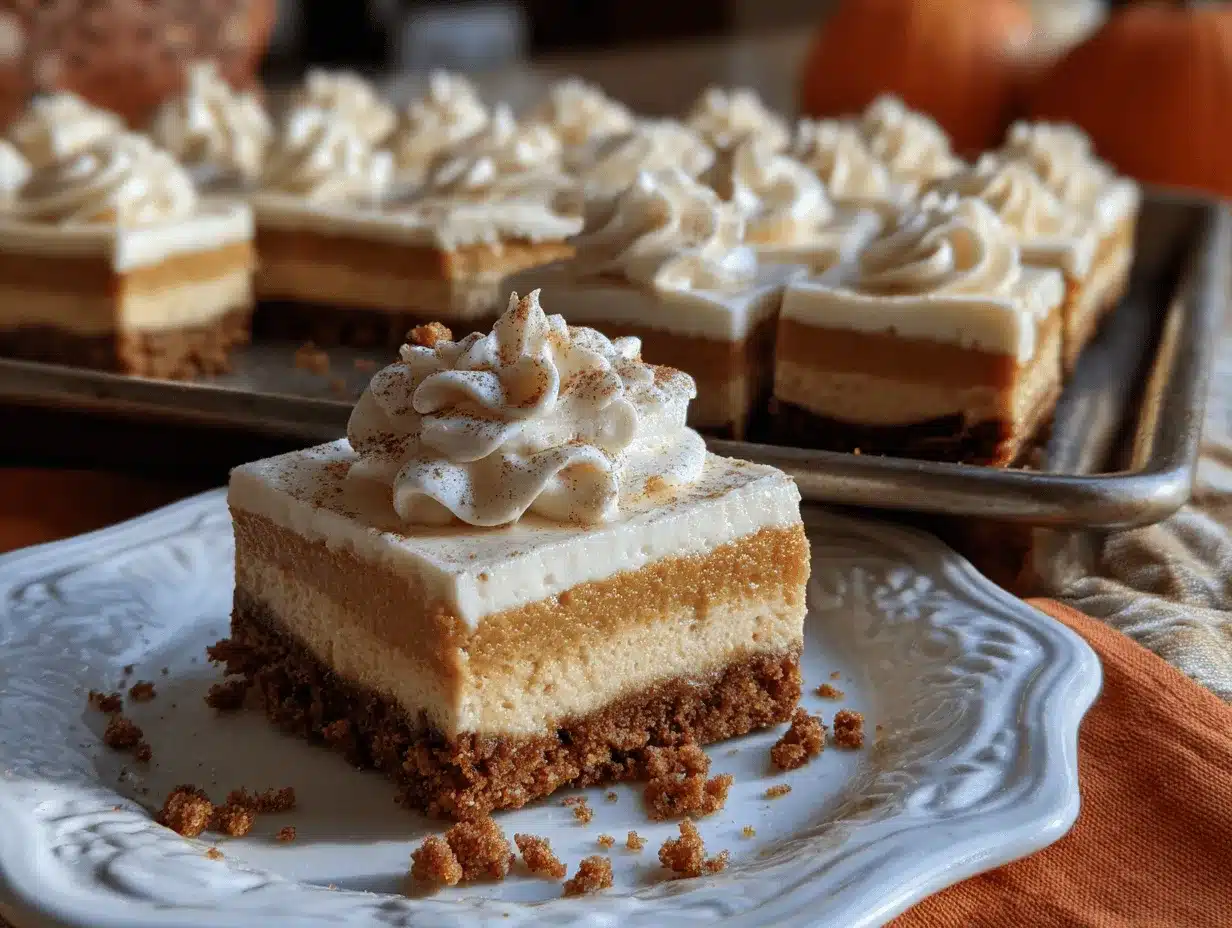
There’s something about the combo of tangy cheesecake and earthy pumpkin that just feels right—like a cozy sweater for your tastebuds. The gingersnap crust adds a crunchy, spicy kick, and the creamy pumpkin cheesecake layer is velvet-smooth (no cracks or baking drama). These bars are perfect for busy families, potlucks, or anyone with minimal kitchen time and maximum pumpkin cravings. Plus, if you love desserts that look gorgeous on a platter (hello, Pinterest!), you’re going to want to save this recipe.
I’ve tested these no-bake pumpkin cheesecake bars a dozen times, tweaking the spice levels and crust thickness till they were just right. As a recipe developer and food blogger, I can promise you this is a foolproof treat—no water bath, no oven, just a few bowls and some fridge magic. If you’re skeptical about no-bake desserts, trust me: these bars will win you over with their rich flavor and dreamy texture. Let’s dig in!
Why You’ll Love This Recipe
Okay, let’s talk about what makes these no-bake pumpkin cheesecake bars with gingersnap crust a total game-changer. After years of baking, testing, and feeding picky eaters, I can tell you—these bars are basically happiness in a pan.
- Quick & Easy: You’ll have everything prepped in under 30 minutes. No oven, no water bath, no stress.
- Simple Ingredients: Everything you need is probably in your pantry or fridge already. Gingersnap cookies, pumpkin puree, cream cheese—nothing fancy.
- Perfect for Fall Gatherings: These bars shine at potlucks, holiday dinners, Friendsgiving, or just a cozy night in with a movie.
- Crowd-Pleaser: Kids love the creamy texture, adults love the punchy gingersnap crust. I’ve never had leftovers (honestly, that’s rare in my house!).
- Unbelievably Delicious: The contrast of the spicy, crunchy crust and the silky pumpkin cheesecake layer is seriously addictive.
What really sets this recipe apart? I blend the cream cheese until it’s perfectly smooth, then fold in pumpkin and spices for a just-right balance. The gingersnap crust isn’t just a base—it’s a flavor bomb that plays off the mellow pumpkin. And because it’s no-bake, you don’t have to worry about cracks or overbaking. It’s the kind of dessert that makes you pause after the first bite, close your eyes, and smile. Comfort food, made easier (and prettier!).
If you’ve ever made a pumpkin pie and wished it was less fussy, this recipe is your answer. It’s faster, lighter, and still gives you all that autumn nostalgia. Plus, the bars slice up beautifully—so they’re perfect for sharing (or not sharing, if you ask me). Whether you’re impressing guests or just treating yourself, these pumpkin cheesecake bars will fit right in.
Ingredient Needed
This recipe uses simple, wholesome ingredients you can find at any grocery store. Each one plays a crucial role—bringing texture, flavor, and that cozy fall vibe. Here’s what you need to make no-bake pumpkin cheesecake bars with gingersnap crust:
- For the Gingersnap Crust:
- 12 oz (340g) gingersnap cookies (about 2 1/2 cups crushed, use crunchy store-bought or homemade)
- 1/2 cup (113g) unsalted butter, melted (adds richness and helps the crust set)
- 2 tablespoons granulated sugar (balances the spice in the cookies)
- Pinch of salt (optional, boosts flavor)
- For the Pumpkin Cheesecake Filling:
- 16 oz (452g) cream cheese, softened (full-fat for best texture, at room temp for easy mixing)
- 1 cup (240g) pumpkin puree (not pumpkin pie filling—just pure pumpkin)
- 1 cup (120g) powdered sugar (for a silky, not grainy, filling)
- 1/2 cup (120ml) heavy cream (whipped for lightness; you can swap for coconut cream if dairy-free)
- 1 teaspoon vanilla extract (real vanilla makes a difference!)
- 1 1/2 teaspoons ground cinnamon (classic pumpkin spice)
- 1/2 teaspoon ground ginger (for extra warmth)
- 1/4 teaspoon ground nutmeg
- 1/8 teaspoon ground cloves (optional, but gives that depth)
- Pinch of salt
- For the Whipped Cream Topping (optional):
- 1 cup (240ml) heavy whipping cream
- 2 tablespoons powdered sugar
- 1/2 teaspoon vanilla extract
- Extra crushed gingersnap cookies for garnish (adds crunch and style)
If you need gluten-free, swap the gingersnap cookies for a certified GF brand (I like Mi-Del for texture). You can use light cream cheese if you’re watching calories, but the bars won’t be quite as rich. For dairy-free, use coconut cream and vegan cream cheese. I’ve tried all the swaps—they work, but the classic version is my personal favorite.
Tip: For extra pumpkin flavor, add a tablespoon of pumpkin pie spice instead of separate spices. And if you’re in a hurry, store-bought whipped topping works fine (but homemade is tastier!).
Equipment Needed
You don’t need fancy equipment for these no-bake pumpkin cheesecake bars. Here’s what I use every time:
- 9×9-inch (23x23cm) square baking pan (for classic bar shape; a springform pan works for round cake style)
- Food processor or blender (for crushing gingersnaps; a zip-top bag and rolling pin work in a pinch)
- Mixing bowls (at least two: one for crust, one for filling)
- Electric hand mixer or stand mixer (for whipping cream cheese and heavy cream effortlessly)
- Rubber spatula (for scraping every last bit of filling)
- Measuring cups and spoons (accuracy matters!)
- Parchment paper (makes lifting bars out for clean slicing)
If you don’t have a food processor, just put the cookies in a sturdy zip bag and crush them with a rolling pin—that’s how my grandma did it. For the pan, any straight-sided dish works, but glass pans make for easy serving and a pretty view of the layers. I’ve tried silicone pans, but the crust sometimes sticks; parchment is your best friend here. If you’re on a budget, skip the stand mixer and use elbow grease—it’s doable, just takes longer.
Keep your mixer beaters clean between steps to avoid mixing crust crumbs into the filling (learned that the hard way!). Wipe down your equipment after each use to keep everything working smoothly for next time.
Preparation Method
Let’s break down the steps for perfect no-bake pumpkin cheesecake bars with gingersnap crust. Follow along and you’ll be slicing up gorgeous, creamy bars in no time!
- Prepare the pan: Line a 9×9-inch (23x23cm) baking pan with parchment paper, leaving some overhang for easy removal. This keeps your bars from sticking and makes slicing a breeze.
- Make the gingersnap crust: Crush 12 oz (340g) gingersnap cookies into fine crumbs using a food processor, blender, or zip bag and rolling pin. Pour crumbs into a bowl, add 1/2 cup (113g) melted unsalted butter, 2 tablespoons granulated sugar, and a pinch of salt. Stir until well combined—the mixture should look like wet sand.
- Press and chill the crust: Transfer the crust mixture to your prepared pan. Use the bottom of a measuring cup or glass to press it down firmly and evenly. Chill in the refrigerator for at least 20 minutes while you prepare the filling. This helps the crust set and stay crisp.
- Make the cheesecake filling: In a large bowl, use an electric mixer to beat 16 oz (452g) cream cheese until smooth and fluffy (about 2 minutes). Add 1 cup (240g) pumpkin puree and 1 cup (120g) powdered sugar; beat until well blended and creamy (another 2 minutes). Scrape the bowl as needed.
- Add flavor and lightness: Pour in 1/2 cup (120ml) heavy cream, 1 teaspoon vanilla extract, 1 1/2 teaspoons cinnamon, 1/2 teaspoon ginger, 1/4 teaspoon nutmeg, 1/8 teaspoon cloves, and a pinch of salt. Beat for another minute, until the mixture is light, fluffy, and evenly orange. If it seems too loose, chill for 10 minutes to firm up.
- Spread the filling over the crust: Spoon the pumpkin cheesecake mixture over the chilled gingersnap crust. Use a spatula to smooth the filling into an even layer, reaching all corners. The mixture should be thick but spreadable; if it’s runny, chill a bit longer before spreading.
- Chill to set: Cover the pan with plastic wrap and refrigerate for at least 4 hours (overnight is best). This lets the bars firm up for easy slicing. If you’re impatient (like me sometimes!), 2 hours can work, but they’ll be softer.
- Make the whipped cream topping (optional): In a clean mixing bowl, beat 1 cup (240ml) heavy whipping cream with 2 tablespoons powdered sugar and 1/2 teaspoon vanilla extract until stiff peaks form (about 2 minutes). Spread or pipe over the chilled cheesecake layer. Sprinkle extra crushed gingersnaps for garnish.
- Slice and serve: Use the parchment overhang to lift the bars from the pan. Cut into 16 squares with a sharp knife, wiping the blade between cuts for clean edges.
Notes: If the filling seems too soft, chill longer. For extra stability, add 1 tablespoon cornstarch to the filling. Bars will keep their shape best if served cold. If your crust crumbles, try adding a bit more melted butter next time. The smell of pumpkin and spices as you mix is a pretty good sign you’re on the right track!
Cooking Tips & Techniques
Let’s be honest, I’ve had my share of cheesecake mishaps. No-bake pumpkin cheesecake bars with gingersnap crust are way more forgiving than baked versions, but a few tricks make all the difference.
- Room Temperature Ingredients: Let the cream cheese fully soften before mixing. Cold cream cheese clumps and ruins the silky texture.
- Crust Compression: Press the gingersnap crust down firmly. Loose crumbs make messy slices! I use a glass with a flat bottom—works wonders.
- Chilling Time: Don’t rush the fridge time. Four hours minimum ensures the bars hold together. Overnight is even better.
- Mixing Technique: Beat the filling until completely smooth. Scrape the bowl often; I learned this after a batch with surprise lumps.
- Whipped Cream Stability: For stable peaks, chill your mixing bowl and beaters beforehand. If you’re in a humid climate, add a pinch of cream of tartar.
- Clean Slicing: Run your knife under hot water and wipe between cuts—this keeps the layers tidy and professional-looking.
Common mistakes? Overmixing the filling (makes it runny), under-pressing the crust (crumbly bars), or skipping the chill (bars fall apart). I once tried to shortcut chilling time for a party and ended up with pumpkin cheesecake pudding—not bars!
Multitasking tip: prep the crust while the cream cheese softens, and whip the cream while the bars chill. Efficiency for the win. For consistency, always measure ingredients by weight if possible—my best results come from precise measurements. Trust me, these little tricks make your bars bakery-worthy every time!
Variations & Adaptations
One of the best things about no-bake pumpkin cheesecake bars with gingersnap crust is how versatile they are. Here’s how you can switch things up:
- Gluten-Free: Use gluten-free gingersnap cookies. Mi-Del brand works well, or try almond flour cookies for a nutty twist.
- Dairy-Free: Swap regular cream cheese for vegan cream cheese and use coconut cream instead of heavy cream. The bars will be a little softer but still delicious.
- Low Sugar: Substitute powdered monk fruit sweetener for powdered sugar in the filling. It’s a little less sweet but still creamy.
- Flavor Variations: Add a splash of maple syrup to the filling for extra autumn flavor. Or, fold in mini chocolate chips for pumpkin-chocolate cheesecake bars (kids go wild for these!).
- Different Crusts: Not a gingersnap fan? Use graham crackers, vanilla wafers, or chocolate cookie crumbs. Each gives a new flavor personality.
- Seasonal Twists: In December, add a dash of orange zest to the filling for holiday brightness. In spring, swap pumpkin for pureed sweet potato—the spice mix still works!
I once made these for a friend with nut allergies and skipped the ginger, doubling the cinnamon instead. The bars came out less spicy but still packed with pumpkin flavor. Don’t be afraid to play—these bars are super forgiving. If you’re experimenting, just keep an eye on the filling texture and chill time, and you’ll nail it!
Serving & Storage Suggestions
For best flavor and texture, serve no-bake pumpkin cheesecake bars with gingersnap crust chilled, straight from the fridge. I love presenting them on a rustic wooden board or white platter—sprinkle extra crushed gingersnaps and a dusting of cinnamon for that “wow” factor.
These bars pair perfectly with hot coffee, spiced chai, or even a glass of cold milk. If you’re serving for a crowd, cut them into bite-sized squares and top with piped whipped cream swirls (looks stunning in photos!). For a fancy touch, add caramel drizzle or toasted pecans on top.
To store, cover bars tightly with plastic wrap or in an airtight container. They’ll keep for up to 4 days in the refrigerator. If you want to save some for later, freeze individual squares on a baking sheet, then transfer to a freezer bag—thaw in the fridge overnight before serving. Reheating isn’t needed; just let them come to fridge temperature. The flavors actually deepen after a day or two, so leftovers taste even better (if you have any!).
Tip: Avoid stacking bars directly—use parchment between layers to prevent sticking. They’re perfect for make-ahead entertaining or meal prep desserts!
Nutritional Information & Benefits
Each no-bake pumpkin cheesecake bar with gingersnap crust (1/16 of the batch) is approximately 220 calories, with 13g fat, 24g carbs, and 3g protein. Pumpkin is packed with vitamin A and fiber, and cream cheese lends protein and calcium. The gingersnap crust is rich in antioxidants from spices like ginger and cinnamon.
If you use gluten-free or low-sugar adaptations, the nutrition shifts a bit—less sugar, fewer carbs. These bars are vegetarian, and can be made gluten-free or dairy-free with swaps. Just watch for allergens in the cookies and cream cheese. Personally, I love that these bars satisfy a pumpkin craving with less sugar than traditional pie, and the portion control makes them a smarter choice for dessert lovers.
Conclusion
If you want fall flavor fast, these no-bake pumpkin cheesecake bars with gingersnap crust are the answer. They’re easy, crave-worthy, and totally customizable—plus, you don’t even need to turn on the oven. Whether you’re a seasoned baker or just starting out, this recipe is a keeper.
Try swapping spices or toppings to make them your own. I make these every autumn, and they never last long in my house. There’s a reason I keep coming back to this recipe—it’s the taste, the texture, the simple joy of sharing something delicious. If you give these bars a try, I’d love to hear how they turned out—drop a comment, share your photos, or send me your creative adaptations!
Here’s to pumpkin season, easy desserts, and sweet memories. Happy no-baking!
FAQs
Can I use graham crackers instead of gingersnaps for the crust?
Absolutely! Graham crackers work well and give a milder flavor. Just use the same amount by weight and add an extra pinch of cinnamon if you want more spice.
How long do these bars need to chill before serving?
At least 4 hours is best for clean slices, but overnight is even better for flavor and texture. If you’re in a hurry, 2 hours will set them, but they’ll be softer.
Can I freeze these pumpkin cheesecake bars?
Yes! Freeze individual squares, then thaw in the fridge before serving. They’ll taste just as delicious and hold their shape well.
Is it okay to use low-fat cream cheese?
You can, but the filling will be less rich and may not set quite as firmly. Full-fat gives the creamiest, most stable results.
Can I make these bars ahead of time for a party?
Definitely. Prepare and chill the bars up to two days in advance. Add whipped cream topping and garnish just before serving for best presentation.
Pin This Recipe!
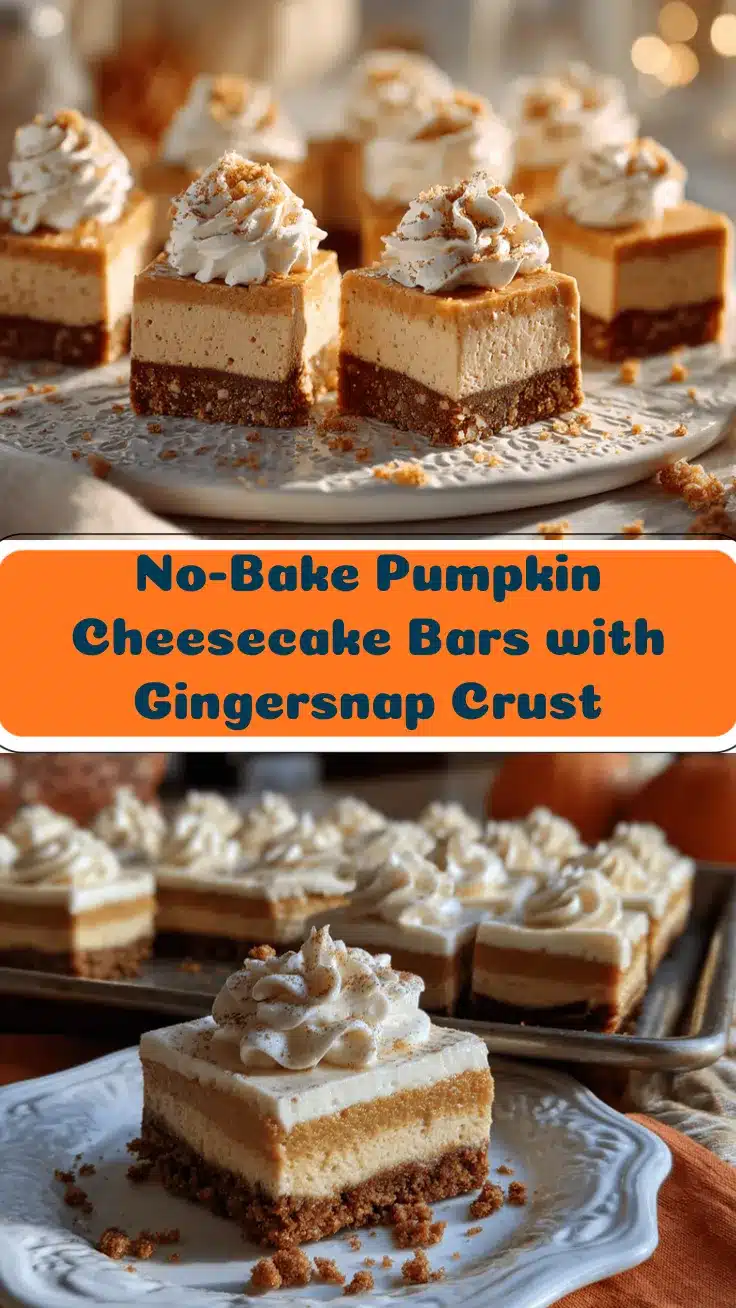

No-Bake Pumpkin Cheesecake Bars with Gingersnap Crust
- Total Time: 4 hours 25 minutes
- Yield: 16 bars 1x
Description
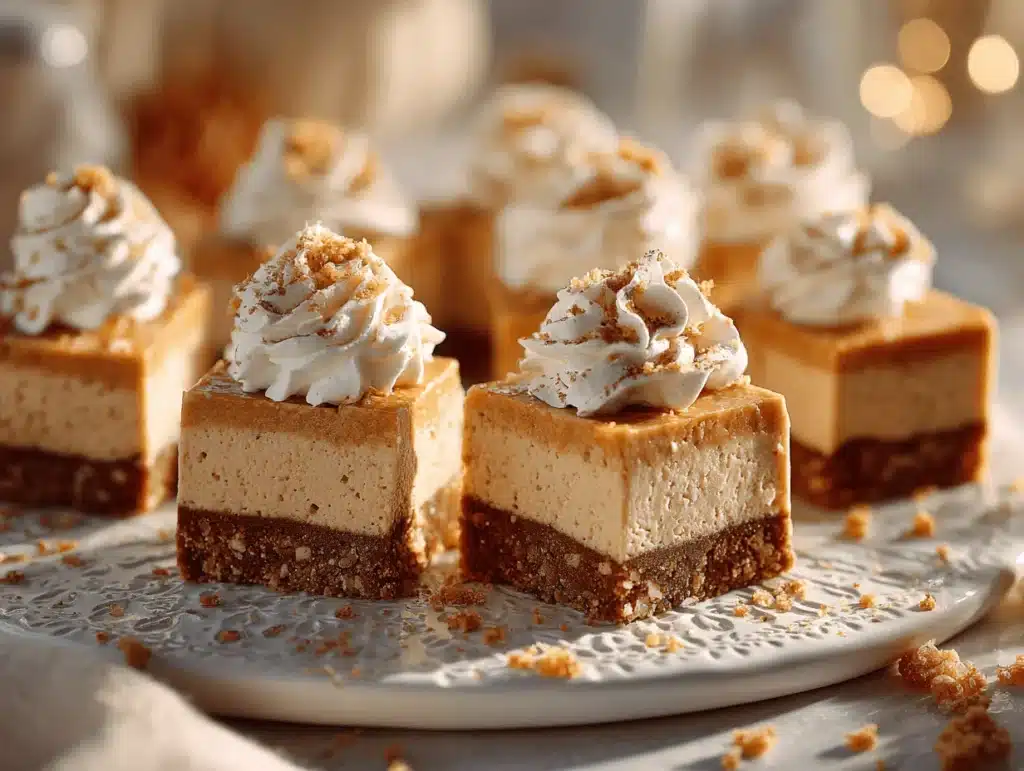
These no-bake pumpkin cheesecake bars feature a spicy gingersnap cookie crust and a creamy pumpkin cheesecake filling, all without turning on the oven. Perfect for fall gatherings, potlucks, or a cozy night in, they’re easy to make and slice beautifully for sharing.
Ingredients
- 12 oz gingersnap cookies (about 2 1/2 cups crushed)
- 1/2 cup unsalted butter, melted
- 2 tablespoons granulated sugar
- Pinch of salt (optional)
- 16 oz cream cheese, softened
- 1 cup pumpkin puree
- 1 cup powdered sugar
- 1/2 cup heavy cream
- 1 teaspoon vanilla extract
- 1 1/2 teaspoons ground cinnamon
- 1/2 teaspoon ground ginger
- 1/4 teaspoon ground nutmeg
- 1/8 teaspoon ground cloves (optional)
- Pinch of salt
- 1 cup heavy whipping cream (optional, for topping)
- 2 tablespoons powdered sugar (optional, for topping)
- 1/2 teaspoon vanilla extract (optional, for topping)
- Extra crushed gingersnap cookies for garnish (optional)
Instructions
- Line a 9×9-inch baking pan with parchment paper, leaving overhang for easy removal.
- Crush gingersnap cookies into fine crumbs using a food processor, blender, or zip bag and rolling pin.
- In a bowl, combine cookie crumbs, melted butter, granulated sugar, and a pinch of salt. Stir until mixture resembles wet sand.
- Press mixture firmly and evenly into prepared pan. Chill in refrigerator for at least 20 minutes.
- In a large bowl, beat softened cream cheese until smooth and fluffy (about 2 minutes).
- Add pumpkin puree and powdered sugar; beat until creamy and well blended (about 2 minutes).
- Add heavy cream, vanilla extract, cinnamon, ginger, nutmeg, cloves, and a pinch of salt. Beat for another minute until light and fluffy.
- Spoon pumpkin cheesecake mixture over chilled crust and smooth into an even layer.
- Cover pan with plastic wrap and refrigerate for at least 4 hours (overnight is best) to set.
- For whipped cream topping (optional): Beat heavy whipping cream, powdered sugar, and vanilla extract until stiff peaks form. Spread or pipe over chilled bars and garnish with crushed gingersnaps.
- Lift bars from pan using parchment overhang. Slice into 16 squares with a sharp knife, wiping blade between cuts.
Notes
For gluten-free bars, use certified gluten-free gingersnap cookies. For dairy-free, substitute vegan cream cheese and coconut cream. Chill bars thoroughly for best texture and clean slices. If filling is too soft, chill longer or add 1 tablespoon cornstarch. Bars are best served cold and can be made ahead or frozen for later. For extra stability in whipped cream, chill bowl and beaters before whipping.
- Prep Time: 25 minutes
- Cook Time: 0 minutes
- Category: Dessert
- Cuisine: American
Nutrition
- Serving Size: 1 bar (1/16 of recipe)
- Calories: 220
- Sugar: 16
- Sodium: 120
- Fat: 13
- Saturated Fat: 8
- Carbohydrates: 24
- Fiber: 1
- Protein: 3
Keywords: pumpkin cheesecake bars, no-bake dessert, gingersnap crust, fall dessert, easy pumpkin bars, Thanksgiving dessert, autumn recipes, pumpkin spice, cream cheese bars